Homemade Pie Crust
Published
Published
This easy Homemade Pie Crust recipe is tender, flaky, delicious, and it’s easy to make with just 4 simple ingredients. Use it for baked or no-bake pies, mini pies, hand pies, a slab pie, and more. I’ve included helpful tips and step by step instruction photos to help guide you into pie crust perfection!
Pin this now to find it later
Pin ItThis post may contain affiliate links. If you click on one and make a purchase, we may earn a small commission at no extra cost to you. We only recommend products we genuinely love.
This pie crust recipe is the one my mom has been using for over 50 years, which I stole from her after I got married 20 years ago. It is really easy and foolproof!
There are different techniques to making a pie crust; some bakers use butter only, some shortening only, and others use a combo of butter and shortening. Some use a food processor to combine the ingredients, others use a pastry blender. Some transfer the dough to the pie plate with a rolling pin, while others fold into quarters. Some use a fork to crimp the edges, some use their fingers. It’s all personal preference and an argument that will go down in history as to which is the best way.
No matter how you do it, it takes practice! Don’t be scared, though. Look at it like a challenge – a fun challenge. A challenge that will result in something delicious, where you can shout out on social media, “Hey look!! I made a pie crust!” *fist bump*
What’s in this Pie Crust recipe?
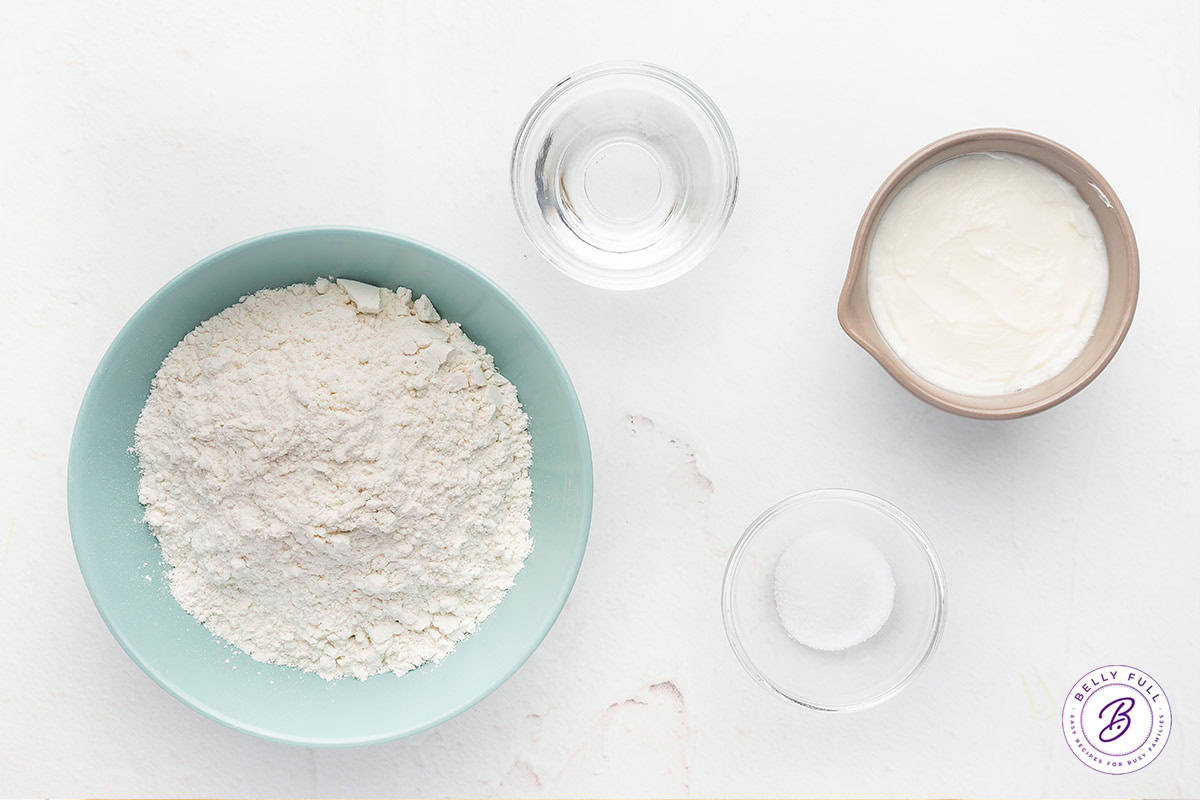
For this pie crust recipe, all you need is 3 simple pantry items and ice cold water. While a short list, all the items are critical. You can find the exact measurements in the recipe card below.
- Flour – Simple all-purpose plain flour.
- Shortening – This provides the dough with structure. Yep, I prefer shortening over butter. Shortening has a high melting point which aids in creating extra flakiness and also holds its shape better. Having said that, if you’re opposed to shortening, this recipe does work with butter. (Note: if you ever have a chance to taste a pie crust made with lard, do it! It’s amazing. But, alas, lard isn’t the most accessible ingredient.)
- Salt – Enhances the flavor.
- Ice cold water – Liquid binds the dough together. I’ve seen some recipes that call for a bit of water and also vodka for an ultra flaky crust, which you can also do if you want!

How To Make Pie Crust
Making pie crust might take a bit of practice, but the end result is 100% worth it! You can find the complete detailed instructions in the recipe card below.
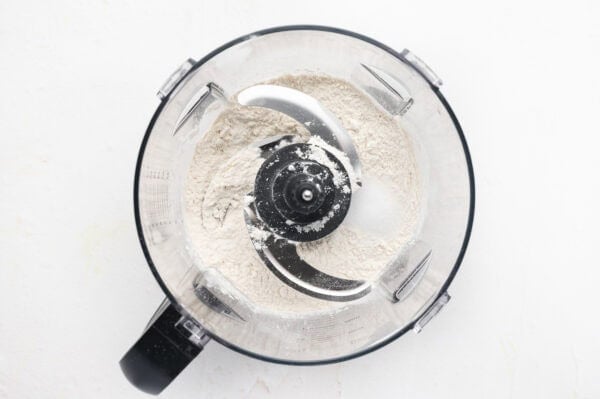
- Mix together the flour and salt – put the flour and salt into the bowl of a food processor and pulse a few times to combine.
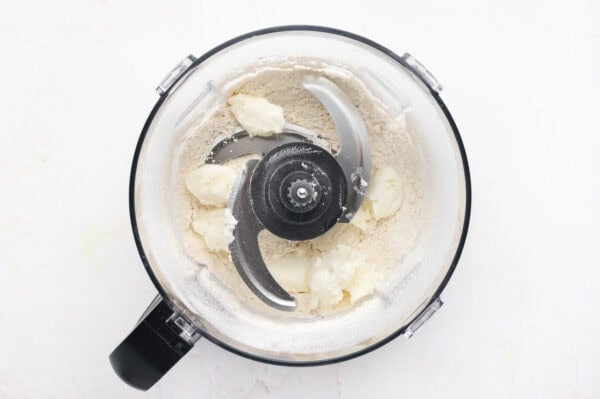
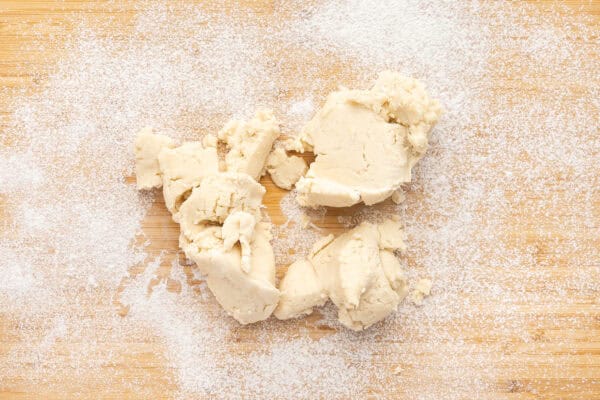
- Add in the shortening – cut the shortening into cubes and sprinkle it on top of the flour in different places. Pulse several times (about 15) until the mixture resembles large pea-sized crumbs and changes to a darker color. Take a little bit of the mixture and pinch it together with your fingers; if it holds together, your dough is ready for the water.
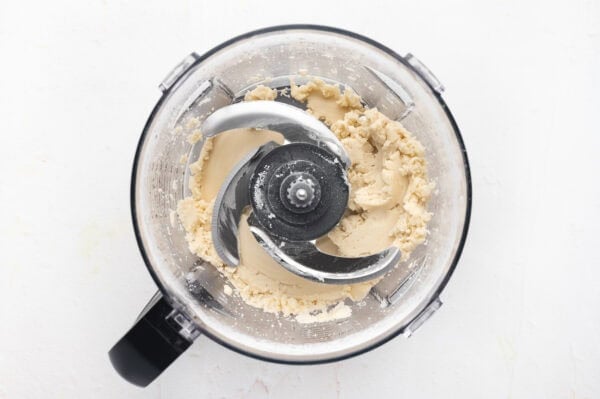
- Slowly add in the water – remove the food processor lid cap and slowly drizzle in the ice cold water while pulsing, until the mixture just starts to form a ball. Don’t over-process.
- Test the texture of the dough – take some of the mixture and pinch it together with your fingers; if it holds together, your dough is good to go. If it’s still crumbly, add a little more water (but no more than a tablespoon at a time. Too much water will require more flour, which will make the crust tough.)
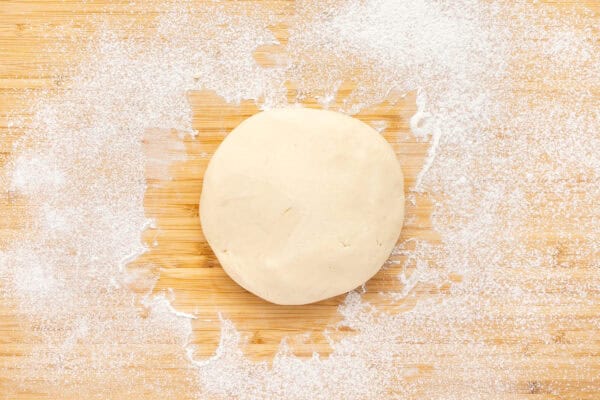
- Form the dough into a disc – transfer the dough mixture onto a clean, dry, flat surface that’s been lightly dusted with flour. Gather into a mound, then fold the dough into itself until the flour is fully incorporated. (The dough should come together easily and should not feel sticky. Don’t over-knead. You should just knead enough so that the dough holds together without cracks.) Then flatten the mound into a 1-inch thick disc, making sure there aren’t any open edges or cracks.
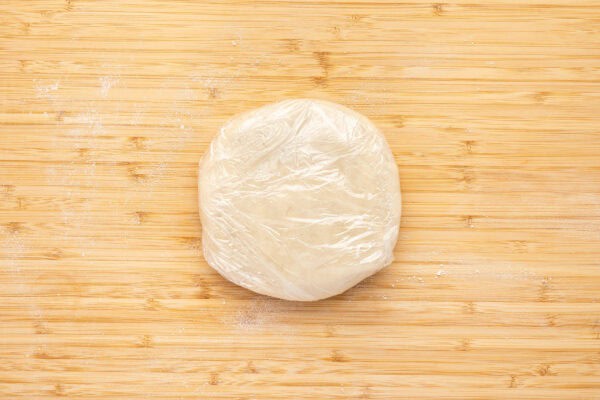
- Wrap and chill – wrap the dough tightly in plastic wrap and refrigerate for 30-60 minutes.
How to Roll Out Pie Crust
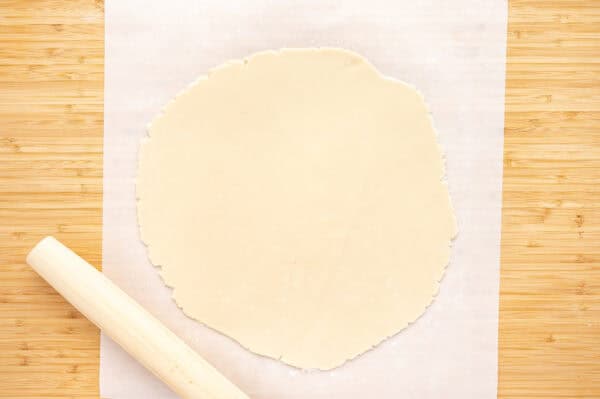
- Let the chilled dough warm up a bit. After the dough has chilled, remove it from the refrigerator and let it sit for just a few minutes while you prep your work surface to roll it out.
- Cut parchment and wax paper. Cut a large piece of parchment paper; lay it on a clean, dry, flat surface and sprinkle with a little flour. Cut a similar sized piece of wax paper. Place your dough disc on top of the parchment paper and sprinkle with a little flour, then place the wax paper on top of the dough.
- Start to roll out the dough using a rolling pin. You want to roll with purpose, but gently. Start rolling from the center to the outer edge, in single strokes, making sure to move in all directions, turning as you go, so that your crust stays in a general circular shape. Roll, turn, roll, turn, etc. If the dough is sticking to the wax paper as you roll, add a few sprinkles of flour on top of the dough, and continue rolling.
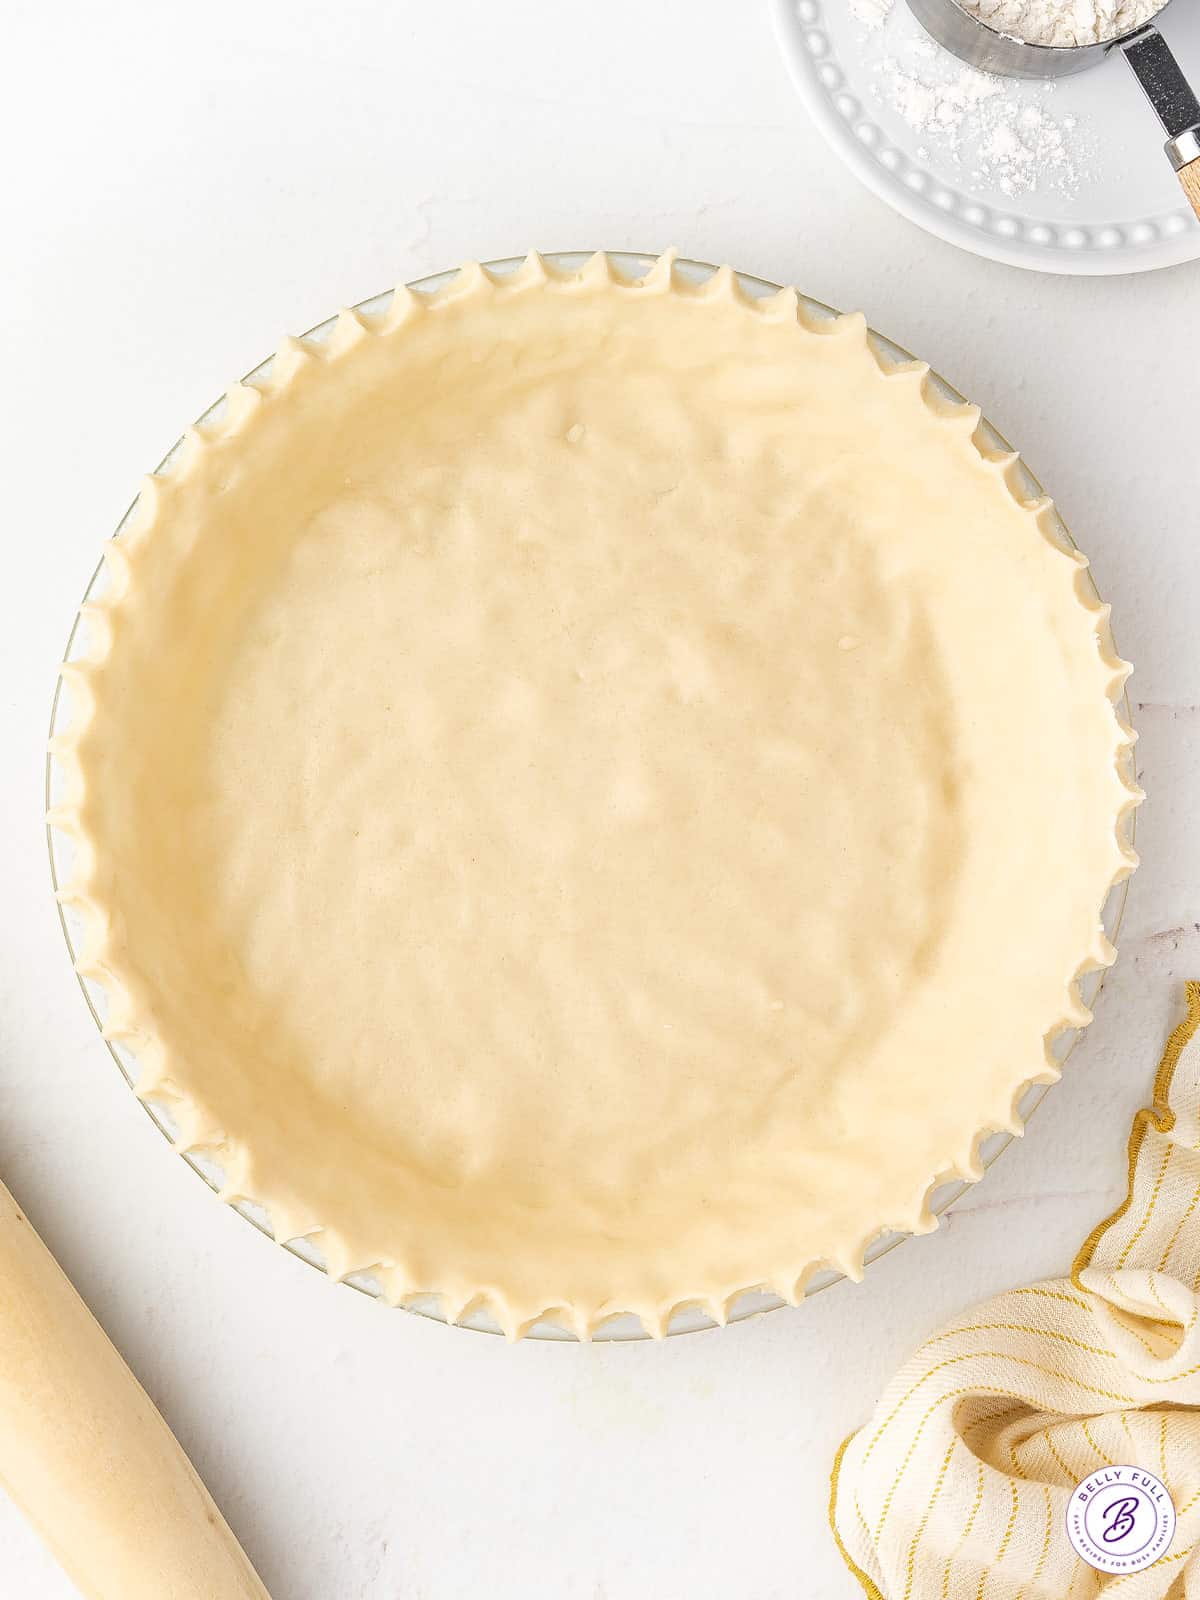
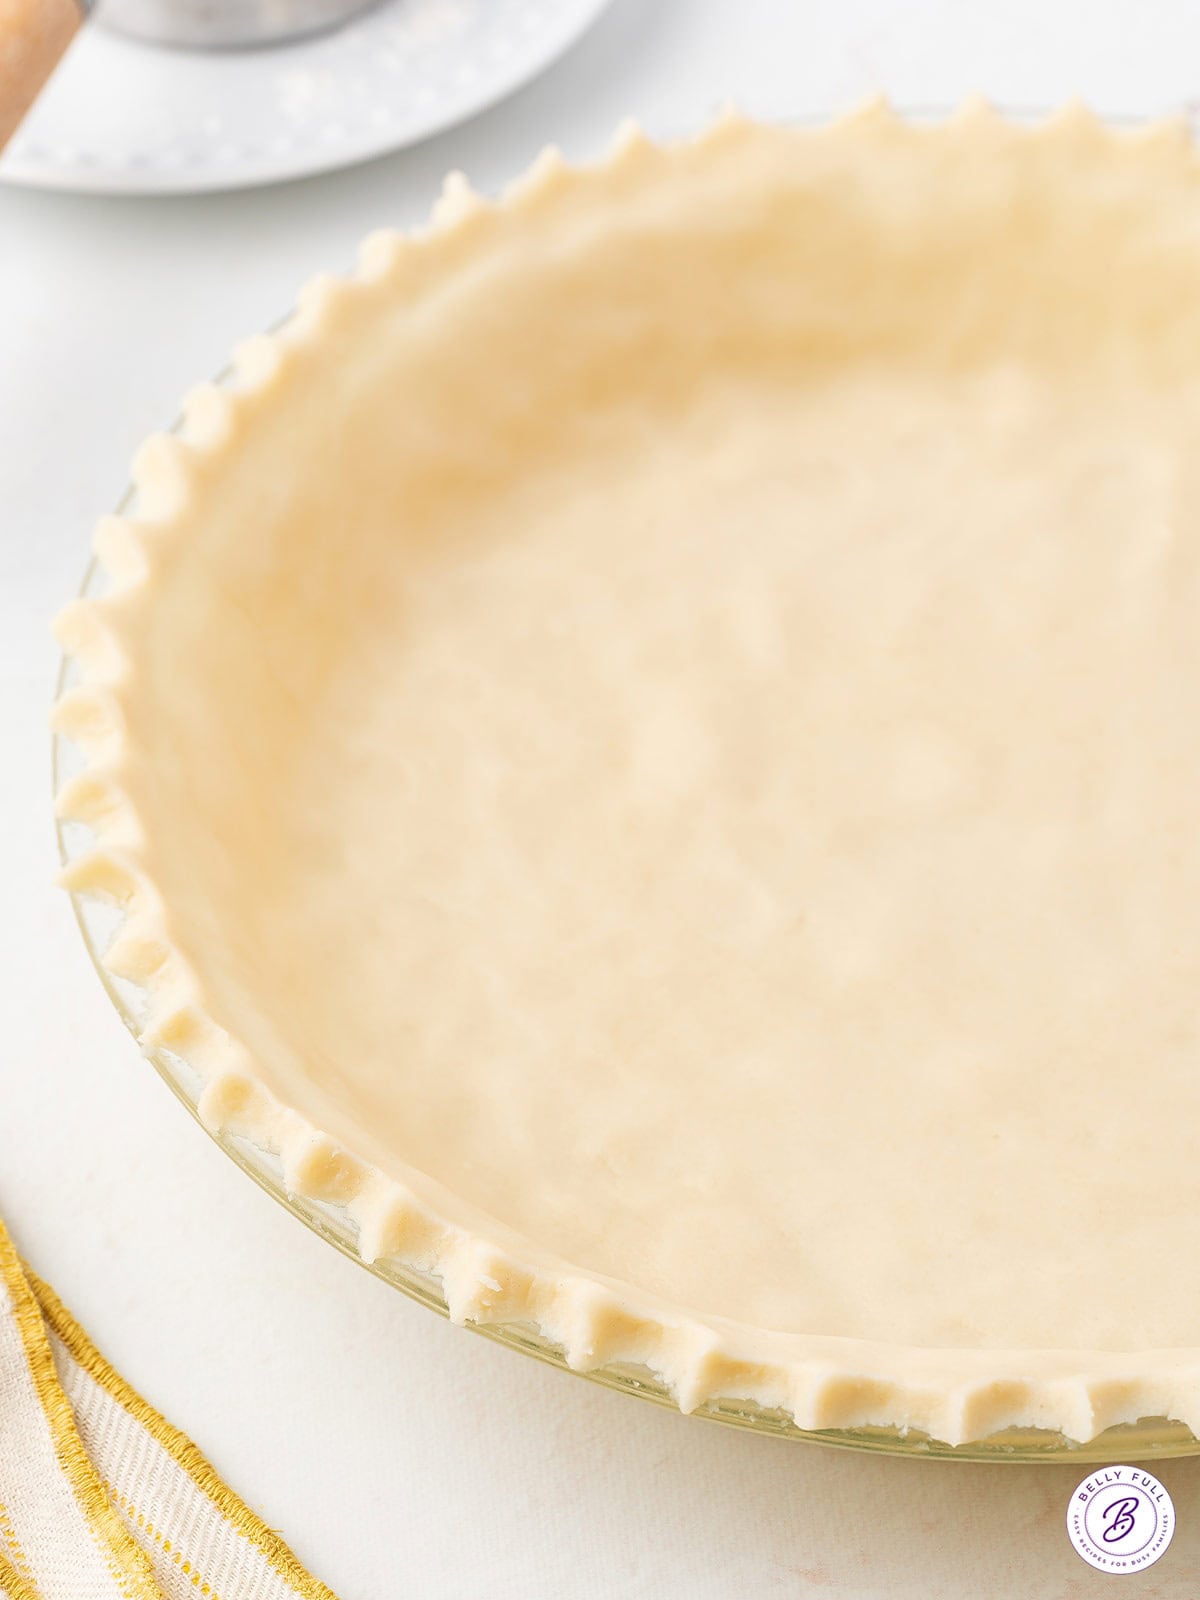
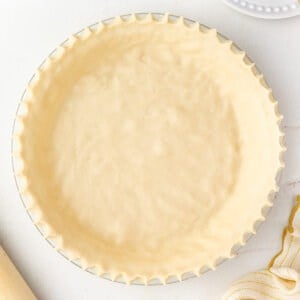
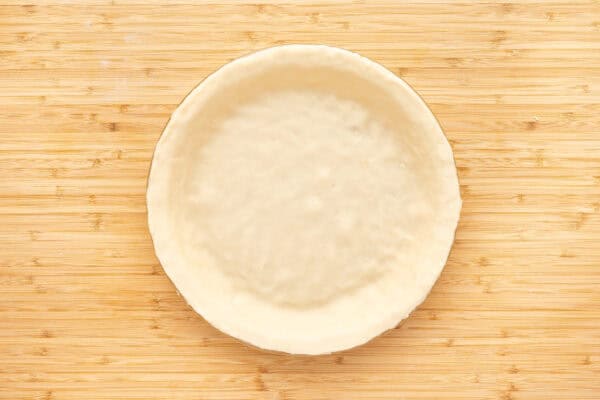
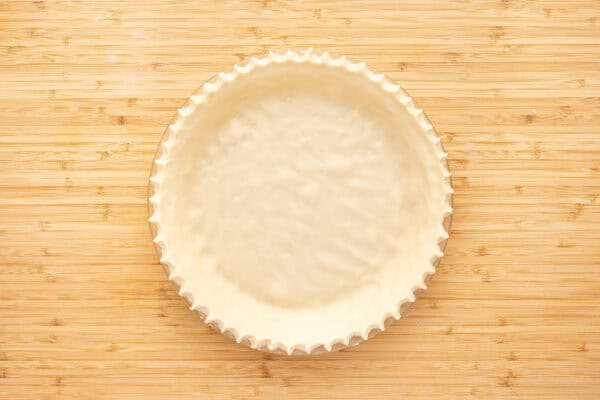
- Roll the dough into a 12-inch circle, about 1/8 inch thick. I then transfer the dough into a 9-inch pie plate, which allows me to trim and crimp the edges. My mom always uses a 10-inch pie plate, so there isn’t any excess and that’s ok, too!
How To Transfer the Crust to a Pie Plate
There are 3 different ways (that I know of!) to do this. After you make a ton of pie crust (and you’re going to, right?), you’ll try all three and pick your preferred method.
- Use the rolling pin. You roll the flattened pie dough onto the rolling pin, transfer to the pie plate and unroll.
- Use a dough blade. Take a lightly floured dough blade and carefully work it gently under the pie dough edges. Then, using the blade to help you as needed, gently fold the dough in half, then into quarters. Place the quartered dough into your pie plate and unfold it.
- Use a cutting board. Slide the parchment paper (with the rolled out dough) onto a large cutting board, then flip your pie plate upside down on top of the dough and invert.
Once you’ve transferred the dough, you’ll gently press down so that it lines the bottom and sides of the pie plate. Use a pair of kitchen scissors or sharp pairing knife to trim the dough to within 1/2 inch of the edge of the pie dish. But, wait! You’ve got some tears and there’s much sadness. DON’T FRET! Just simply use your fingertips and gently press together any tears or cracks.
Tips For A Perfect Crust
- Use ice cold water to bind the dough. Make sure you use ice cold water, but without the ice.
- If possible, use a food processor. You absolutely can use a dough blender to combine your ingredients, but I prefer a food processor because it does a better job of thoroughly distributing the shortening.
- Glass pie plates are ideal to make pie. Glass transmits heat evenly, which ensures the bottom of the crust will cook through. Plus, you can see when the bottom and sides have browned.
- Use a pie crust shield to prevent the crust from over-browning. I like to use an adjustable silicone pie crust shield that you can fit to the size of your crust. You can also go old school and use a piece of aluminum foil gently wrapped just around the crust rim.
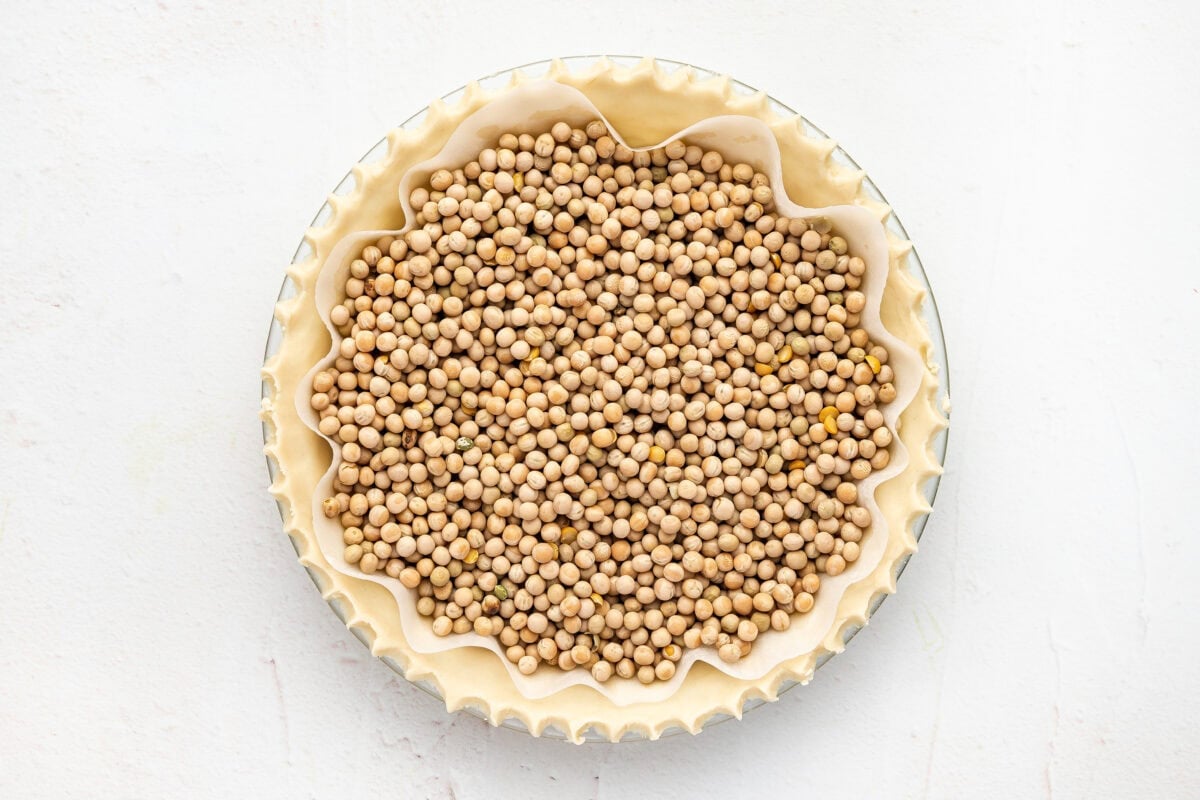
When To Blind Bake Pie Crust?
Blind baking, Pre-baking, and Par-Baking (which stands for Partial Baking) refers to baking pie crust without a filling. Why would I bake pie crust without a filling, you ask? There are a few instances – when you’re making quiche, custard pies, pudding pies, anytime your filling doesn’t need to be cooked (as in no-bake pies), or if the filling cooks faster than the crust. This article on how to par-bake pie crust has more details.

Ways to Use a Pie Crust
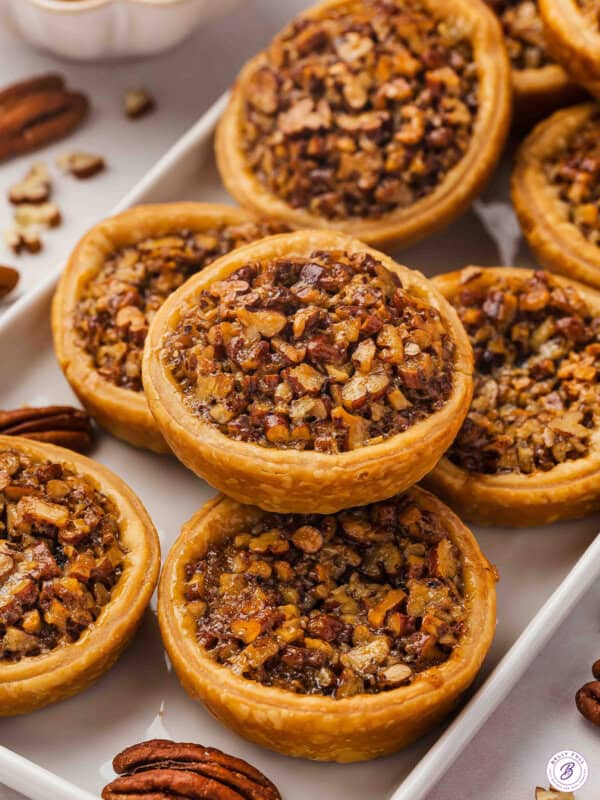
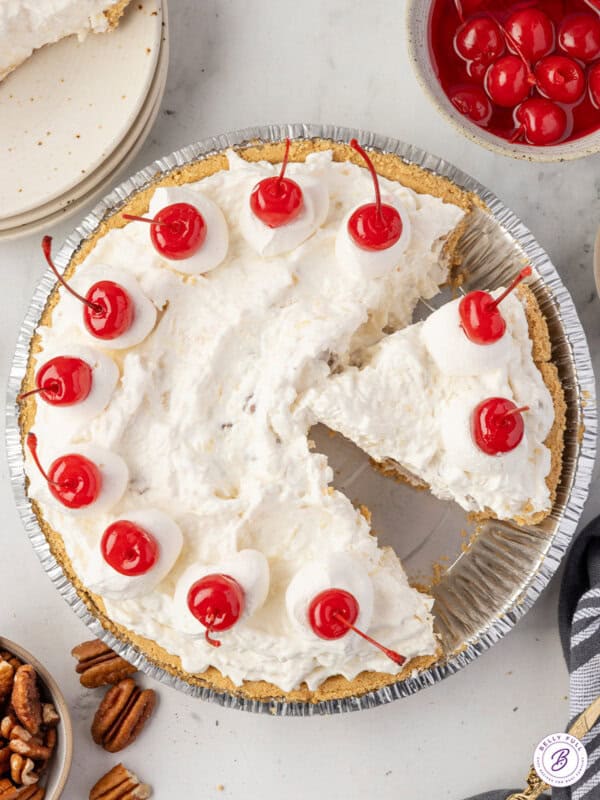
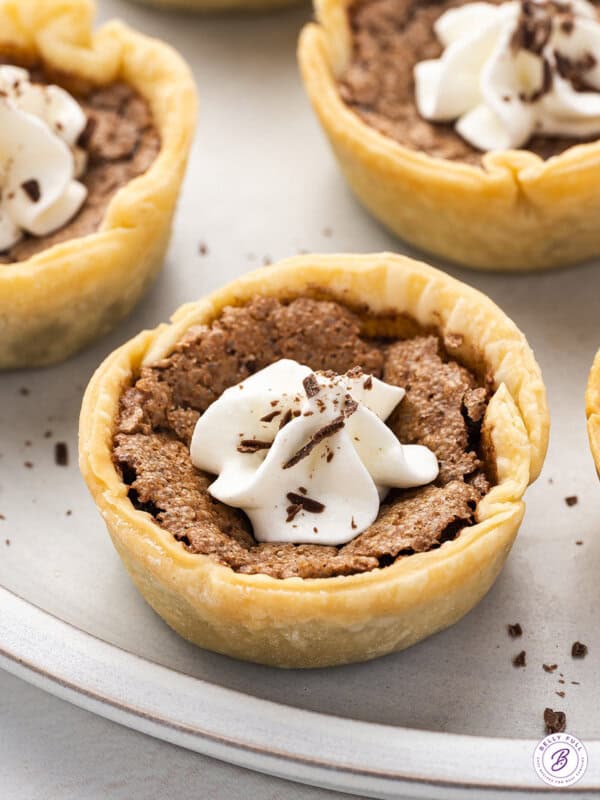
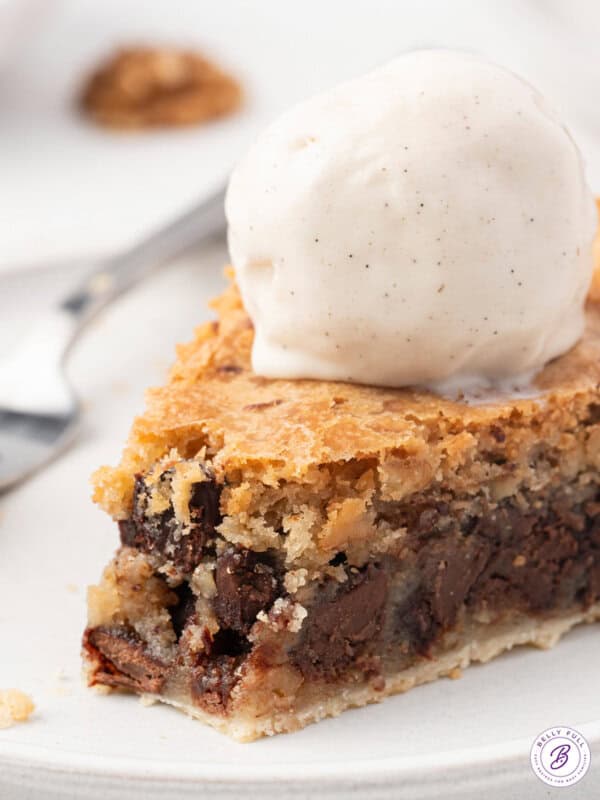
The beauty of making pie crust is you can use it for all the different pie recipes, whether they’re for fruit pies or cream pies, a slab pie, or cut circles out for mini pecan pies and air fryer apple hand pies! Try this pie crust recipe on some of my favorites pie recipes, such as chocolate pie, coconut pie, and peach pie!
Can I make Pie Dough Ahead and Freeze?
So you’ve made this pie crust recipe, but you don’t need it immediately. You can prepare the pie dough, wrap it up as instructed and place the disc in the refrigerator for up to 2 days or freeze in a freezer-safe plastic bag for up to 3 months. Thaw overnight in the refrigerator before rolling it out.
I hope you love this easy delicious recipe – be sure to give it a review below! Also don’t forget to follow Belly Full on TikTok, Instagram, Facebook, Pinterest, and YouTube!
Homemade Pie Crust
Ingredients
- 1 & 1/2 cups all-purpose flour, , spooned and leveled
- 1/2 teaspoon salt
- 1/2 cup shortening, (see note below)
- 3 tablespoons ice cold water
Instructions
Process the Dough Ingredients
- Put 1 & 1/2 cups all-purpose flour and 1/2 teaspoon salt into the bowl of a food processor and pulse a few times to combine.

- Cut 1/2 cup shortening into cubes and sprinkle it on top of the flour in different places.
- Pulse several times (about 15) until the mixture resembles large pea-sized crumbs and changes to a darker color. Take a little bit of the mixture and pinch it together with your fingers; if it holds together, your dough is ready for the water.
- Remove the food processor lid cap and slowly drizzle in 3 tablespoons ice cold water while pulsing, until the mixture just starts to form a ball. Don't over-process.
- Take some of the mixture and pinch it together with your fingers; if it holds together, your dough is good to go. If it’s still crumbly, add a little more water (but no more than a tablespoon at a time. Too much water will require more flour, which will make the crust tough.)
Form the Dough & Chill
- Transfer the dough mixture onto a clean, dry, flat surface that’s been lightly dusted with flour.

- Gather into a mound, then fold the dough into itself until the flour is fully incorporated. (The dough should come together easily and should not feel sticky. Don’t over-knead. You should just knead enough so that the dough holds together without cracks.) Then flatten the mound into a 1-inch thick disk, making sure there aren’t any open edges or cracks.
- Wrap the dough tightly in plastic wrap and refrigerate for 30-60 minutes.
Roll out the Dough
- After the dough has chilled, remove it from the refrigerator and let it sit for a few minutes while you prep your work surface to roll it out.
- Cut a large piece of parchment paper; lay it on a clean, dry, flat surface and sprinkle with a little flour. Cut a similar sized piece of wax paper.
- Place your dough disk on top of the parchment paper and sprinkle with a little flour, then place the wax paper on top of the dough.
- Using a rolling pin, start to roll out the dough. You want to roll with purpose, but gently. Start rolling from the center to the outer edge, in single strokes, making sure to move in all directions, turning as you go, so that your crust stays in a general circular shape. Roll, turn, roll, turn, etc. If the dough is sticking to the wax paper as you roll, add a few sprinkles of flour on top of the dough, and continue rolling.
- Roll the dough into a 12-inch circle, about 1/8 inch thick. (I then transfer the dough into a 9-inch pie plate, which allows me to trim and crimp the edges. My mom always uses a 10-inch pie plate, so there isn’t any excess and that’s ok, too!)
Transfer the Dough to Pie Plate
- Transfer the dough to your pie plate with a rolling pin, dough blade, or cutting board. Gently press down so that it lines the bottom and sides of the pie plate.
- Use a pair of kitchen scissors or sharp pairing knife to trim the dough to within 1/2 inch of the edge of the pie dish. (If you've got some tears DON’T FRET! Just simply use your fingertips and gently press together any tears or cracks.) Crimp the edges.
Make all the pies!
- Proceed with whatever pie recipe you’re making! (Some recipes do call for a fully baked pie crust or a partially baked crust, so pay attention to that.) Don't miss all the helpful tips about forming and rolling the pie crust, and blind baking in the article.
Video
Notes
Nutrition
Nutritional information given is an automatic calculation and can vary based on the exact products you use and any changes you make to the recipe. If these numbers are very important to you, I would recommend calculating them yourself.


Made your Apple Hand Pies and your perfect recipe for the dough-dough recipe was exact and easy to make. Thank you Amy
I have saved your site to my Gmail and my phone. My best friend told about your site and she text me you site address. I am so glad she found you. We will be using your recipes a lot.
Thank you for sharing.
Will the butter flavored Crisco be good?
Yes, that would be fine. The butter flavor variety adds a richer buttery taste while still performing the same function as regular Crisco in terms of texture and baking properties.
You are the best easy and simple thank you so much for sharing your passion with us.
The directions on this was so much easier to follow than one that I had tried before(by time it was rolled out to fit as a pie it was paper thin). I will definitely hold on to this pie crust recipe…..Thank You.
When using lard (instead of shortening), would I just follow the recipe measurements the same as in this recipe?
Yep!
I finally made a good pie crust! I’ve tried quite a few – this one was easy. Thank you Amy to you and your Mom for the excellent how-to video – it really helped. And the link to the crimping video was great too.
I would love to try this recipe but don’t have a food processor. Is there an alternative hand way to make this? I do have a blender, an electric hand mixer, strong arms and lots of patience. Just getting started cooking different desserts at home but don’t have a budget for new kitchen gadgets. ?(Darn inflation!)
Hi Ashley! As mentioned in the article, you can use a dough blender (https://amzn.to/3ZdZXCN) – you’ll have to put some muscle into it and be thorough, but it’ll work.
I don’t have a food processor what else can I use
Hi Marcy! As mentioned in the article, I prefer a food processor because it does a better job of thoroughly distributing the shortening. But you can use a dough blender/pastry cutter.
Perfect pie crust, thank you!
I did half butter and half shortening, came out GREAT!
I’ve been so scared to make a pie crust, but your instructions were awesome. Thank you for this!
I agree shortening is the way to go for pie crust!
You nailed it! I’ve made it this way for years (married 67 yrs) and have yet to have a failure. I also agree shortening is by far the best, as much as I love butter, not in the recipe.
I’ve been making this crust for years, it’s the best. When I make it I make a few batches and freeze it.It freezes well
I made it and it was so delicious. Thanks for sharing recipe
Absolute pie crust perfection!
I don’t have a food processor. Can I just use a fork to keep blending?
Hi Lenora – I prefer a food processor since it tends to blend all the ingredients so thoroughly, but if you have pastry/dough dough blender, that will work fine.
Seriously helpful tutorial, Amy! I am SO unbelievably lazy and almost ALWAYS use store-bought crust. But homemade is leaps and bounds better. I need to “retire” and take up a new life as a baker or something.
Oh goodness, I need your help Amy… The last pie I tried to bake was a soggy disaster! I hadn’t baked a pie in 2 years, and I’d never thought to parbake the crust… That probably would’ve helped a bit. As would your awesome recipe!
I’m an all butter food processor girl myself, but I really should give this method a try!! An excuse to make pie? You know I’m in.
To me it’s not the perfect recipe, but the perfect ‘touch’. I can’t say anything more definite than that. Twice in my life I made a lot of pies and my crust was flakey heaven. It’s been a while since I have been in that pie crust zen mode. It’s a space I am yearning to be again.
Love me a good pie crust!