Mini Chocolate Pies
Published
Published
These Mini Chocolate Pies have all the flavors of a traditional chocolate pie, but in mini form and individual servings. They’re rich and creamy with just the right amount of sweet, and only take a few minutes to prep. Their adorable bite size makes them great for entertaining!

Pin this now to find it later
Pin ItThis post may contain affiliate links. If you click on one and make a purchase, we may earn a small commission at no extra cost to you. We only recommend products we genuinely love.
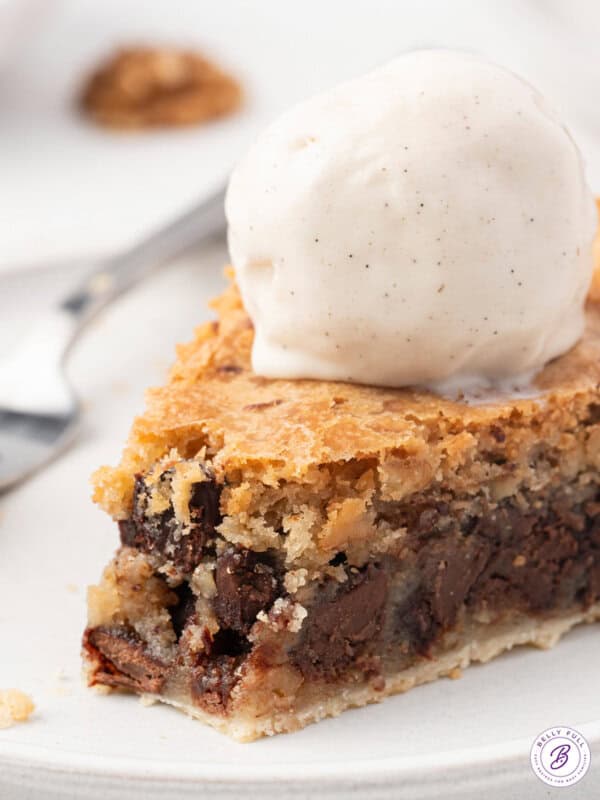
I took my super popular easy chocolate pie and converted it into mini pies! These mini chocolate pies have all the elements of a good chocolate pie with a rich chocolate flavor, but not overly sweet, and a flaky crust. These pies are baked in a muffin tin, which makes them the perfect size for a dessert spread at holiday gatherings or at any party.
Tips for Success
- Pie crust. I like to use my homemade pie crust for these mini pies but store-bought refrigerated rolled pie crust works too.
- Avoid tears in the crust. When working with the pie crust circles, make sure that they are fitted into the muffin tin and that there are no rips or tears. If there is a tear, use your fingers to press it together.
- Don’t overfill the crust. The pie filling will rise a bit during baking so make sure to not fill the mini pie crusts more than 3/4 full. You want some of the crust to show.
- Enhance the chocolate flavor. For an even more robust chocolate flavor, mix 1/2 teaspoon of instant espresso into the filling. It won’t make it taste like coffee but it does enhance the chocolate flavor.
Mini Chocolate Pies

Ingredients
- 2 9-inch unbaked refrigerated rolled pie crusts, (homemade or store bought)
- 1 & 1/4 cups granulated sugar
- 3 & 1/2 tablespoons unsweetened cocoa powder
- 2 large eggs
- 1/4 cup unsalted butter, , melted
- 5 ounces half-n-half, (see note)
- 1/2 teaspoon vanilla extract
- pinch of salt
- homemade whipped cream, , for topping
- chocolate shavings, , for garnish
Instructions
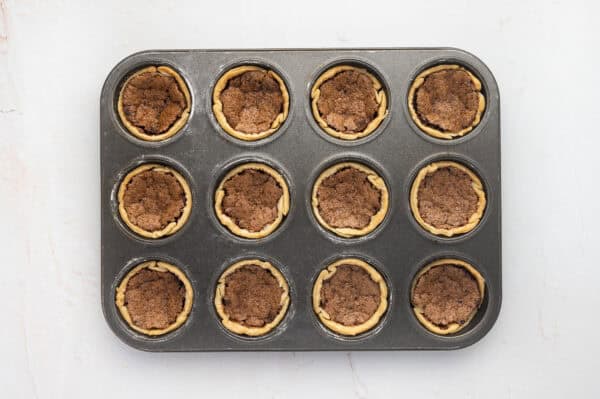
- Preheat oven to 350 degrees F. Grease 2 standard 12-count muffin pans with nonstick spray.
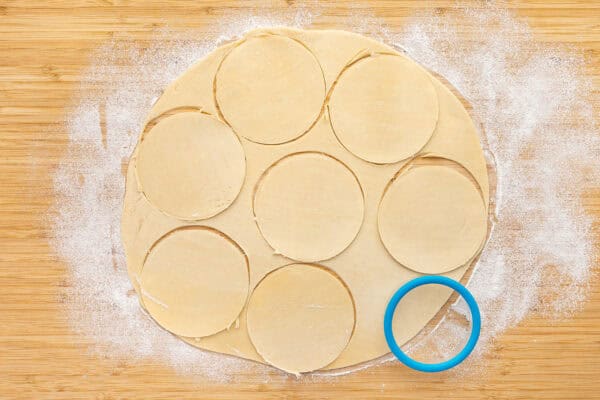
- On a lightly floured work surface, roll the pie crusts out to 1/8-inch thickness. Using a 3 & 1/2-inch cookie cutter (or cup) cut out 18 circles from the pie crusts. Re-roll any scraps of pie dough to cut out the circles, if necessary.

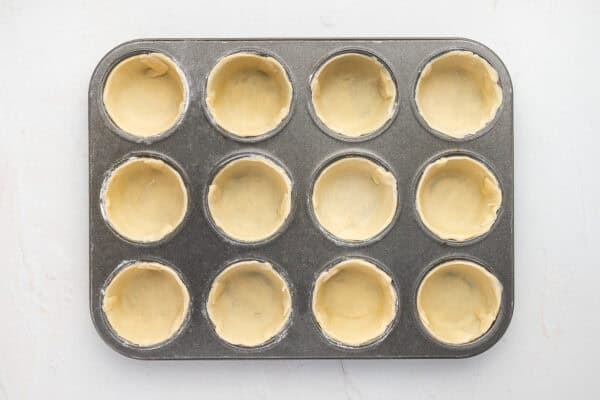
- Place each circle of pie crust in 18 slots of the prepared muffin pans. Gently press the dough down and around the sides, making sure the dough fits snuggly in each cavity and that there aren’t any tears.
- Transfer the muffin pans to the refrigerator while you make the filling.
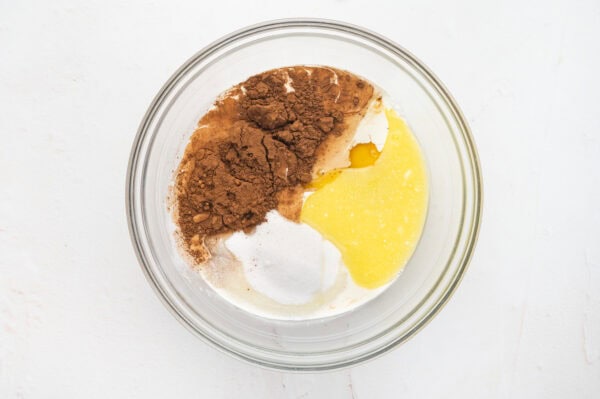
- In a mixing bowl, whisk together 1 & 1/4 cups sugar, 3 & 1/2 tablespoons unsweetened cocoa powder, 2 large eggs, 1/4 cup melted butter, 5 ounces half-n-half, 1/2 teaspoon vanilla, and a pinch of salt until thoroughly combined (the filling will be thin.)

- Remove the muffin pans with the pie crusts from the refrigerator.
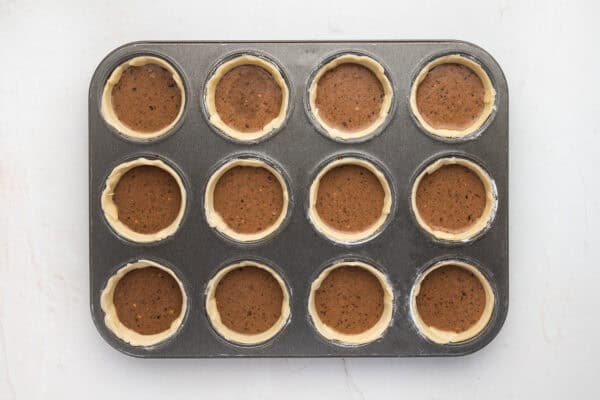
- Evenly distribute the chocolate filling between all 18 pie crusts in the muffin pans (no more than three-quarters of the way full.)
- Bake for 22 minutes or until the filling sets and there is a thin crackled crust on the tops. (The filling will puff up high, but then deflate once removed from the oven – this is normal.)
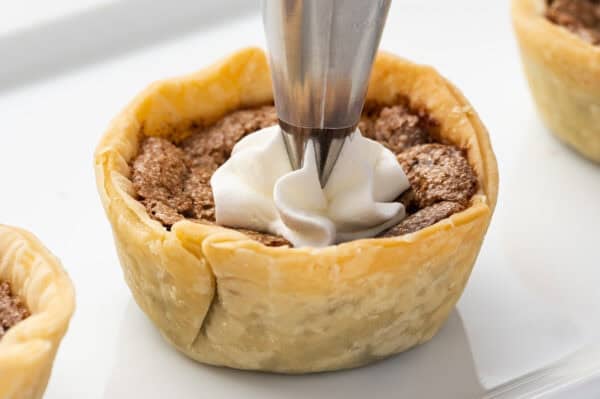
- Remove from the oven and allow to cool on a wire rack for 30 minutes, then carefully run a dull knife around the perimeter and remove from the muffin pan and place on the wire rack to cool completely.
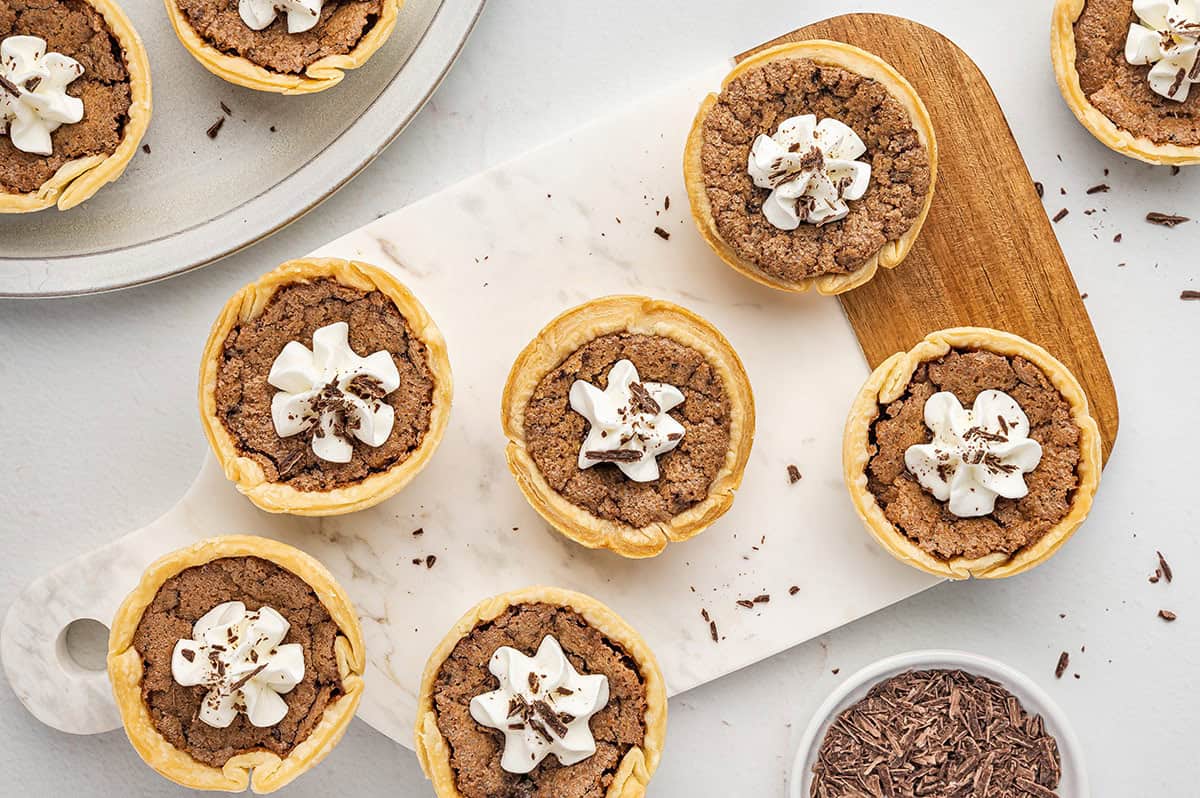
- You can serve them chilled or at room temperature. Pipe with fresh homemade whipped cream and garnish with chocolate shavings.
Video
Notes
Nutrition
Nutritional information given is an automatic calculation and can vary based on the exact products you use and any changes you make to the recipe. If these numbers are very important to you, I would recommend calculating them yourself.
Serving Suggestions
I like to serve these mini chocolate pies at room temperature but they’re also yummy cold. I usually top them with homemade whipped cream and chocolate shavings or chocolate curls. A drizzle of raspberry sauce with fresh berries or caramel sauce is also nice for a delicious addition.
Proper Storage
- Counter. These mini chocolate pies can sit on the counter for up to a day without any whipped cream. Keep them lightly covered with foil.
- Fridge. After a day on the counter, any leftover pies should be refrigerated, either covered with foil or placed in an airtight container, separating layers with waxed paper. They will last for up to 4 days. Note that the longer they chill, the more they will dry out.
- Freezer. Once the chocolate pies have cooled completely, wrap each one in aluminum foil then place them in a Ziploc freezer bag. Freeze for up to 2 months. Thaw overnight in the fridge.
I hope you love this delicious and easy recipe – be sure to give it a review below! Also don’t forget to follow Belly Full on TikTok, Facebook, Instagram, Pinterest, and YouTube!


Per usual, this recipe is delicious! Things in mini form just taste better haha. I may reduce the bake time next time because of my oven. Thanks for simple instructions and a great dessert!
Love these so much! I make your easy chocolate pie all the time, it’s a family fav.
5 FLUID oz or 5 oz by weight for the half & half?
Also, the instructions say it makes 18, but the photo is of 12.
Well, half and half is liquid, so it would be fluid ounces. The written recipe is correct at 18. Regular muffin tins.