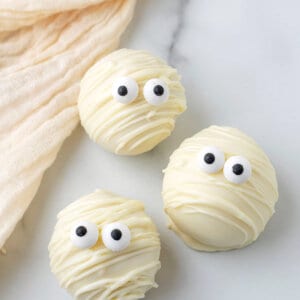
Mummy Oreo Balls
Updated
Updated
A fun Halloween dessert, these Mummy Oreo Balls are made with just 4 ingredients. With a hard outer shell and creamy center, Oreo cream cheese balls are so delicious, plus they’re no bake and easy. Have your little ones help you make them!
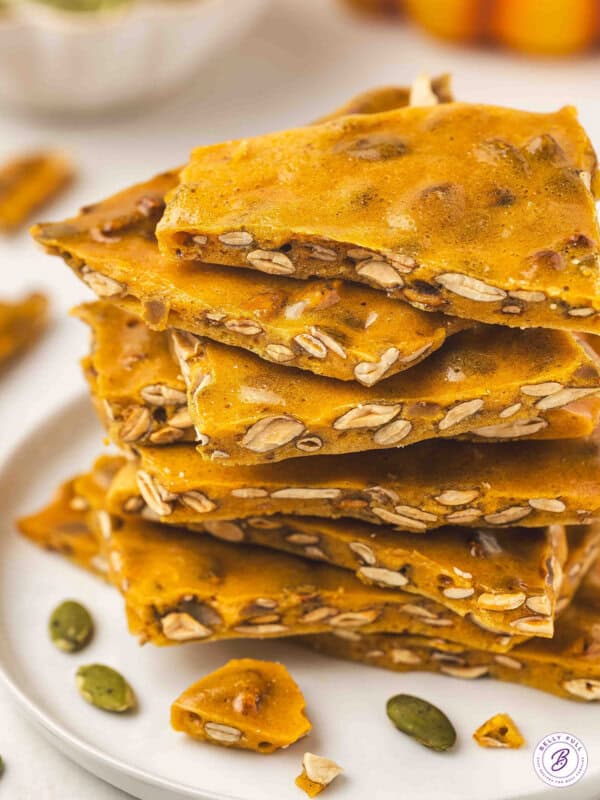
While you’re at it, buy extra candy melts and make this addictive Candy Corn Pretzel Bark, too – only 3 ingredients and also no bake!

Pin this now to find it later
Pin ItThis post may contain affiliate links. If you click on one and make a purchase, we may earn a small commission at no extra cost to you. We only recommend products we genuinely love.
Easy Oreo Cream Cheese Balls
If you’re looking for a fun, easy, delicious Halloween dessert this year, these Mummy Oreo balls fit the bill. I took a basic no bake Oreo ball recipe and turned it into these adorable mummy truffles.
These Oreo cookie balls are made with just 4 ingredients, including the candy eyes. All you need is some golden Oreos, cream cheese, and dipping wafers, plus the eyes for decorations. These do need to sit and chill at two different points but you can still have them ready to eat within the hour.
This was great for my 3, 5, and 6 year olds! Their play-dough-ball-rolling skills made this a breeze! We had as much fun making them as eating them!
– Kayla
What You’ll Need
This fun Halloween dessert is made with just 4 ingredients:
(Scroll below to the printable recipe card for details and measurements.)
- Oreos: Blonde/golden oreos are ideal for this recipe for the light color.
- Cream cheese: Soften to room temperature before using so the center is lump-free and creamy.
- White Chocolate Candy Melts: You can also use candy melts or dipping wafers. Avoid regular white chocolate chips for best results.
- Candy eyes: A fun addition that turn these white chocolate oreo balls into Mummy Oreo Balls!
How to Make Oreo Balls
This no bake Halloween dessert is super easy to make! The hardest part is waiting for the Oreo balls to set. Here’s a summary of how to make them:
(For all the details, scroll below to the complete printable recipe card.)
- Make the Oreo balls. Pulse the cookies in a food processor until they are a fine crumb. Then combine with the cream cheese. Use a cookie scoop to form 1-inch balls. Place in the freezer for 30 minutes to set.
- Melt the chocolate. Melt according to package instructions.
- Assemble the mummy oreo balls. Dip each Oreo truffle into white chocolate, turning to coat. Tap any excess off. Transfer to baking sheet. Drizzle remaining chocolate over top of balls and stick two eyes onto the Oreo truffles.
- Chill and enjoy. Place in the fridge for 20 minutes or so to set, then enjoy!

Tips for Success
If this is your first time making Oreo balls, here are a few things to keep in mind:
- How to easily dunk the truffles. When dunking the Oreo balls in the chocolate, the truffle sits on top of the fork, the fork tines do not poke into the truffle ball.
- Add extra chocolate for the eyes. If the chocolate hardens too quickly when you drizzle it on, you can add a dot of melted chocolate to the back of the eyes before sticking them to the Oreo balls.
- Melting wafers or candy melts vs. white chocolate chips. I prefer Wilton candy melts or Ghirardelli White Melting Wafers for candy making because of their smooth consistency and once dried and hardened, they don’t soften at room temperature. If you want to use regular white chocolate, I recommend combining it with some coconut oil, which will help thicken it up and harden faster. You’ll need about 1 tablespoon coconut oil per 1 cup of chocolate.
FAQs
From issues melting chocolate to where to get the candy eyes, here are the answers to some of the questions I’ve received about these mummy Oreo balls:
- My chocolate is very thick. What can I do to help? If it’s too thick, you can stir in one teaspoon of coconut oil at a time until it’s thinner. This tends to happen more often if using regular white chocolate instead of melting wafers.
- My chocolate looks like it has cookie crumbles after I tried to melt it. What happened? When you melt the chocolate, and it is overheated, the white chocolate looks like there are cookie crumbs. There is no way to undo that; unfortunately, you will need to start over from scratch. I highly recommend heating in your microwave for 30 seconds at a time and stirring after every 30 seconds until the chocolate is melted.
- Where do you get candy eyes? I found mine at my local grocery store with all the sprinkles. You can also get them on Amazon here.
- Can I make these with classic Oreos? Yes, but the filling might slightly show through the white chocolate coating, so you can double dip them if you need to.

Mummy Oreo Balls
Ingredients
- 20 Golden oreos
- 4 ounces cream cheese, (softened to room temperature)
- 10 ounces vanilla candy melts or dipping wafers
- 1 package candy eyes
Instructions
- Line a large baking sheet with parchment paper; set aside.
- Pulse the Oreos in a food processor until the cookies are a very fine crumb.
- Pour the cookie crumbs and cream cheese into a large mixing bowl. Stir the mixture until it’s well combined and smooth.
- Using a cookie scoop, form the mixture into about 1-inch balls, roll the balls between the palms of your hand until they are smooth. Place the Oreo balls onto the parchment paper, then transfer into the freezer for 30 minutes to allow them to set.
- Melt your chocolate according to package directions.
- Pour the chocolate into a small bowl or glass.
- Working one at a time, using a fork, dip each Oreo truffle into white chocolate, turning to coat. Tap off any excess chocolate on the side of the bowl. (Note: when dunking in the chocolate, the truffle sits on top of the fork, the fork tines do not poke into the truffle ball.)
- Transfer balls back to the prepared baking sheet.
- Pour the remaining chocolate into a ziploc bag and cut a small hole on the bottom corner. Drizzle the chocolate over the top of the balls, stick two eyes onto the Oreo balls. (If the chocolate hardens too quickly, you can add a dot of melted chocolate to the back of the eyes before sticking them to the Oreo balls.)
- Place them in the fridge for 15-20 minutes to allow the chocolate to set up.
- Serve and enjoy!
Nutrition
Nutritional information given is an automatic calculation and can vary based on the exact products you use and any changes you make to the recipe. If these numbers are very important to you, I would recommend calculating them yourself.
How to Store Mummy Oreo Balls
While the chocolate won’t melt at room temperature, these cream cheese Oreo balls do need to be stored in the fridge. They will last for up to 5 days. If you make extras and need to layer them, I recommend laying down parchment paper between them.


This was great for my 3, 5, and 6 year olds! Their play-dough-ball-rolling skills made this a breeze! We had as much fun making them as eating them!
SO cute, Amy!
Hope all is good for you and the family.
These are so much fun!