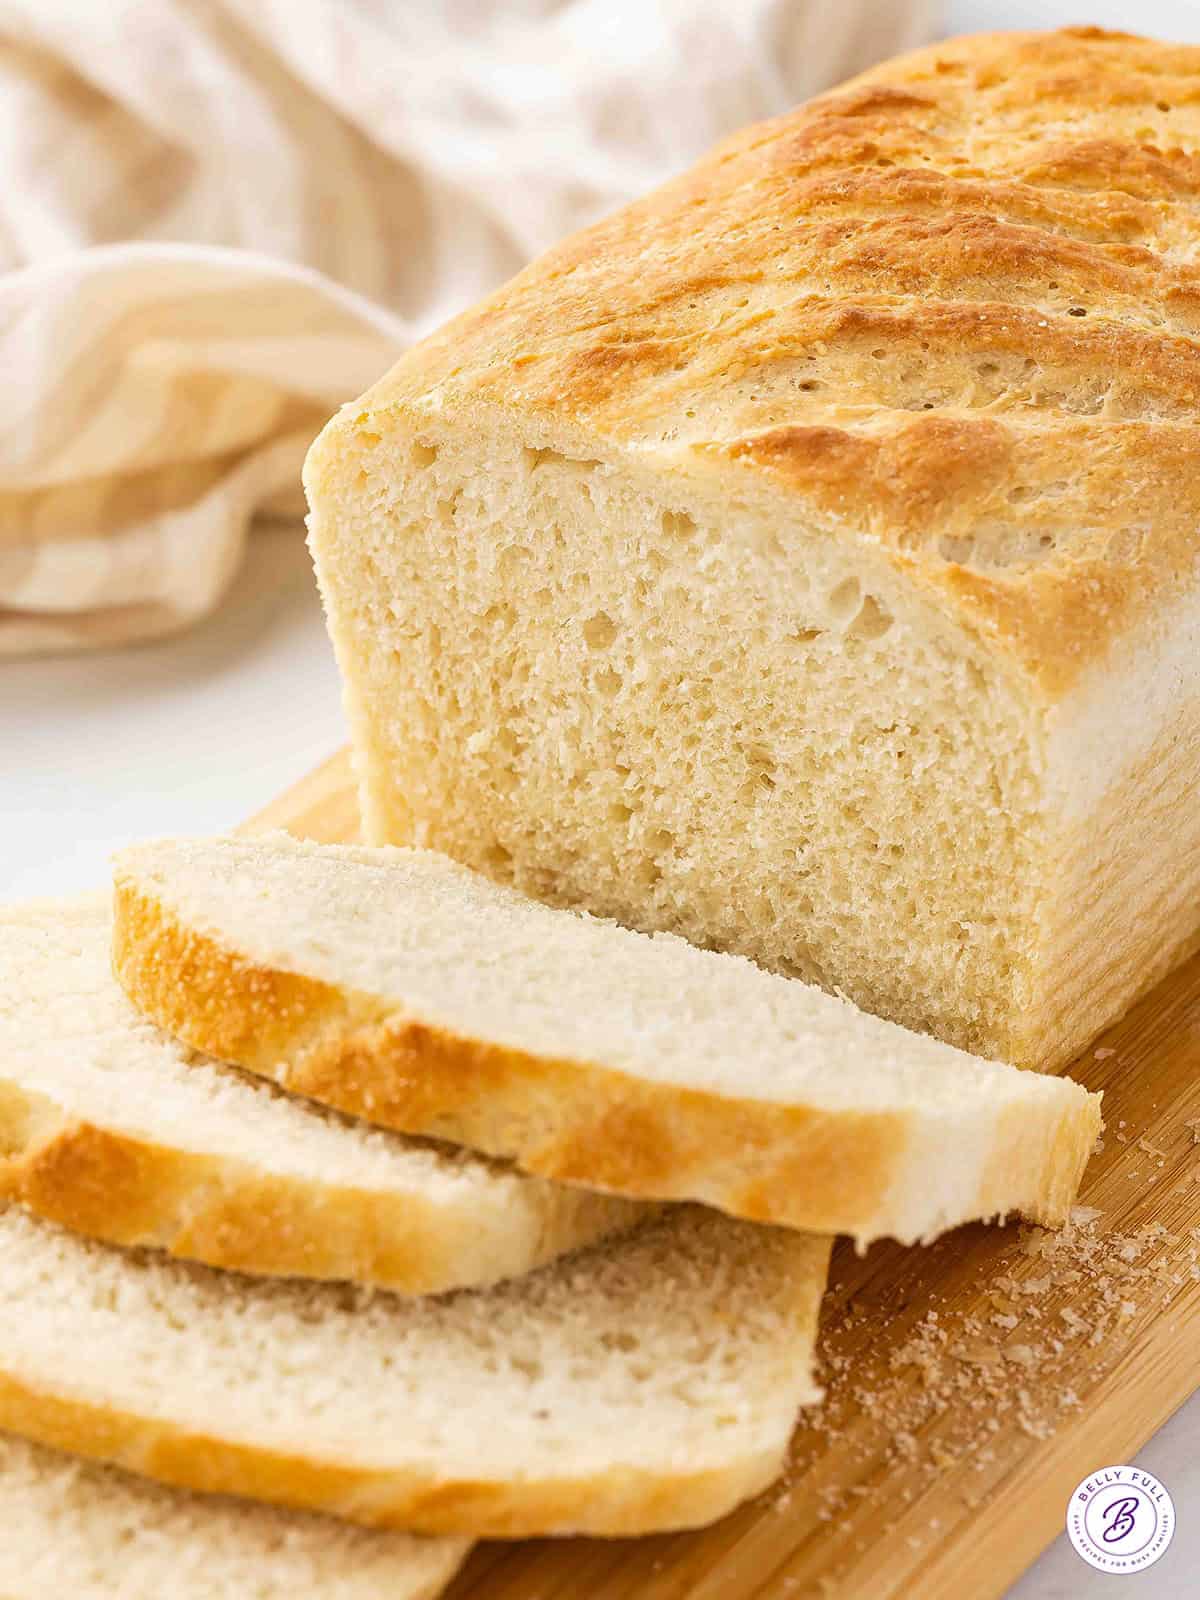
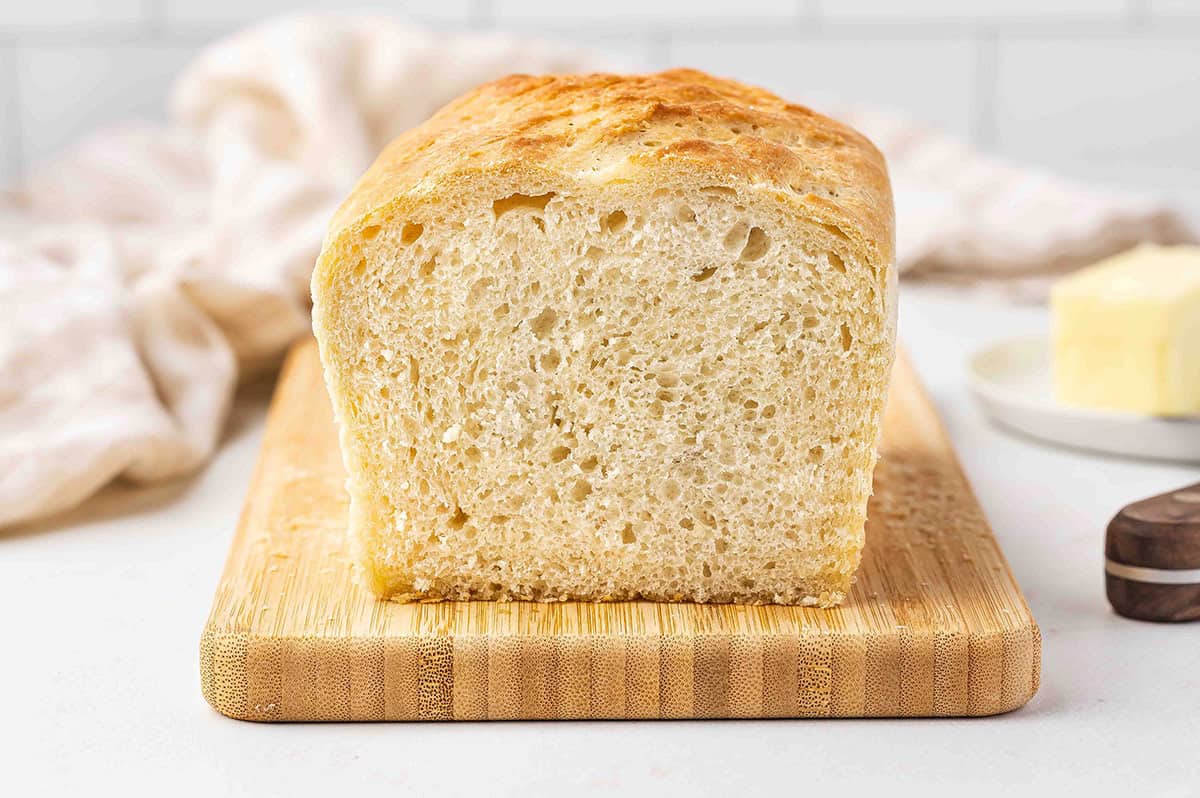
World’s Easiest Homemade Sandwich Bread
Updated
Updated
Just over an hour start to finish is all you need to make the World’s Easiest Sandwich Bread Recipe. Don’t have a stand mixer? No problem! Just knead by hand in a couple minutes. With only 5 pantry ingredients, this recipe is so easy and thrifty, resulting in soft tender loaves of bread every time!
Pin this now to find it later
Pin ItThis post may contain affiliate links. If you click on one and make a purchase, we may earn a small commission at no extra cost to you. We only recommend products we genuinely love.
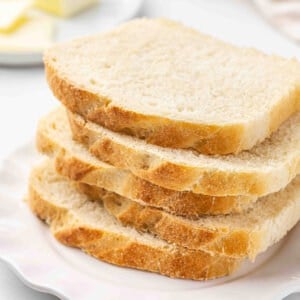
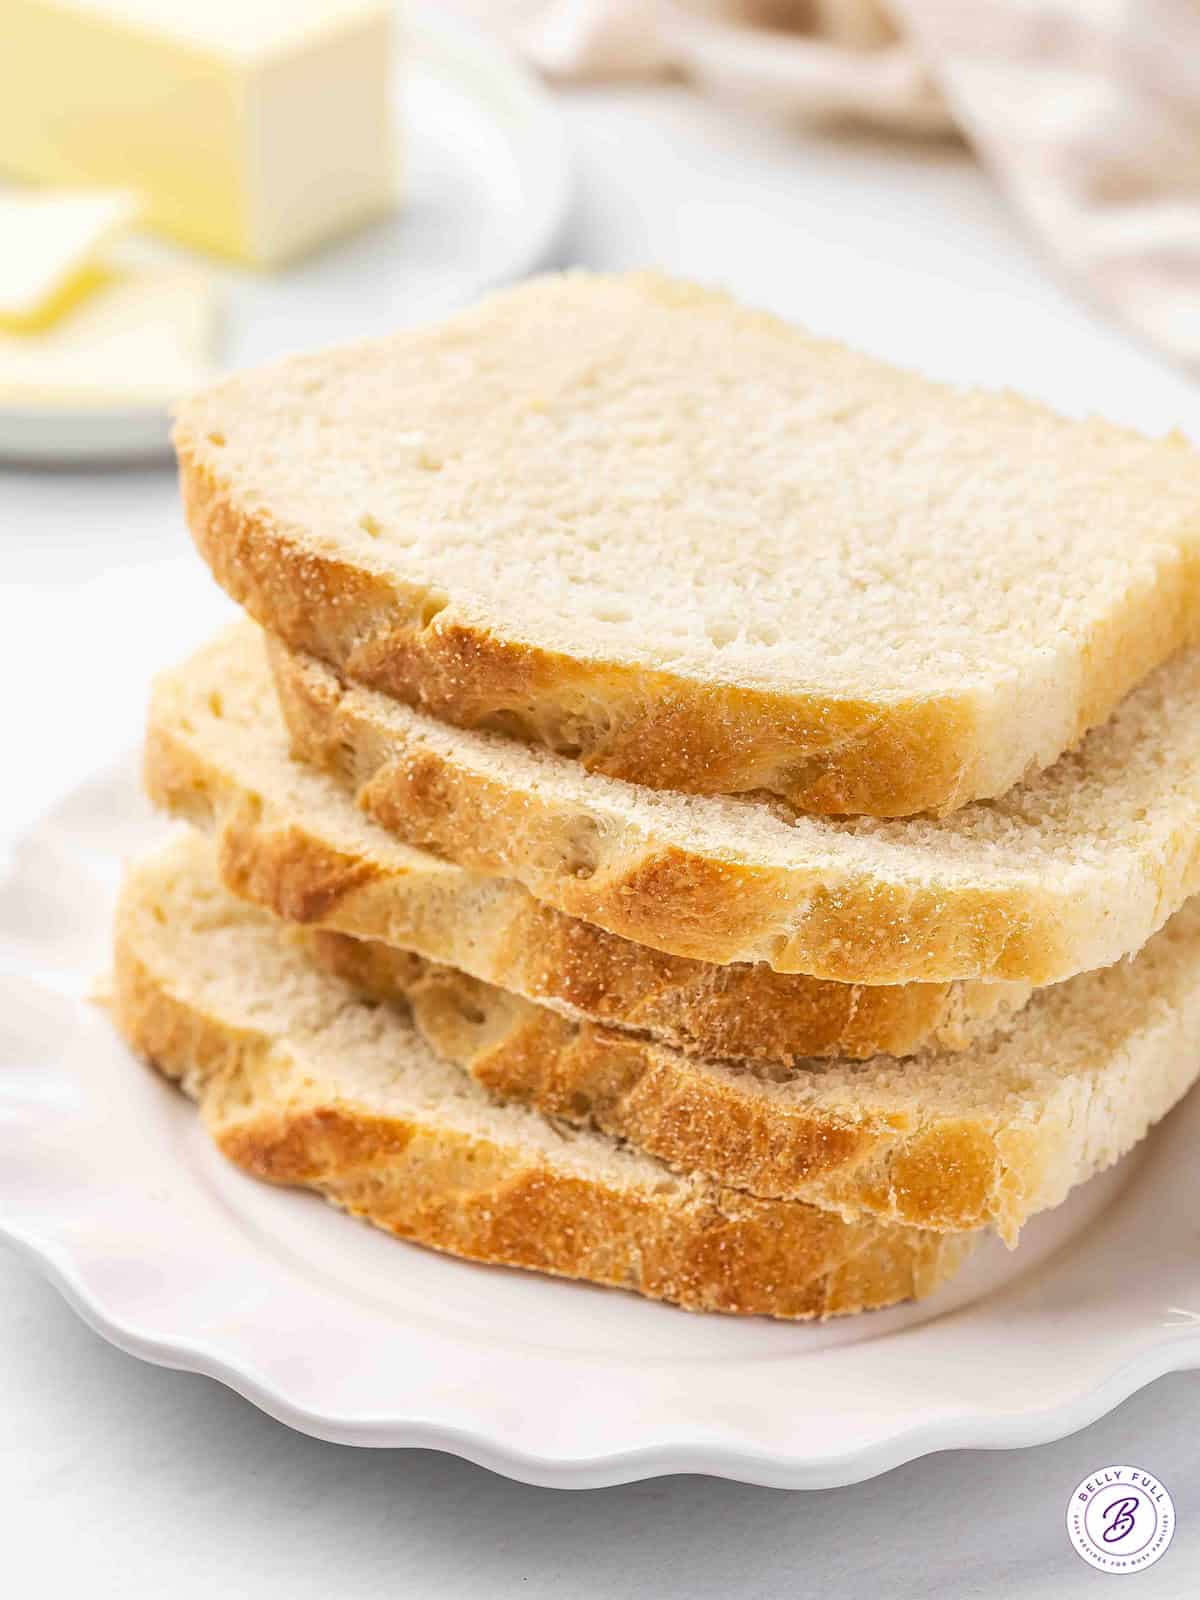
If you’re someone who is bread-baking challenged or just simply afraid to use yeast, this homemade sandwich bread will change your life, I promise! I’ve made it on so many occasions. It’s really similar to my quick and easy pizza dough, in ingredients and simplicity. The process is just different, but with excellent results every time. I can’t say enough about how easy and wonderful this recipe is – and nobody says you have to use it just for sandwiches. Sliced fresh with a slab of butter is out of this world!
5 STAR REVIEWS
Helpful Tips
- Use fresh yeast for the dough. Check your expiration date and if it’s old, get a new batch! If your yeast isn’t fresh, the dough won’t rise properly.
- Speed up the rise time. If it’s cold in the house, I like to place the covered bowl of dough on a heating pad to assist in the rising time.
- It is critical that you start the loaves in a cold oven! A cold oven and moist heat from the hot water (on the lower rack) improves the oven spring and creates a nice crust.
- Use a stand mixer, if preferred. I love the simplicity of this recipe and that it doesn’t require an electric mixer, but if you’re someone who wants their KitchenAid dough hook to do the kneading, you certainly can.
- Prevent over-browning. Toward the end up baking, tend loosely with foil if you notice the tops over-browning.
- Add flavoring. A little bit of dried herbs or garlic powder can be added to the dough, for a different flavor.
- This bread does NOT convert well to gluten free. As a general rule, you can sometimes substitute all-purpose gluten-free flour in place of all-purpose regular flour at a ratio of 1:1. However, this recipe does not convert well. I tested it with Bob’s Red Mill All-Purpose Gluten-Free Flour and also King Arthur Gluten Free Flour, adding in 1 teaspoon of xanthan gum. In both tests, the bread did not rise well and came out very dense and hard.
World’s Easiest Homemade Sandwich Bread
Ingredients
- 6 cups all-purpose flour, , spooned and leveled
- 2 tablespoons instant dry yeast
- 2 tablespoons granulated sugar
- 1 tablespoon coarse salt
- 2 cups very warm water, (about 120 degrees F)
- 1/4 cup extra-virgin olive oil, , divided
- melted butter, , for the crust, optional
Instructions
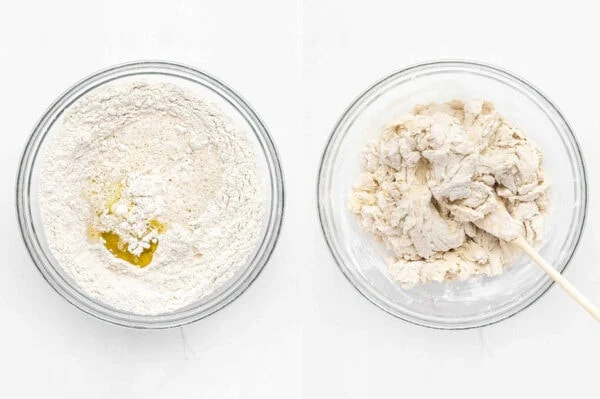
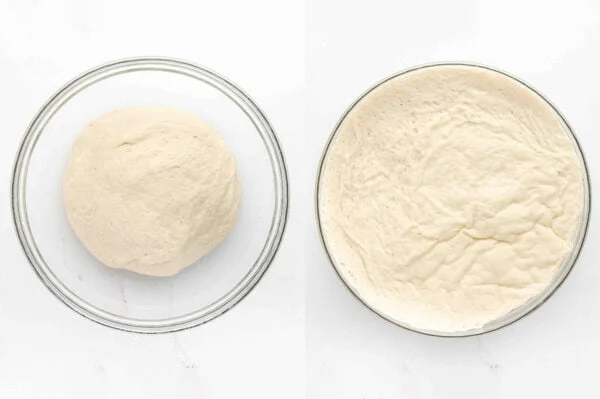
- In a large mixing bowl, whisk together the flour, instant dry yeast, sugar, and coarse salt. Then add in the warm water and 2 tablespoons of olive oil; mix together with a sturdy wooden spoon until a shaggy dough forms.

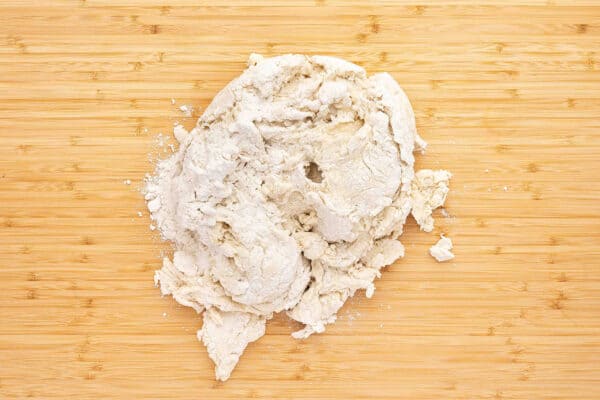
- Turn out onto a clean lightly floured surface and knead until the dough comes together and becomes smooth, about 4 minutes.

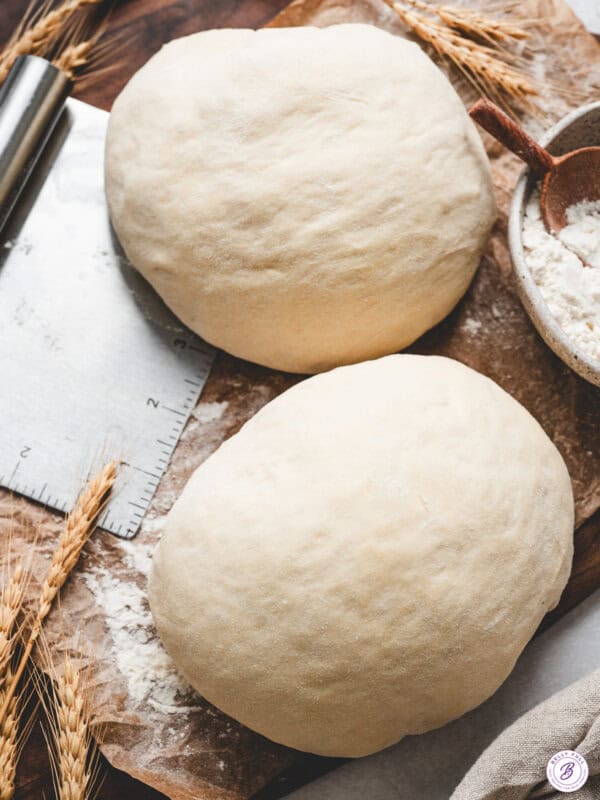
- Form a smooth dough ball and return to the mixing bowl. Cover with a clean tea towel and let rise in a warm place for 30 minutes (or longer, if you wish – see note.)
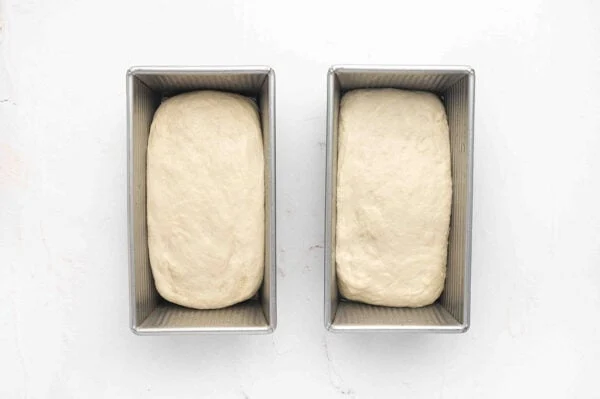
- Divide the dough in half and form into two loaf shapes; place loaves into two standard-size 9×5 greased loaf pans.
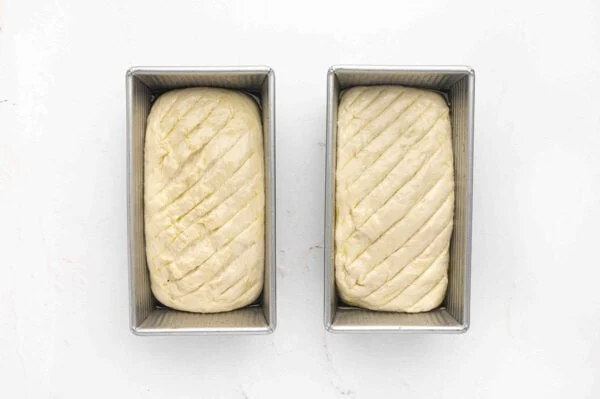
- Drizzle each with a tablespoon of olive oil, then slash the tops of the loaves about 1/4-inch deep with a sharp knife.
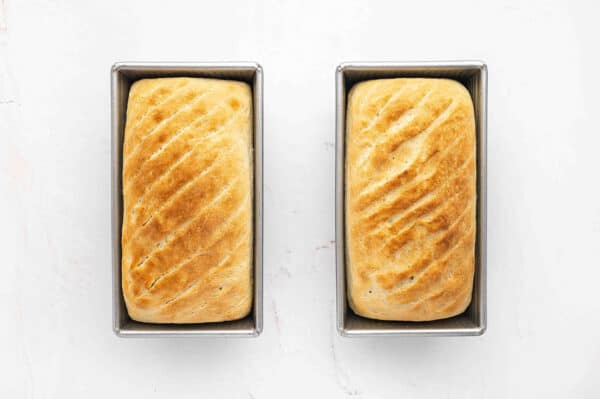
- Place loaves on the middle rack of a cold oven with a pan filled with hot tap water on the rack below it.
- Close the oven, set the heat at 400 degrees F, and start a timer for 40 minutes.
- After 40 minutes, remove the pans from the oven, carefully transfer bread out of the pans and onto a cooling rack to cool completely. (Feel free to baste the crust with melted butter while still warm, if preferred.)
- Slice and enjoy!

Notes
Nutrition
Nutritional information given is an automatic calculation and can vary based on the exact products you use and any changes you make to the recipe. If these numbers are very important to you, I would recommend calculating them yourself.
How To Store Sandwich Bread
There is just nothing like freshly baked bread right from the oven! Unfortunately, bread really shouldn’t be left out for an extended period of time, because it gets stale. But you’ve got options for storing it.
- If you’ve got yourself a breadbox (your grandmother probably had one!), definitely use it. These old fashioned contraptions do actually work because they allow bread to breathe without letting in air that typically dries the bread out.
- Once cooled completely, double-wrap your bread loaves in clean plastic wrap, then store in a cool, dry place. But make certain there isn’t even a drop of moisture on the plastic, which can make the bread mushy or moldy.
- The freezer is your friend for long-term storage. If you won’t be finishing your loaves with a couple of days, cool the bread completely, slice it, then wrap in plastic (as instructed above.) Slicing the bread prior to freezing is the way to go, since the slices thaw faster at room temperature and also you can just take out what you need.
- Skip the refrigerator. It’s sort of the worst thing you can do to bread, because it completely dries it out.
- Bread can be kept frozen up to 2 months. It’s safe to eat after that, but the quality and flavor diminish significantly.
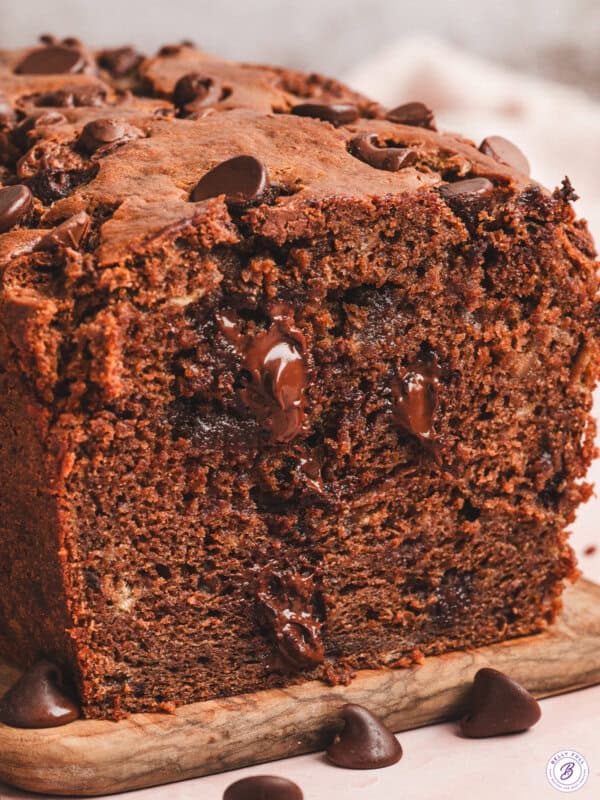
More Bread Recipes To Try:
I hope you love this delicious and easy recipe – be sure to give it a review below! Also don’t forget to follow Belly Full on TikTok, Instagram, Facebook, Pinterest, and YouTube!


Love this recipe. It is so fast, easy and tasty. I did bump the salt up a bit, like, just a heavy pinch, on my second time around. It really did boost the flavor for me. I LOVE bread, especially warm from the oven – or toaster – and this really delivers.
I love this recipe was so simple and beautiful, I just made one loaf of bread. So I just cut the recipe in half thank you so much 🙏🏾
If I make the whole 1x recipe, is there a place to stop and only cook half/ one loaf? Can the dough or partially done dough be stored for a number of days?
I wouldn’t recommend that. It’s best made and baked right away. You could always make both loaves and freeze one of them.
Thank you for sharing this recipe. I’ve tried many recipes previously for sandwich bread but none came out as I was expecting for soft sandwich bread. This bread IS AMAZING!!!
The first time I made this recipe the bread was incredible – delicious with great crumb. I followed the recipe to the letter as this was my first time making sandwich style as I usually make artisan boules. But my loaves fell short of the bread pans by about 1/2” on each side and didn’t rise as much as I had hoped. I made the bread today for the second time and, again, followed the recipe to the letter BUT this time I let the dough enjoy a second rise in the pans for another hour in the oven with only the light on, and presto-chango, the dough fills the pans side to side and rose another inch or so crowning above the edges of the pans. As I write this it is still baking but I have no doubt it will be scrumptious. The recipe is DROP DEAD easy and bread a winner. Oh well… so much for keto.
I made it properly, just did not drizzle with olive oil. The bread inside was perfect, but the crust a bit over done. Should I cut back on the time a few minutes?
I made the bread but thought my yeast might not be good because it didn’t rise all that much. So I bought new yeast, tried again and still not a very good rise. Then I saw a comment in the reviews that referred to “the second rise”. I don’t see that in the directions. I have other bread recipes and do use a second rise with them. Am I missing something here?
Hi Mary! No, you’re not missing anything. This bread does not require a second rise. Someone chose to do a second rise. There are many factors that go into baking bread – the yeast, the temperature of the water, the temperature of your kitchen, etc. If you read through the other comments, you’ll see that 99% didn’t need a second rise, but you can certainly try it and see if you get the results you’re looking for.
This was such a blessing of a recipe! For too long I’ve been scared to make bread but I’ve had all the ingredients needed just sitting in my pantry, this was the recipe that finally convinced me to do it. I followed the exact instructions and turned out amazing. I did only have one loaf pan on hand but letting the other half of the loaf dough rest for the 40 minutes it took to cook the first one had no adverse effects. This will be my go-to recipe and I’m never buying supermarket bread again!! This one’s going in my personal notebook cookbook!
I made this last night! We ate a whole loaf today. I do think it needed to be kneaded longer. Can I make this using my kitchen aid? Paddle attachment until shaggy dough, then switch to dough hook?
I’ve never tried making this with a kitchen aid mixer
I will give it a try today and let you know how it goes!
How did it go with the kitchen aid?
excellent excellent excellent
So easy and so, so, so good! Thanks for the yummy recipe!
Can I use active dry yeast instead of instant?
Yes, as long as you allow it to bloom first.
I am considering making this bread, but have a question. Is the sugar needed or can I use a substitute?
I would not omit the sugar. It helps bloom the yeast and speeds up the rise time, while also enhancing flavor, creating a slightly sweeter, softer, browner crust.
This bread is delicious! Do you by any chance have a version that is whole wheat too?
I don’t, sorry. Glad you loved it!
I made the bread and it was great! I wonder if if anyone has made it into buns?
I made it into buns and all I can say is OMG !!! Love , love , love this recipe! It’s was so easy to make and it took no time to enjoy that first warm slice !!
To the creator of this recipe all I can say is BRAVO !!
And of course thank you for sharing it !
I made half recipe this morning… It is delicious! I’m not that much of an experience baker and it turned out great!
Wonder if you could make cinnamon bread out of it? Anybody ever try that?
Thank you so much for sharing!!
Yes, after the 30 minutes rise time and halving the dough, you can roll out one half at a time into a rectangle, brush the flattened dough with softened butter, then sprinkle cinnamon and sugar on top. Now, roll the dough into a loaf, place in the bread pan and allow to rise a second time before following the baking instructions.
easiest bread recipe a person could ask for. so glad it’s a one and done
The best recipe I’ve tried for bread. It is now my go to and I make it at least once a week. Recipe allows a little room for error and very beginner friendly. Comes out perfectly every time.
Excellent slicing sandwich or toast bread, A bit like an Italian loaf ! Really beautiful for garlic bread!
I want to make this but I live in a tiny house and use a toaster over. I do have enough room to make one loaf. Can I half this recipe?
Hi Tracie – I’ve never tried halving this recipe, so I can’t vouch for results without further testing. But you could freeze the second loaf for later.
I halved this recipe for one loaf, but not sure how big your toaster oven is, the bread will rise above the pan, so it may likely burn. Try rolling into rolls after first rise, let rise again but only bake what fits.
I’ve made this recipe a few times and it is a staple! If anyone is a metric person, I used 720 g of flour, 18g of yeast, 15 g of coarse salt and 25 g of sugar. I haven’t weighed the water since I have a fluid/ml cup and same with the oil. I’ve also used whatever neutral oil I’ve had around without any issues. Also have added about 100g of whole wheat with great results too. Great recipe!
I’ve made this recipe twice, cutting it in half as I didn’t have 2 same size bread pans. I am no baker, but this bread came out perfect both times!
Definitely a keeper recipe, and I just ordered a second pan, so I can freeze 1 loaf. 😉
This recipe is actually SO forgiving! I overproofed by a lot, probably added too much water, and it still turned out so soft and delicious. It looked like the surface of the moon, lol. I used vegetable oil and a baking sheet on the lower rack to prevent browning too much. My picky family claimed it tasted better than the sourdough I bought!
Was looking for a quick sandwich bread recipe and found this one! Easy to make and it is now the favorite one I will make over and over again! Nice and moist and perfect for a sandwich or toast! Thank you soooo much for sharing the recipe!
Recent empty nester and I wish I knew about you and your recipes before the kids moved out..lol. Love this easy bread..it totally was that easy. I also made your easy deviled egg recipe but added celery to the mix. Took both (easy sandwich bread and deviled eggs) to work and it was a hit! Gone in less than 10 mins. Thanks for bringing joy back to my kitchen.
I am new to bread making and I have made this twice already. It’s super easy and taste great, however the top is very very hard and crusty. Am I doing something wrong? Am I over / under kneading it? Over baking it? What?
Hi Adriana – Every kitchen and oven is different, so it’s hard for me to say for sure what’s happening, but typically those issues can be caused by not enough moisture in the dough, over-baking, or insufficient rising time.
Are you by chance brushing it with butter? That should help keep the crust soft.
Can I use bread flour? I have some already and wanted a recipe I could use it up on.
I haven’t tested this recipe with bread flour.
I made this yesterday and it was incredible. I have a box type air fryer with a proof setting. It’s the first time I used it and I couldn’t believe how well it worked. I only had extra virgin olive oil and it was a little strong tasting so next time I will use canola oil. There will definitely be a next time! My husband and I ate one whole loaf during the day! SO GOOD!
This is a great recipe! I decreased the flour by 1/2 Cup and the water by 1/2 Cup and added 1 Cup of sourdough discard in its place and this was the BEST Sourdough Discard sandwich loaf that I have ever made! I received so many compliments on it! It was literally gone within hours of it being done. Thanks so much for a very versatile and adjustable recipe. I threw mine in a large Pullman loaf pan and cooked it for the time in the recipe. Everything turned out perfect! It’s a moist and springy sandwich loaf with a nice airy crumb. 10,000/10! Thanks again!
I can’t afford olive oil, but I always have grapeseed oil on hand for making my herbal salves, I also cook with it. Will that do? And are the packets of yeast the proper measurement for this recipe? Thanks this looks great. And easy.
Grapeseed oil should be fine. A standard packet of instant dry yeast contains 2 & 1/4 teaspoons.
Easiest bread. First one was gone in a day and there only 3 of us!
I make a big breakfast every Saturday morning. It’s my “thing”. When I went to grab the bread to let it soak for French toast – there wasn’t any! So… I made this instead! I’ve never baked bread except in a bread maker. This was so easy! Cut the end immediately after it came out of the oven – man! This is good!
This was so easy and turned out amazing! I love baking bread, but sometimes I don’t have the bandwidth for all the proofing and stretch and folds, so this is an absolute dream for when I need to whip up a quick loaf! I subbed the granulated sugar for the same amount of honey since we only use natural sweeteners and just mixed it into the warm water with the oil. Thank you for this recipe! So soft and delicious!
Followed the recipe to a T and it came out perfect! Lovely golden crust with a tender crumb. So easy too!
I followed this recipe to a T and am very pleased with the end results! I don’t have a kitchen aid and am always so disappointed when bread recipes call for one. This bread recipe was so simple. My loaves didn’t rise quite as much as I would have liked but the crumb was still tender and fluffy and the crust was perfectly golden. We enjoyed a slice with a bit of butter and then sandwiches the next day. Thank you!
Hi, could I use some whole wheat flour with this recipe do you think?
Hi Joanna! I haven’t tested this using whole wheat flour. For proper results, I would make it as written.
I made this and switched 2 cups of flour out with 2 scant cups of whole wheat flour and it still turned out really well!
This recipe is truly very easy and quick. I didn’t have instant yeast so i mixed the warm water sugar and active dry yeast and let it sit until foamy then followed the recipe. Very good bread!! love the taste and texture!!
I baked this bread today, and everyone LOVED it! My son said it was the best bread he has ever had!
My husband & I loved this bread.
Easy recipe.
This will be the first anything I am making with yeast. Do I need to activate it before putting it in the mixture on step one? Looking forward to trying it!
Not the author but an avid baker!
This recipe called for instant yeast, which does not require the same proofing/activation process as active dry yeast. If you follow the recipe as written, using instant yeast, you should be fine! If you use active dry yeast, you’ll need to proof the yeast mixture first with the water and a bit of the measured sugar.
Since you expressed it is your first time baking with yeast, I’d follow this recipe to gain some insight into how yeast wants to behave, and adjust accordingly. :)
I hope this helps! Also, sorry that this reply is so many months later than your original comment. I just noticed the author hadn’t responded and figured I’d share an answer in the event you were still wondering.
Happy baking!
What kind of pans are you cooking them in? Glass or Metal non-stick? Thanks!
I currently have my two loaves in the oven and with having a 3 and 1 year old at my feet in the kitchen, this was the EASIEST recipe for bread! Literally was able to trust the ingredients to mend themselves in the stand mixer. Didn’t have to play around with flour or add more water for literally the best consistency. This recipe is going on my cabinet door or a new staple thank you!
I’ve currently got 2 loaves in the oven and I’m hoping I didn’t mess up. I always weigh my flour using 120 grams per cup. I hope this works for this recipe.
15 minutes left to cook, I sure hope it turns out good. Also, thank you for sharing your recipes.
This recipe is so good. I think I ate a half a loaf in one sitting.
How hot/what temperature should the water be that’s put in oven?
We made this yesterday and one out of two loaves has been eaten already!
The family approves and this will be our go-to from now on.
Thank you so much for sharing.
This recipe is super easy and delicious every time, though every time I make it the crust on top is crusty/ crunchy. Any tips for a softer crust?
To soften the top, after baking, I brush with melted butter, put the loaf on its side and wrap loosely in a linen kitchen utility towel to cool
I loved this recipe so much explanation Easy To follow directions and tastes amazing Period I did have an issue with the top of my bread keeps Getting hard crust only on the top, which isn’t pleasant when trying to use it for sandwich bread. Is it something that I did? any tips Or tricks Would be extremely helpful!
Hi Ashley – I’m not sure I fully understand your question. You’re saying that the top develops a hard crust but the sides don’t?
I have had some better luck by misting the top of the bread with a bit of water right before it starts to change color in the oven.
Loved the directions,shape into loaf put in pan in cold oven with hot water in pan on lower rack , It rose nicely. So little work for such delicious bread. Next time I will season the bread to serve with stew,Garlic cheese bread with spaghetti endless varieties in an hour.
Hi, I made this twice and it’s very good. But I have a couple questions. It doesn’t mention I’d the pan should be greased or not? And, with the flour, I know it says scooped and leveled. I just want to verify cuz some recipes want the flour “loosened up” so to speak. Which makes it lighter. Do you need to do this, or just scoop right into the cup directly? Thank you!
As mentioned in the recipe, the pans are greased. Flour should be spooned and leveled so it’s lighter, yes.
Have been looking for an easy, no fail bread recipe. This did not disappoint! I only had bread flour, so looking forward to seeing the difference when I use the AP next time. Thank you, will be my go to now for sure. Trying to avoid all those chemicals and bad stuff in the commercial breads.
Have you topped the bread with any seeds or oats? I’m thinking about fortifying it a little.
I just taught my 14yr old this recipe and she did wonderfully with it for her first bread. Thank you for the recipe. Now that we are avoiding all processed seed oils, we do not buy any breads from the store. This recipe saves me much time feeding my family of 9.
Easy to make and tastes delicious! Love that it makes two loaves. Will definitely be making this one again :)
This was delicious and so easy! I’m new to baking bread and don’t have a stand mixer OR a lot of time haha. The whole family loves it!
Exactly the recipe I was looking for, as I don’t have a stand mixer (or the attention span) to make most recipes for home made bread that I see online! I accidentally added all of the oil at once before re-reading the instructions and it still came out great! This will be my go to from now on and I’m also thinking of playing around with it to make a dessert bread :)
Yessss!
Made this yesterday. Made two loaves. That comment about letting it cool before cutting was quite hysterical, I hardly had time to get it out of the pan before it was cut. That first loaf never knew what it was like to lay on the cooling rack. Lol. Was great recipe, will make it again. I did oil my pans and brushed them with butter. Thank you for sharing this recipe with me.
SOOO EXTREMELY EASY. THE DOUGH JUST FELL OUT OF THE BOWL. HARDLY SNY STICKY RESIDUE. THE PERFECT CONSISTENCY!! PROBABLY WOULD ROLL OUT SOME AEESOMR Biscuits OR CINNAMON ROLLS THANKS AMY FOR THE SHARE. WERE About TO HIT start on the oven.
Is a serving size 2 oz?
Such delicious and easy bread! My husband gave me a high five after I made this one. Thanks for giving this new baker some confidence!!! This is a new staple!
So easy. Came out great.
Just wonderful. I’m not a bread baker and this was super easy to make with great results. Thanks!
This is my go-to easy bread recipe. So great when you’re in a pinch and it does in fact produce fluffy tender bread!
This recipe turned out perfectly!
I just made this bread but half recipe and I understand why the recipe calls to make 2 loaves. It is FANTASTIC!! At about 20 minutes the top was burning so I popped it out of the pan (lost a piece here and there stuck in the pan) but then I put it back in the oven upside down for the remainder of the cook time. We lasted a whole 25 minutes of cool down time before cutting into it to make tuna sandwiches and it was delicious and soft with crispy edges. Almost consistency of a fresh french bread. Thanks for this recipe, it’s definitely a keeper.
I followed the recipe to a T, but did cut the recipe in half for just one loaf. It’s wonderful!
Sounds like your yeast was too old and not active. Test yeast by putting 1/2 c warm tap water in bowl with 1 teaspoon of sugar and 2 1/4 yeast. Stir to dissolve. Check in 10 minutes. Yeast should foam and double in sizw
yeast and mix
You weren’t lying when you said this bread was easy! Made it today… my rise did take about an hour but I live in the uk so it’s cold. Followed the recipe but halved it as I only have 1 tin. Highly recommend – thanks!
I halved it and it was great. Flavor was good had to place a piece of tin foil over the top to stop it from over browning. Next try I will be keeping recipe whole but maybe trying some rolls or buns?
Simple effortless bread. Turned out great.
First time making bread & it turned out perfect!
Such a great recipe! I’ve made it dozens of times! I’m wondering, could I substitute whole wheat flour? Instead of White? Will it still turn out? Thank you :)
Hi – did you try making it with whole wheat flour? I’m interested in trying that too but wanted to check if yours turned out. Thanks :)
I made mine with whole wheat flour and it came out perfect!
So easy and yummy! I just started getting into making my own bread, this one is simple, quick, and tasty. Good luck keeping it for more than a day or two!
LOVE THIS BREAD AND I AM AMAZED IT TURNED OUT FOR ME IN MY 1950 OVEN. THANK YOU SO VERY MUCH!!!!!!! THIS WILL BE MY FOREVER BREAD MAKING RECIPE FROM NOW ON.
This recipe tastes amazing and is super easy! My one complaint/question however is that the bread continually sticks to the pan and when I try to transfer it to a cooking wrack I always lose the entire bottom of the loaf. How can I fix this?
Hi Tiffani! I have never had that happen. It could be a couple things. 1) you’re not greasing the pans, as mentioned, (2) you’re not allowing the bread to cool enough before removing them from the pans or 3) it’s the actual pans themselves. I would suggest using a bit of nonstick spray before placing the dough in the pan and also trying to let them cool completely in the pan before removing them.
Try putting some parchment paper with some olive oil and flour under the dough. Bake as usual and that should make taking it out of the pan easier.
I put a single piece of parchment in each pan to cover the bottom and up the long sides of the loaf pan (my pans are older and having read this comment I wanted to take extra care) to great success! Doesn’t seem to have affected the crust or texture negatively! Maybe try next time? :)
I’m just learning to make bread and this was my first sandwich bread recipe and I’m so pleased with how it turned out. Thank you for the thorough instruction.
I was not confident in my ability to make this bread because of all of my failed attempts with other sandwich bread recipes… but it was SO EASY! I was awestruck with its simplicity and so pleased with the result. My husband is not a bread person, but he went back 3 or 4 times to just get a plain slice!! 10/10
Going to make this, this weekend. In the directions for putting it in the cold oven, do we start the timer once we start to preheat the oven to 400 or do we start the timer once it hits 400?
start the timer once you start to preheat
You start the timer the second you put the bread in the cold oven!
I’ve been baking bread for years and have tried many many recipes. This bread is now my “go to” bread recipe. Absolutely delicious! I was a little nervous about the “cold oven start” because my oven is so old I wasn’t sure if the 40 minutes would work for me, but it was perfect. It reached the perfect internal temperature at 40 minutes. The flavor and texture is wonderful. Thank you so much for sharing this recipe.
Easy and yummy! Will make this again!
Made this today for the first time baking homemade sandwich bread WITHOUT a bread maker.. will make again!!
First time making homemade bread and I’m so pleased. It didn’t rise as high as store bought bread, but the inside was nice and fluffy and the taste was great. Thank you!
Great recipe quick and easy. The tops of my loafs overbrowned, I may leave out the oil drizzle next time
Did this help? I didn’t like the over browned crust but the bread was great!
Fantastic recipe!
Minimal ingredients, minimal dishes, and two loaves of delicious bread! The crust is fantastic…that water hack is a game changer for getting bread to have that “knock.”
Have you made this using a stand mixer vs a spoon? I have a Kitchen Aid (well, 2) that I should really start using. ;-)
Hi John – yes, you can use a stand mixer if preferred, as mentioned in the recipe tips.
This was my first time making bread, and this was so easy and fast. I ended up making three loafs with this recipe, smaller. The bread taste amazing ? will definitely make again
I loved this recipe. The bread is delicious. Only a question, Can I let it rise more than 15 minutes? I’d like the bread a bit fluffier. Thank you for sharing this recipe.
I’m getting ready to make this recipe. Can I use bread flour along with all purpose flour?
Hi Florence – I haven’t tested this recipe using bread flour, so I can’t vouch for results at this time.
New to making bread. Can I half the recipe for one loaf for my first try? Thank you
Hi Mitzi – I’ve never tested this recipe by cutting the ingredients in half, but you could try it.
Yes, you can half it.
Hey! I am going to try this recipe today! Just making sure this is a soft crust type bread- like fluffy, easy to cut through for kid sandwhiches? Thanks! Can’t wait!
Hi Claire! This is the easiest sandwich bread ever, but you might like my recipe for a more traditional sandwich bread here: https://bellyfull.net/white-bread-recipe/
Do not attempt this recipe with Bob’s Red Mill gluten free flour. The dough was crumbly, and would not rise. The outside was hard as a rock and the inside was sticky. However, the flavor was great! I think the recipe would have been good as written with AP flour.
my bread didn’t rise as tall as the side of the pan. Is it supposed to be that small?
It looks good and taste good it’s just not that big! It rose really well on the first rise, but in the oven, it didn’t come as high as the side of the pans.
Thia recipe is SUCH a hit! I was wondering if it could be made into buns?
I’m making this recipe for the first time today… I am new to baking bread. I did kneaed it by hand cuz I don’t have one of those mixers. I’m letting it rise now… It’s been about 20 minutes I’m not necessarily seeing a big rise on it and wondering if I did something wrong even though I followed the instructions as they’re written. I hope it turns out.
I always add the yeast to the warm water with the sugar and salt. Let it sit about 5 minutes. If the yeast is good, that mixture will turn nice and foamy. You can then add the oil and the flour and go from there. Hope that helps
I too had no idea how to tell if the active yeast was foamy seeing it is put in with the other dry ingredients. I had a small rise in the 15 mins but nowhere near double.
I’m just making this recipe for the first time and I did indeed get a shaggy dough in the KitchenAid. Is it possible to get a smooth dough ball only using the KitchenAid? I physically am not able to turn out the dough and knead it.
I did manage to get a smooth dough ball in the KitchenAid, but I added a little more water than required. I halved the recipe to make 1 loaf, so I used a bit more than 1 cup of water. My dough was slightly wetter as a result but was smooth and baked well; a crusty loaf with soft sandwich crumb.
Hi! Try using the dough hook on a medium-low setting, and possibly add a small bit of water to help bring it all together. Best of luck!
Love this recipe!! Can it be made in a bread machine and if so how would I do that
Best bread I’ve made so far. I am also going to try and let it rise on the counter a bit more next time. Also taking out at 35-37 min for a slightly softer crust. Thank you so much!
Going to give this recipe a try today as it sounds great! One question though, do I need to grease my bread pan?
I only just now begun learning how to bake bread and I am 60 years old. This recipe was super easy and delicious and will be our go to from now on.
I followed your recipe exactly, except the rising time after reading some of the reviews. For the first Rise, I left the bread in a bowl in a warm place for 40 minutes and it doubled beautifully. After I formed the bread into loaves and put it into loaf pans, I oiled it as directed and slit the bread in the top, but then I covered it and let it sit on my counter for a 2nd Rise for a total of 25 minutes. The loaf doubled in size and then I baked it as directed, but it only took 35 minutes. The crust was beautiful and the smell in the house, incredible. It was hard to be good and wait about 1 hours before I broke down and had to slice and taste it. Both my Son and I loved it.
I’ve been making bread for many years and this is, by far, the best recipe. I didn’t read the recipe correctly the first time and put whole 1/4 cup of oil in the mix. It turned out so good, and soft, that I just keep doing it. Thank you for the best, easiest, bread recipe!! Oh yes, forgot to mention, I put 1/4 C each of flax and wheat germ.
This is a great recipe. I made it the first time exactly as instructed and got a delicious chewy Italian style loaf. And because I love to experiment and recipe test, I played around with it a little bit the second time I made it.
Instead of kneading by hand, I let my KitchenAid dough hook do the work, took about 5 minutes.
For the rise, I wanted a softer fluffier bread, so I let the dough rise for 30-40 minutes instead of fifteen.
I formed my loaves and put them into a parchment lined baking sheet instead of in a loaf pan, I then let them rise as loaves for another 10 minutes.
I skipped brushing on the oil and I did not split the tops.
I put them into the cold oven with a pan of water and they came out SO soft. I’m sure it freezes beautifully, however they don’t last long enough to need to freeze them before my family makes them disappear.
Thank you for this great recipe!!
Did you put the loaves in a loaf pan to bake or did you keep them on the baking sheet?
I’m so surprised and delighted how easy this was and turned out!
I loved this recipient so much! So easy and oh so yummy!
I’m an avid bread baker and I was totally not sure about this quick recipe… but it was absolutely perfect for our end-of-summer last minute BLTs. It WILL go into the recipe book for future last minute bread needs! Didn’t have to bake it quite as long (by about 5 minutes) but otherwise followed the recipe from beginning to end.
I am new to baking breads. The recipe calls for 2 tablespoons of active yeast. How many of the little yeast packets is that? The packets do not have measurements do I was unsure. I attempted to google it and it said each packet is 2 1/4 teaspoons….so I would need several to make 2 tablespoons. Help!
1 Tablespoon is 3 teaspoons. So 3 envelopes but remove 1/2 – 3/4 teaspoon from the third envelope. It’s not too crucial if you’re a little off.
Hi Christina I used 2 packets of active dry yeast and the recipe turned out great. I added a little more water and used my stand mixer and let it proof for about 40 minutes. Divided the dough, put it in the loaf pans and let them do a second proof until they doubled in size again. They turned out amazing!
this recipe is AMAZING!! it is awesome with soups and sandwiches! thank you for making this!!!!!
Amy, thank you so much for this awesome recipe. I bake a LOT of bread, but this morning, I didn’t have time to make my usual two-rise sandwich loaf. My daughter was hankering for a lunch sandwich and I had no time to go to the store before she needed to leave for work! I made this bread and was SO impressed. I used what I had–4 cups of A/P unbleached, supplemented with ~1/2 cup of “doppio zero” white pasta flour and whole organic wheat for the rest. This made a really beautiful sandwich loaf and 9 runzas (meat-and-cabbage filled buns). I will be making this again and again!
Thank you so much for sharing this recipe. This was so easy and tasted great.
Quick question can you make the dough and store it for a later time or do you have to bake it right away
I wonder if this would work with all purpose einkorn flour?!
Yes, it works with AP Einkorn REALLY well!! I was very happy with mine .
I added cheese and garlic salt to the top right before I put it in the oven. Such a great sandwich bread when you want to switch things up!
I’ve made your recipe a couple of times with great results, even when I mess up the timing! lol Thank you!
I don’t usually leave reviews but WOW! Seriously I’m so impressed with this recipe it’s delicious! One of the best recipes I’ve ever made and I bake bread often. Thank you so much I will for sure be making this bread again.
Our stores are still struggling to keep bread on the shelves, so I was thrilled to find this recipe. This was truly the easiest bread ever.
Great easy bread recipe! Out store shelves have been so empty so I was excited to find this recipe. It came out great. Thank you for sharing!
Like a lot of commenters I was highly skeptical of this recipe because of the short, single rise. The only reason I considered it other than curiosity was because I was out of milk to make the bread I usually make. It came out great! The only differences I did was I cut the recipe in half and let it rise for about 45 minutes so it could truly double in size. I also took it out of the oven with 5 minutes left on the timer. Follow the recipe and play around with variables like these to get your desired outcome.
Also, please note that you SHOULD NOT use King Arthur 1:1 gluten free flour if trying GF; it says right on the package that it isn’t recommended for baking with yeast (it’ll come out hard as a rock)
Anyway this will be another go-to recipe to add to the collection. Thanks!
OMG Thank you for this super quick, failproof bread recipe! It turned out p-e-r-f-e-c-t. I left my loaf in the full noon sun (~80F) for 15 min and baked it and it came out wonderful. One loaf is one already, and it was baked less than 3 hours ago. And there are two of us in the house :p ThankyouThankyouThankyouThankyou ps: I followed the recipe exactly, just weighed instead of using measuring cups, just subbed white sugar with Turbinado brown. The crust is perfect! The fluffiness is perfect! We are two happy carb-eaters over here!!!
have you ever used whole wheat flour for this recipe?
Perfect bread! Simple, easy, quick. Soft and tender on the inside, beautiful crust, easy to slice. I put the dough in the oven (off) with the light on and a pan of hot water below to rise for 15 minutes before baking, and it rose beautifully. This is the perfect recipe! Looks amazing and tastes amazing!
What a perfect sandwich bread! I’ve been making bread for 45 years, and this is the best one for sandwiches ever, and so easy! Thank you for the recipe! My husband just came home from 3 weeks in a hospital for a stem cell transplant. I’m spoiling him as much as possible. Made these loaves and fresh tortillas today. I will definitely look through your recipes for more foods to make.
I love this recipe! However I cannot get the dough to rise in 15 minutes. I’ve tried heat and different towels and even tried them damp. What am I doing wrong? Brand new ingredients!
Hi Maddy! As long as you used fresh yeast, warm water, and kneaded it a bit, I’m sure you’re not doing anything wrong. The temperature of everyone’s house can vary, so it simply might take longer than 15 minutes. I like the place the loaf pans on a heating pad to speed up the process – maybe try that.
I loved this! One loaf is almost gone between my son and my husband. For the 15 min rise I put the bowl in a warm dryer. Sounds crazy but it worked!
This is amazing bread. I think I made my slashes too deep. I will see how well it stays together when I cut it. Update later.
Bread has a nice taste but is a little dense. Reminds me of bread machine bread. Looks beautiful, great crust! Will try again soon and see if we get the same results.
Awesome recipe, famtabulous bread
Looks great! Does the yeast have to be proofed before adding to other ingredients?
Re yeast question, scroll way down. The author suggests proofing separately if unsure of sell by date
The bread came out great except both times the bottom burned, I Even used parchment paper the second time…any advice??
Hi Kimi! That’s odd. Did you start in a cold oven as instructed? And bake on the middle rack, not bottom? Not sure otherwise. Some ovens run hot. Maybe test for doneness a few minutes sooner next time.
Hi Made this yesterday. It is good as stated. Only thing is my loaves turned out kinda small is that normal. Everything else is fantastic.
Incredible Bread!
Usually when a bread recipe promised “fast” results the texture isn’t great. Not this recipe. Love it!
This was perfect! Only needed one loaf so I cut the recipe in half. Wonderful sandwich bread! Also served with dinner with some butter. Thanks!
It worked! Hallelujah! Wish I could add a pic.
I really thought I had completely messed this up- my yeast was at the end of its life cycle, i thought I hadn’t kneaded it long enough, my “molding” was very novice level, and yet it came out so beautiful and yummy I can’t believe it.
I was amazed! Only 15 min rise time, easy kneading, awesome finished product! My new go-to bread recipe! Start after noon, ready before dinner.
I followed your recipe exactly, which is hard for me. This recipe is the BEST and easiest I have ever used for bread. I used my Kitchen aid to do the work. Had to half the recipe as I was low on flour and it was raining here in South Louisiana. It came out perfect. Thank you for this great recipe which was easy to follow and had every detail included. My husband gives you an A plus.
It turned out perfectly!!
Very happy with how this turned out – great recipe, thank you!
This was so easy!! I baked one loaf In a glass pan and one in an Emile Henry pan. Both were amazing. The glass cooked faster and had less rise. The EH was perfect but took an extra 10-12 min. Keeper recipe.
The easiest and most delicious bread I have tasted. Third time in a month i have made this bread!
So thrilled to find this recipe. So easy and we all loved the tender crumb and flavor. Thank you!
I want to make one loaf for now, and freeze the remainder of the dough for another day. Have you tried freezing the dough?
We usually bake it and then freeze, but you could probably freeze the dough. Make sure you allow the dough to completely finish rising before covering in plastic wrap and then place in a resealable freezer bag. It should keep for 1-2 months.
I was a doubter, but no more! I can’t believe how easy this was with fantastic results. I let it rise for 30 instead of 15 while I folded laundry. Lol. Great recipe!
Wow! Thank you so much for bringing this recipe into my life! I make bread on a weekly basis and I was in a time crunch last night and didn’t have the 3hrs needed for my regular loaf and came upon your recipe! Worked out perfectly! I halved the recipe and had to prove for about 35min, turned out great!!!
do you grease the bread pans
You can, but it is not necessary for this recipe.
Thank you Amy! I’ve tried similar recipes in the past and while they produced good bread, the top crust was just a little too hard for sandwiches. Not only does this recipe produce a great crust, but the flavor is great! Made 2 loaves at 4pm, and it’s now 9:30pm amd the first loaf is already history! This is now my new “goto”!
I just made this bread. I was looking for a quick receipt with ingredients I have on hand. I ended up substituting out one cop of AP flour with whole wheat. I also used my stand mixer with dough hook and then proofed for 20 minutes in my oven (I have a proof setting). My house is cooler and I wanted to make sure this would rise. It is fantastic bread! Both loaves are perfect and I look forward to having this as my go to recipe from here on out. I look forward to exploring more recipes on your site.
Thank you from Texas! All of the stores are out of milk and bread. Your recipe saved us from having to go without bread!! I used vegetable oil instead of olive oil, and accidentally put in the entire quarter cup, also I buttered the topi stead of drizzling oil. The recipe still worked great! I gave one loaf to a neighbor and am making more today. Thanks again for such an easy, fast, and delicious recipe!!
This recipe pleasantly surprised me. I was skeptical because of the short time involved. I’m used to two rises, which makes bread take much longer. I found myself in a severe weather situation, and unable to go out to buy bread. My family uses bread regularly for toast, sandwiches. etc. so we definitely needed some, and fast. I was shocked, in a great way. I only had one loaf pan, so I cut the recipe in half, and it worked just fine. Thank you so much for this super easy, fast and tasty recipe! The whole family immediately wanted a slice, slathered with butter, and enjoyed it very much.
can this recipe be cut in half?
Hi Donna – without more recipe testing I can’t vouch for the results, personally. But a previous reader said she was able to halve it down to a single loaf. Or maybe make the recipe as written and freeze the second loaf if that’s an option?
Very simple and quick. I wanted to make a loaf for my grandson’s sandwiches, and this was great! I need to work on softening the crust after baking, though. Flavor and rising were on point
Can you make this dough in mixer with dough hook vs kneeding by hand
Hi Julie – I’ve never tested it that way, so I can’t advise, sorry! One of the things that makes this bread so easy is that you don’t need a special appliance.
Yes! I recently was diagnosed with an autoimmune inflammatory arthritis that makes manual kneading pretty miserable. I crossed my fingers and tried it with the dough hooks on my hand mixer for the prescribed amt of time and honestly it might have even been better than when I hand-kneaded because my hands are so bleh right now.
I doubted this would work but I was in a hurry. Absolutely the easiest and most amazing sandwich bread ever. I thought it called for too much yeast. 2 tablespoons is exactly 2 packets that I buy. I used fast acting and followed the recipe exactly. Everybody raved about it as they gobbled it up.
I made this with regular flour, and it worked well, although it needed more than 15 minutes to double in size. I then tried it with Bob’s gluten free flour and it was a disaster. This does not transfer well to being a gluten free recipe.
I am testing this out with Bob’s right now, I made a slight modification and we will see how it ends up, I will report back
I made this bread today, I sauteed onions,ham added 3 different cheese’s (let onions and ham cool) mixed this right into the flour etc. as I was mixing the dough. Turned out fabulous. My oven is iffy on the temp (it’s new) my mini loafs are awesome I will have to wait to see if the full size loaf in done all the way (I added 10 to bake) for the reg. Size loaf. An absolutely wonderful versatile bread recipe. Adding to my little red book.
So yummy. I need to practice my kneading skills more as it never got as smooth as your pictures. But seriously so so good and easy.
Tips for cutting straight sort of uniform slices though? Maybe my bread knife isn’t sharp enough.
This really is such an easy, quick and delicious bread recipe. The whole family loves it! Thank you!
I love this recipe. I am experimenting with flours and grains etc. Today I goofed up put all the oil and little too much salt. Tastes amazing to me. Thank you
Do you use a bread slicer?
Nope, just a serrated knife.
I use an electric knife to slice my bread and it does fantastic
Question. Do you grease pans before adding to loaf pans?
Hi Donna – if you have good quality, nonstick pans it’s not necessary. But it certainly won’t hurt if you do spray them.
Wonderful recipe! Very easy and delicious bread. My husband saying best sandwich bread I’ve ever made! Will definitely make again.
I don’t have a loaf pan, can I substitute in another shape?
Hi Jess – I’ve only made this recipe as written, so I can vouch for results using a different pan.
is 15 minutes rise time a typo??
nope.
Thank you for this easy tasty bread. Even better than my husband’s bread made in his fancy bread maker. My grandchildren have opted for this loaf as their daily lunch box bread. Kind regards and stay safe from South Africa
Can I use bread flour instead of AP? If so, do I use the same amount? I’m obviously new to bread making.
Yes, you can absolutely use bread flour. Same amount.
Looking forward to trying this today! One question- do you need to spray/grease the loaf pans??
Hi Caroline! You don’t need to if your loaf pans are nonstick. If they aren’t, then I would lightly spray them.
I’m having trouble with shaping the bread. Any tips? Tastes amazing but looked horrible.
MY QUESTION IS ABOUT THE YEAST AND THE WATER. HOW MUCH WATER DO I USE TO TEST MY YEAST OR IS IT PART OF THE 2 CUPS WATER I USE ?I
I’d start by looking for the expiration date on the packets or jar. If it’s past that date, it’s likely not good anymore. If the expiration date is nowhere in site, it’s a safe bet you’re good to go. If there is no expiration date at all, then you’d need to take a bit of it and sprinkle it on top of a bowl with warm water to make sure it foams (1 cup should be enough – not part of the 2 cups needed for this recipe.) Hope that helps!
I made it today turned out well. Thanks for this great recipe.
Awesome Easy and delicious! Have made it 4 times already!
Can you substitute wheat flour on this recipe?
Hi Sandy – I have only tested this recipe as written, so I can’t vouch for the results, but you can certainly try it if you’re comfortable with bread baking. Let me know if it turns out!
I made this early in the morning for my family. They went crazy over it. It really is quick and good.
Can I use extra virgin olive oil in this recipe? It’s all I have on hand.
This recipe calls for extra-virgin olive oil, as included in the list of ingredients and instructions.
Our stores are still out of bread, but I was able to locate flour (already had yeast) and make this – definitely the easiest bread ever and tasted wonderful. I will be making this long after the stores restock their shelves. Thank you for this!
Do you have a recipe for bread that doesn’t require yeast. We are self isolated and cant get yeast from shop.
Hi Christina – if you have beer, you can make beer bread (which has yeast built into it.) I don’t even like beer and I LOVE this bread https://bellyfull.net/easy-beer-bread-recipe/
Can you make this in a bread machine?
Hi Marie – I haven’t tested this recipe in a bread machine, so I can’t vouch for the results. It’s such an easy recipe, though, you don’t need one at all.
What size are your bread pans?
Standard 9×5
I was wondering if I could make this in a 16x4x4 Pullman bread pan?
How do i make a smaller portion… Just for 2 people.. Thanks
Hi Sylvia – without more recipe testing I can’t say for certain how to modify this recipe in such a small amount. But a previous reader said she was able to halve it down to a single loaf, so maybe try that and simply freeze the portion you don’t use. Is that an option?
Does it have to be olive oil
Do not have olive oil could you use canola oil instead?
Hi Trina! Yes, canola oil will work, it just won’t have the same flavor and not my preference. But if that’s all you have, by all means, use it.
Made this today. We devoured it at lunch time of course. It was indeed very easy to make with very little effort. I halved the recipe as I only have 1 bread pan, was a bit worried wouldnt come out right but I was soo wrong. This recipe is a huge keeper. It was picture perfect wish I could show you because of course I took a picture of it, it was definitely picture perfect. Thank you!!
I’m so happy to hear it, Wendy!! And good to know it can be halved successfully.
How about Monday flour for keto bread? I cannot find a good Keto high rise bread!
Hi Mari – sorry, I don’t have a recipe like that. I would surf Google, Pinterest, and Facebook bread groups if you haven’t already. Good luck!
Oh, how this takes me back to when I was making all my own bread for many years.
Once healthier breads were made available in our supermarkets, I stopped homemade bread making. But there is nothing like fresh bread from the oven. I’ll definitely put this in my to try folder.
I remember all the bread you used to make – the house smelled amazing!