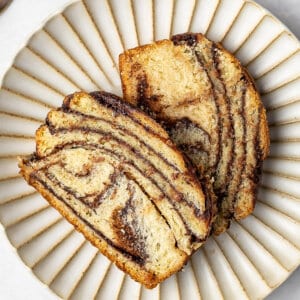
Chocolate Babka
Updated
Updated
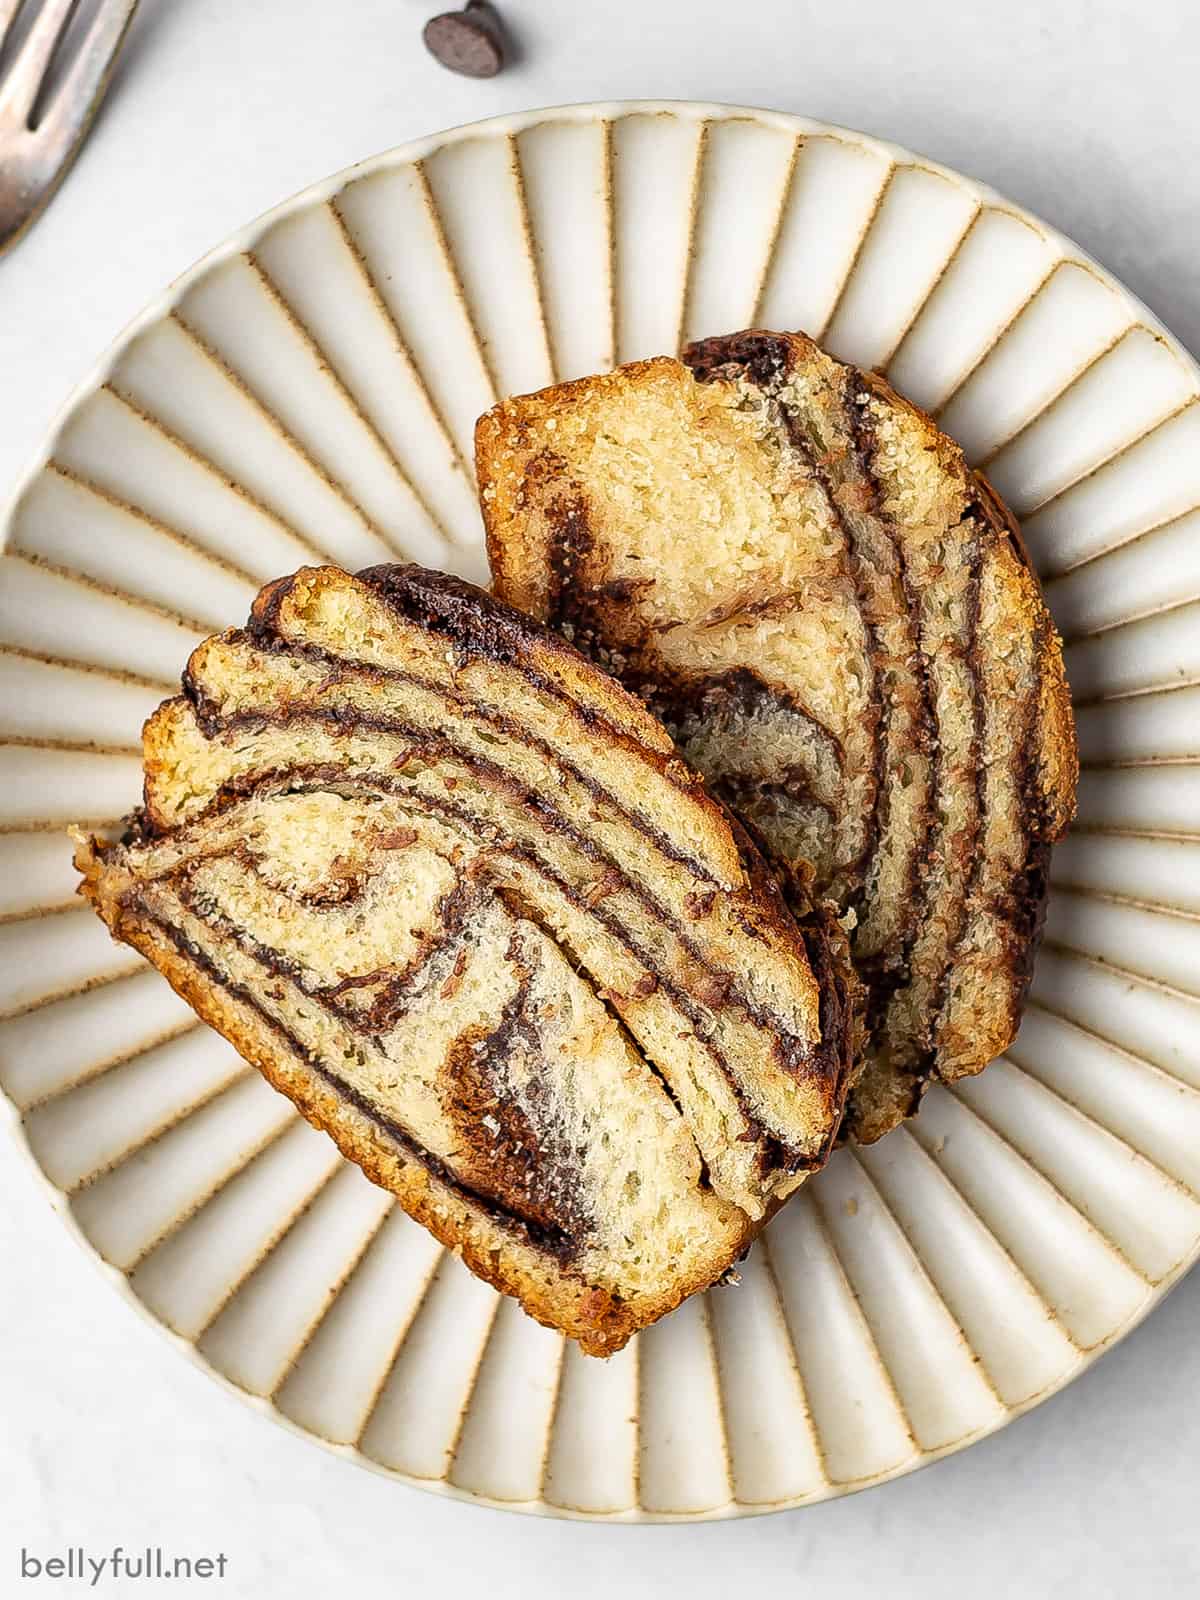
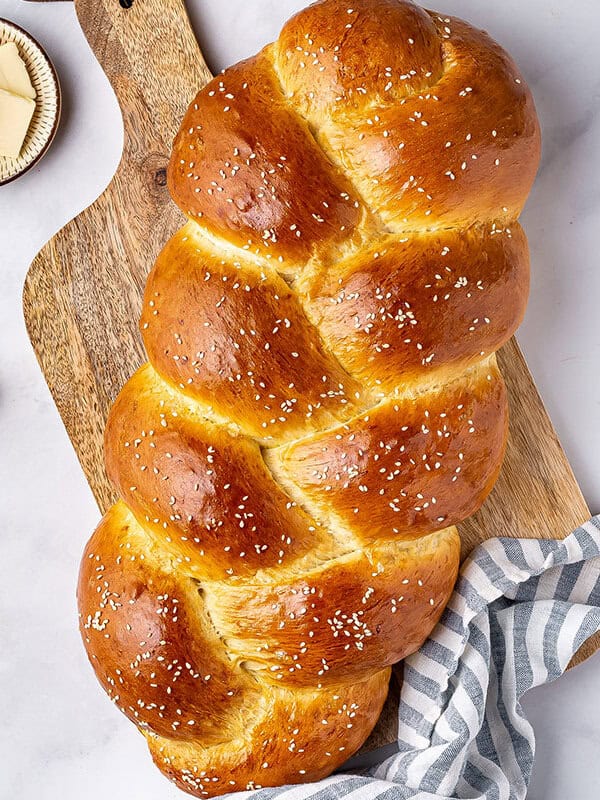
Sweet and rich, this Chocolate Babka has the texture of a cinnamon roll with a decadent chocolate filling. This is a showstopper bread recipe that I love sharing with friends and family, along with a cup of coffee or tea. It takes a bit of time to prepare this luxurious loaf, but I guarantee you’ll be glad you did.

Pin this now to find it later
Pin ItThis post may contain affiliate links. If you click on one and make a purchase, we may earn a small commission at no extra cost to you. We only recommend products we genuinely love.
5 STAR REVIEW
Chocolate Babka Recipe
I absolutely love making babka. It’s an Eastern European yeast-risen sweet bread with Jewish roots, though it can also be found in Polish bakeries. If you’ve never had it, think of it as a soft, cinnamon-roll-like bread, but filled with rich chocolate and braided to show off that gooey filling. I know chocolate babka has a reputation for being tricky, but honestly? I don’t think it’s hard at all. Sure, it takes a little more time than a quick bread, but if I can make it, I know you can too—especially if you’ve ever tackled cinnamon rolls or challah bread!
This is not a bread that you can whip up in 30 minutes or even a few hours though. There are several times when the dough needs to cool or rise for an hour or more—even up to 8 hours at one point. So find a lazy day and plan to make this babka!
Though the ingredient list is a bit long, almost everything used is a pantry staple: all-purpose flour, sugar, powdered sugar, yeast, salt, cocoa powder, butter, milk, eggs, and chocolate chips.
Helpful Tips
- Don’t rush. This is by far the most important thing. Do not rush any of the rising or cooling times. The easiest way to mess up babka is by not letting it rise correctly. Yes, it’s a lot of time spent waiting, but it’s 100% worth it!
- Use a thermometer to check doneness. The easiest way to tell if your bread is finished baking is to use an instant-read thermometer. The temperature should be about 190°F.
- Don’t cool completely in the pan. Once you add the syrup, it should cool for 10 minutes in the pan. Then transfer it to a cooling rack. If you leave it in the pan, it will likely stick.
- Cool before cutting. As tempting as it is to slice immediately, allow the chocolate babka to cool to just about room temperature before slicing. Otherwise, the filling won’t set properly, and it will make a mess.
- Chilling the dough. Chilling the dough in the fridge overnight is ideal and highly recommended. However, you can make the babka the same day as long as the dough can chill in the fridge for at least 2 hours. The chill time is important as the dough continues to rise, and it helps increase the flavor. The dough is also easier to work with when it’s cold. Note that the dough can harden when placed in the fridge for a long time. Leave it at room temperature for 30 to 60 minutes until it’s easy to work with.
- Bake once, eat twice. I created this recipe so it makes two loaves; the second loaf is perfect for epic French toast or to throw in the freezer for another day.
Chocolate Babka
Ingredients
For the Dough
- 3¾ cups all-purpose flour, spooned and leveled (plus extra for dusting)
- ½ cup granulated sugar
- 1 tbsp instant dry yeast
- 1 tsp kosher salt
- 3 large eggs, room temperature, lightly beaten
- ½ cup whole milk, lukewarm (about 100-110°F)
- 10 tbsp unsalted butter, softened to room temperature
- canola oil, for coating the bowl and the loaf pans
For the Chocolate Filling
- ½ cup unsalted butter
- ¼ cup heavy cream
- 6 oz. semisweet chocolate chips
- ½ cup powdered sugar
- ⅓ cup unsweetened cocoa powder
- pinch of salt
For the Syrup Topping
- ½ cup water
- ½ cup granulated sugar
- 1 tsp vanilla
Instructions
Make the Dough
- In the bowl of a stand mixer fitted with a dough hook attachment, whisk the flour, sugar, yeast, and salt. Add the eggs and milk; mix on medium speed until everything is incorporated and the dough forms a rough ball, about 2-3 minutes.
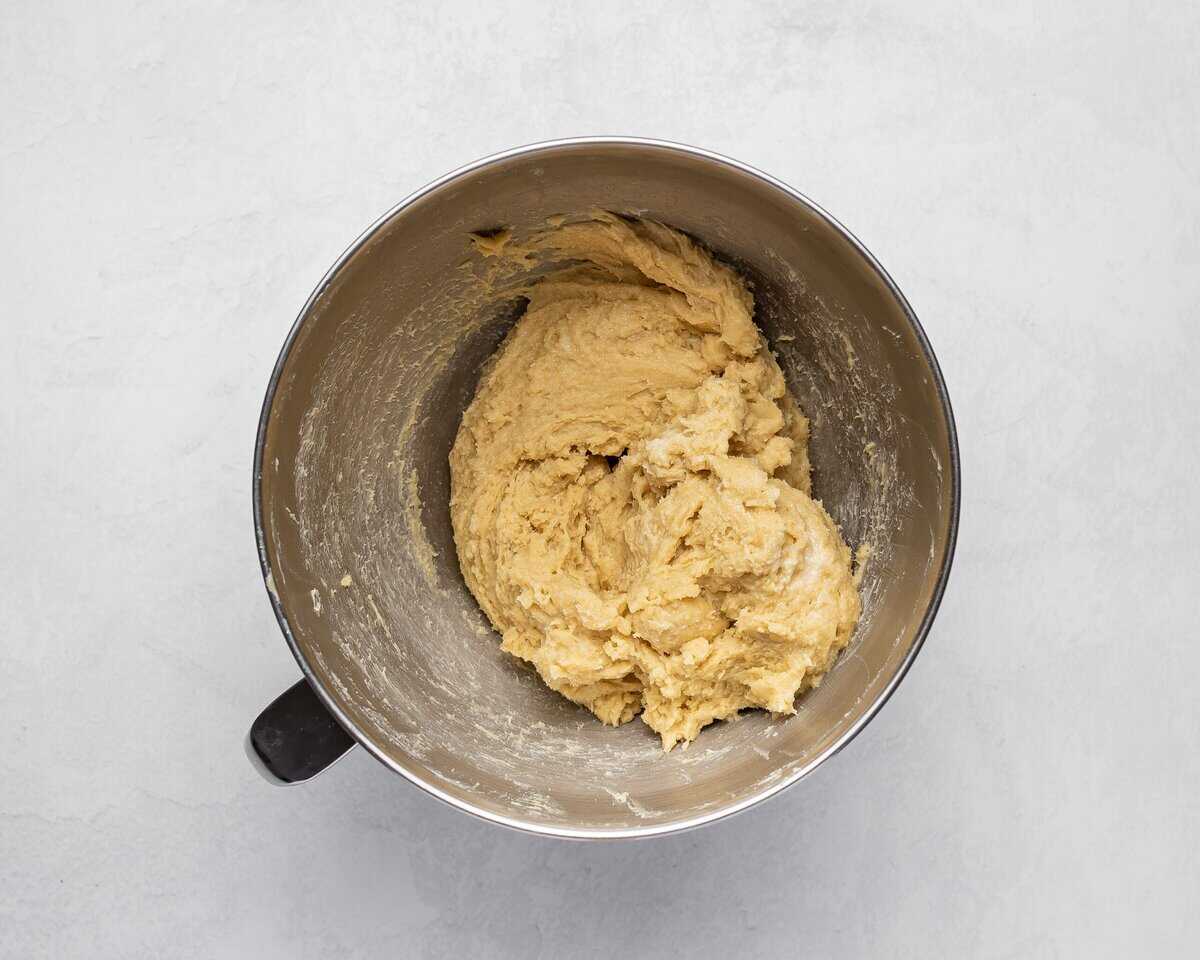
- Switch to medium-low speed and add the butter, 1 tbsp at a time, waiting until each is fully incorporated before adding the next. (Adding all the butter will take about 5 minutes.)
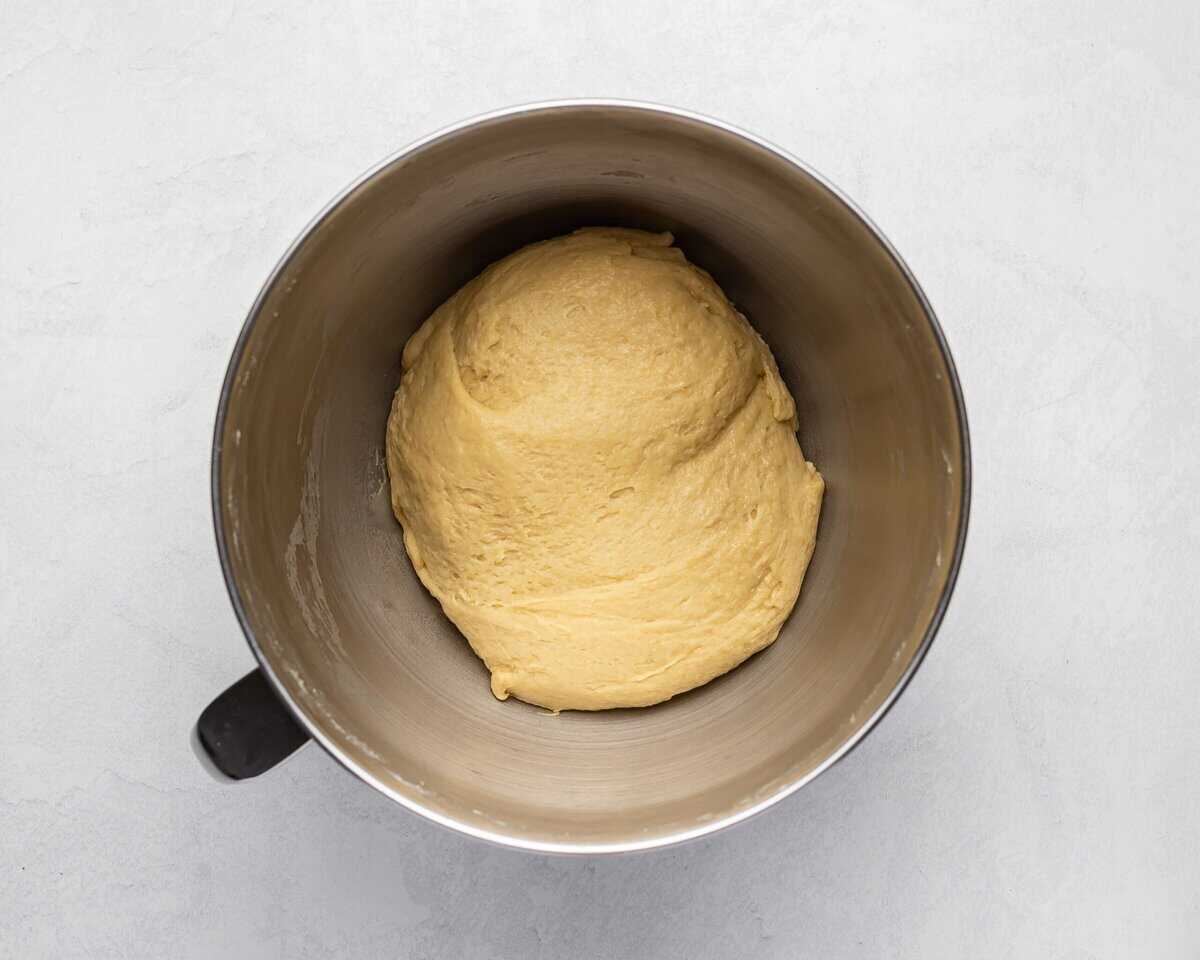
- Continue kneading the dough for about 8-10 minutes on medium speed, scraping down the sides of the bowl as necessary, until it is smooth, elastic, shiny, and doesn't stick to the bowl.
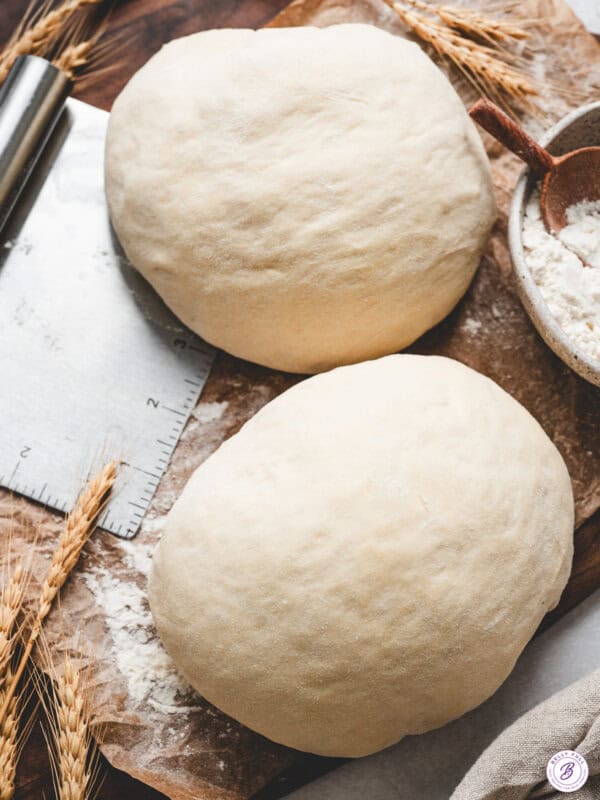
- Brush a large bowl with canola oil to coat and place the ball of dough inside. Cover with plastic wrap and let rise at room temperature for 1 hour. (It won't double in size, but it should be puffy and have visibly risen.) Transfer the covered bowl to the refrigerator and chill for 8 hours/overnight so it can rise further and develop flavor.
Make the Chocolate Filling
- Combine butter and cream in a small saucepan over medium heat. Once the butter is melted and the mixture is steaming, add the chocolate and stir constantly until melted. Remove from the heat and whisk in the powdered sugar, cocoa powder, and salt. Transfer to a bowl and let cool until thickened to a spreadable paste-like consistency, about 1 hour.
Roll and Shape
- On a lightly floured surface, punch down the dough and cut it in half with a bench scraper or sharp knife. (Work with half the dough at a time, placing the other half back in the fridge, covered.)
- Lightly dust the top of the dough and a rolling pin with flour. Roll the dough out to a 12×16-inch rectangle, with the short edge closest to you.
- Using an offset spatula, spread half of the chocolate filling evenly over the entire surface, leaving a ½-inch margin at the top of the rectangle furthest from you.
- Starting from the short side closest to you, using both hands, tightly roll the rectangle into a log, pressing to seal where the seam is. Wrap in plastic wrap and transfer to the fridge. Repeat the same process with the other half of the dough and chocolate filling.
Prep the Pans
- While both rolls are chilling in the fridge for a few minutes, prep the pans.
- Grease 2 loaf pans with oil (you can use either 9×5-inch or 8×4-inch), then line with parchment paper, leaving a couple of inches of overhang on the long sides, for easy removal once baked. Set aside.
Twist the Babka
- Remove one dough log from the fridge and using a large serrated knife, gently cut the roll in half lengthwise, starting at the top, so you have 2 long even halves.
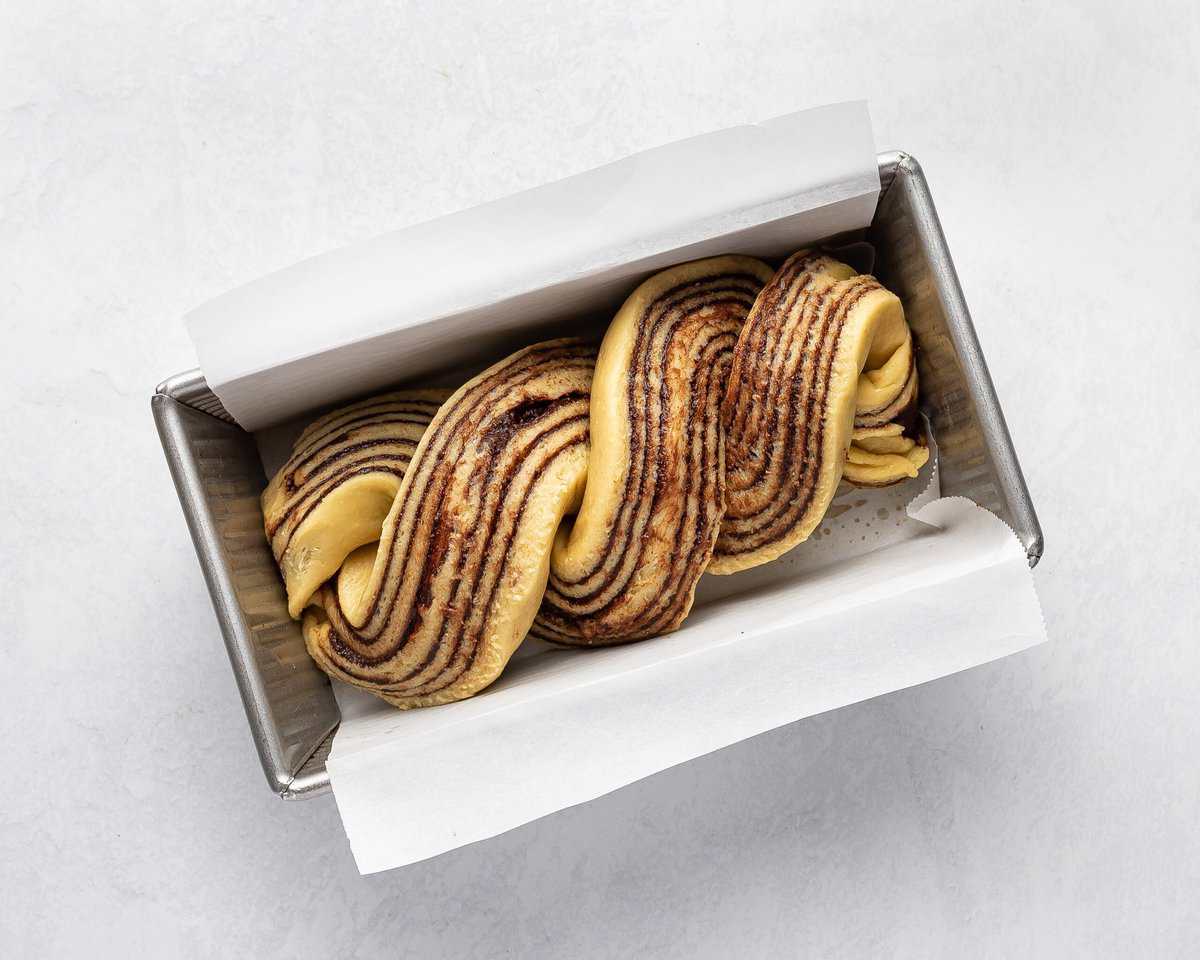
- Position each half parallel to the other with the cut sides and chocolate layers facing up. Twist the halves together a few times, keeping the cut sides facing up. Gently squeeze the ends together and tuck them under.
Transfer to the Pans
- Carefully transfer the babka into one of the prepared pans. (Don't be concerned if there are gaps in the pan – they will fill up as the babka rises and bakes.)
- Cover the pan with plastic wrap and allow to rise at room temperature for 1-2 hours until almost doubled in size. (The dough should be puffy and will have risen to about ½-inch below the rim of the pan.)
- Repeat the entire process with the second log of dough.
Preheat Oven and Bake
- 15 minutes before the end of rising, preheat the oven to 350°F with a rack in the middle position.
- Once the oven is fully preheated, remove the plastic wrap from both pans.
- Bake for 30-35 minutes, until golden brown on top. A toothpick inserted deep into the loaf should come out clean. To check for exact doneness, you're shooting for an internal temperature of 190°F with an instant thermometer.
Make the Syrup
- While the babkas bake, make the syrup topping. In a small saucepan over medium heat, bring water and sugar to a bubble. Once the sugar dissolves, take off the heat and stir in the vanilla. Set aside to cool.
- As soon as the babkas are finished baking, pierce the top of the loaves in several places with a fork or tiny skewer.
- Using a pastry brush, brush the syrup all over the surface. It may seem like a lot, but use it all, dividing equally between both loaves. This helps keep the bread moist and adds that beautiful shine.
Cool and Enjoy
- Let the loaves cool in their pans for 10 minutes, while they absorb the syrup (but not longer, or they can stick). Then, using the parchment paper, lift them out and transfer them to a wire rack to cool completely. Don't be impatient and slice too soon—the bread needs to be close to room temperature to set properly.
Video
Nutrition
Nutritional information given is an automatic calculation and can vary based on the exact products you use and any changes you make to the recipe. If these numbers are very important to you, I would recommend calculating them yourself.
How to Make Chocolate Babka Step by Step
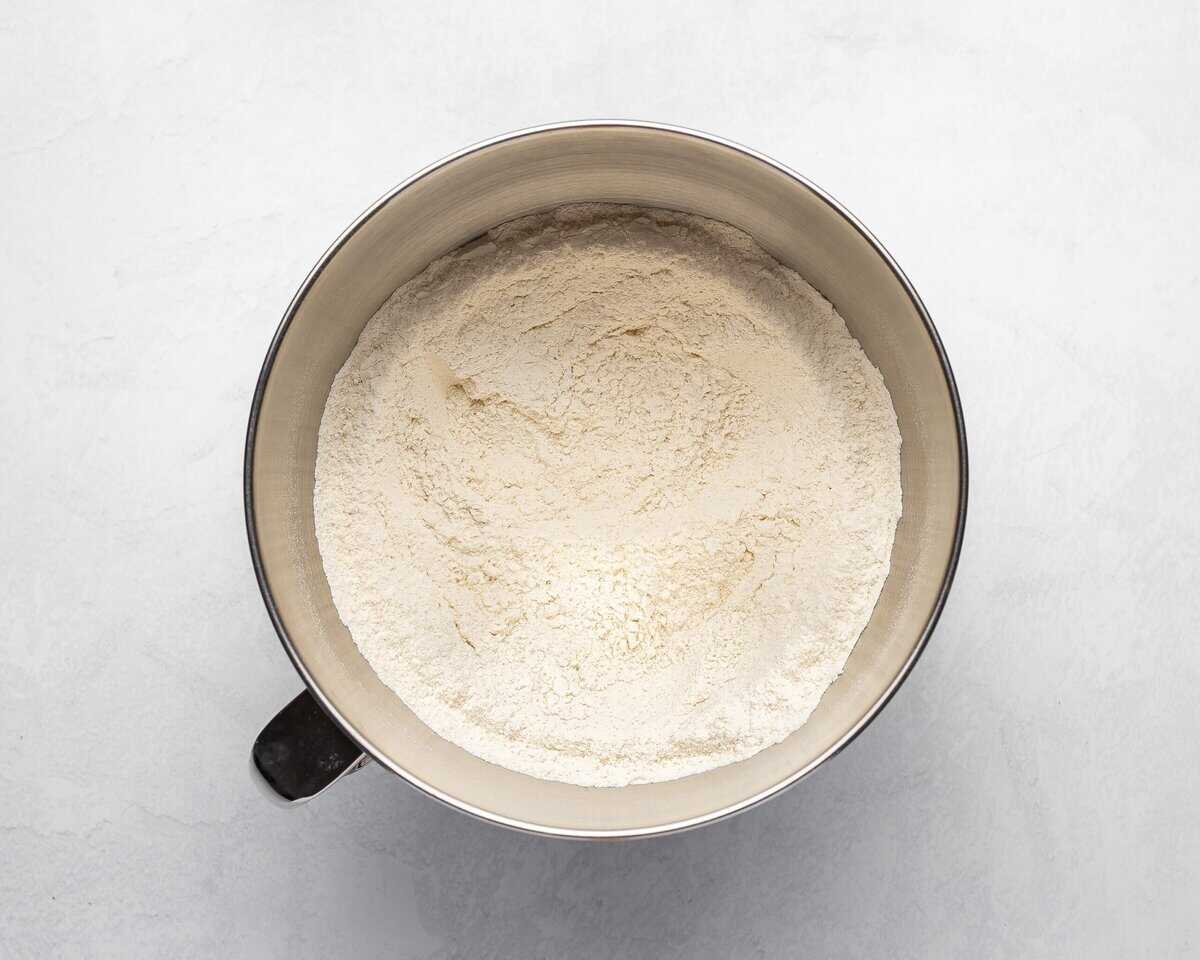
Make the dough: In the bowl of a stand mixer fitted with a dough hook attachment, whisk 3¾ cups flour, ½ cup sugar, 1 tbsp yeast, and 1 tsp salt together until nicely combined.
Add 3 eggs and ½ cup milk; mixing on medium speed until everything is incorporated and the dough forms a rough ball. This usually takes me about 2-3 minutes.
Switch the stand mixer speed to medium-low speed and add the butter, 1 tablespoon at a time, waiting until each one is fully incorporated before adding the next. Adding all the butter to the batter will take about 5 minutes.
Knead the dough for about 8-10 minutes on medium speed, scraping down the sides of the bowl as necessary, until the dough is smooth, elastic, shiny, and doesn’t stick to the sides of the bowl.
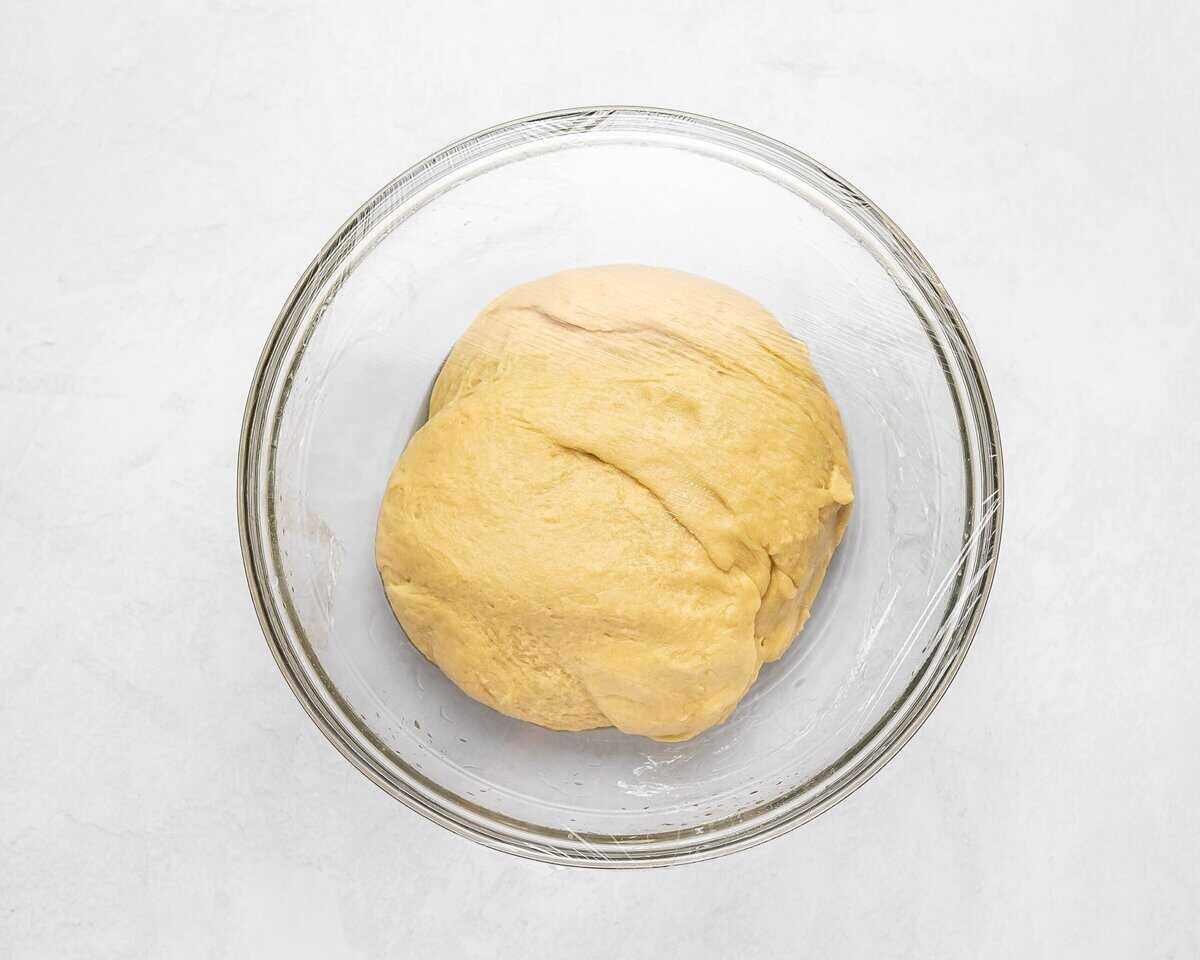
Prep the bowl: Brush a large bowl with canola oil and place the ball of dough inside. Cover the bowl with plastic wrap and let it rise at room temperature for 1 hour. It won’t double in size, but it should be puffy and have visibly risen. Transfer the bowl to the refrigerator and chill for 8 hours or overnight so it can rise further and develop the amazing flavor.
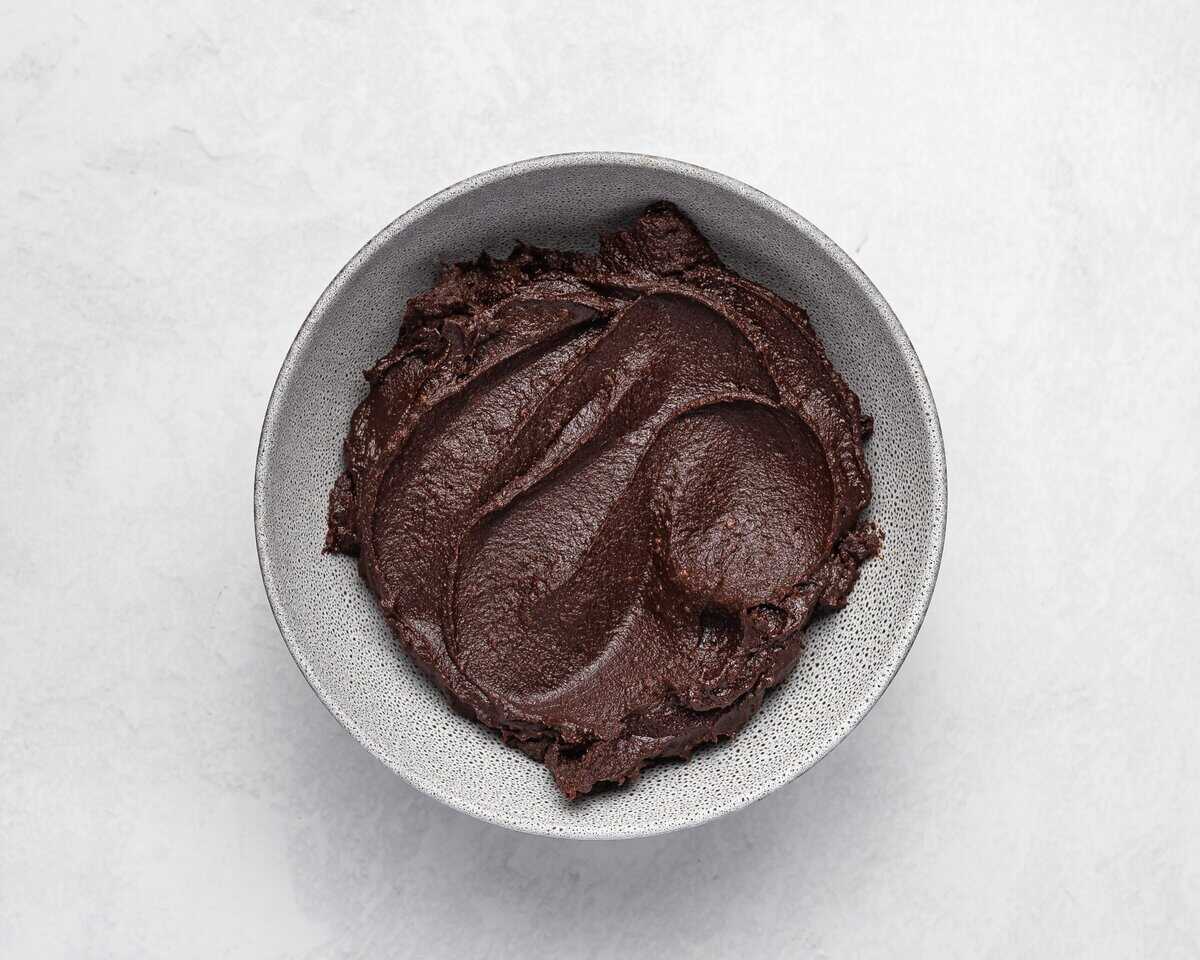
Make the chocolate filling: Combine ½ cup butter and ¼ cup cream in a small saucepan over medium heat. Once the butter has melted and the mixture is steaming, add 6 oz. chocolate chips and stir constantly until melted.
Remove the pot from the heat and whisk in ½ cup of powdered sugar, ⅓ cup of cocoa powder, and a pinch of salt. Transfer the mixture to a bowl and let the chocolate cool until it has thickened to a spreadable paste. This usually takes me about 1 hour.
On a lightly floured surface, punch down the dough and cut it in half with a bench scraper or sharp knife. I like to work with half the dough at a time and place the other half, covered, in the fridge.

Roll out the dough: Lightly dust the top of the dough and the rolling pin with flour and roll the dough out to a 12×16-inch rectangle, with the short edge closest to you.
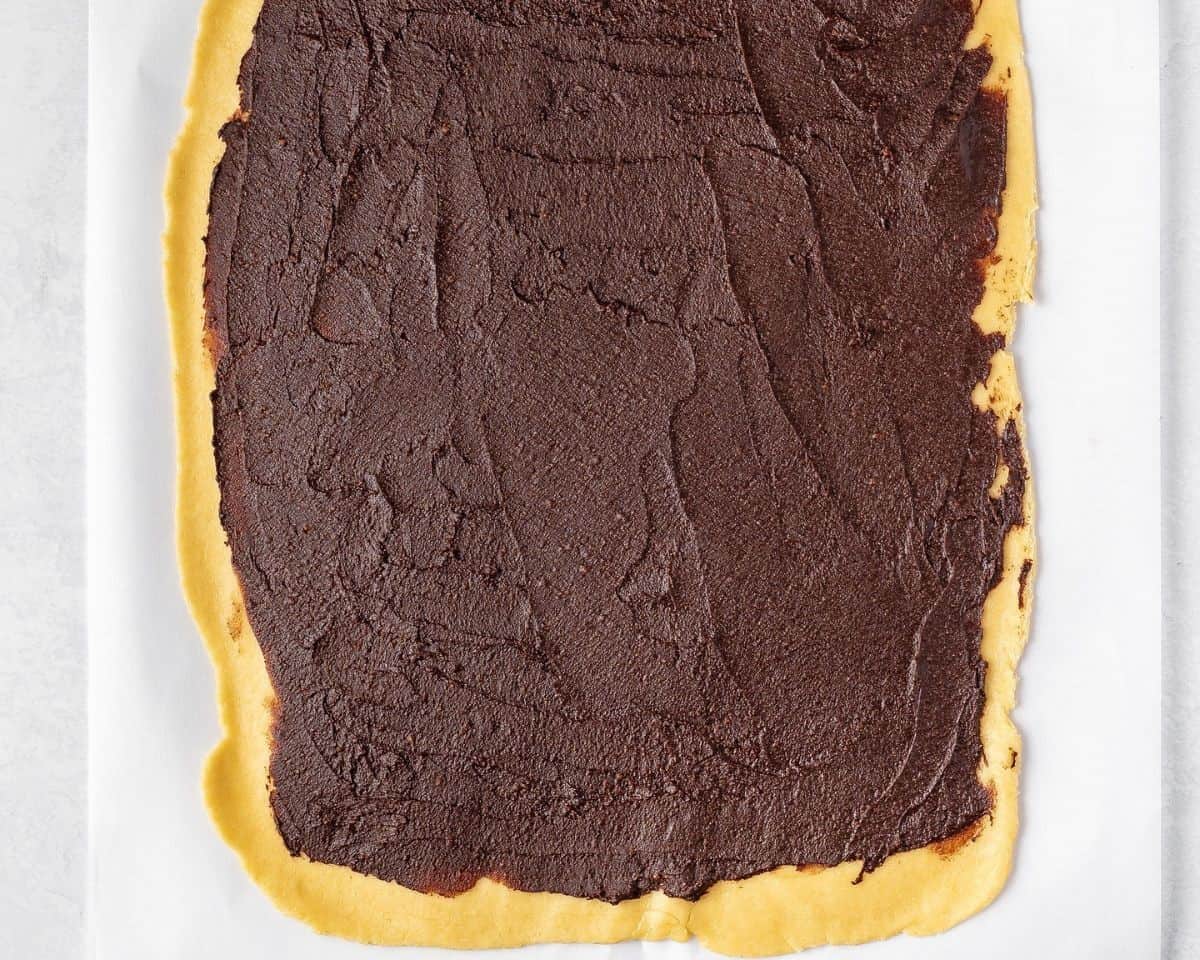
Spread the chocolate filling: Use an offset spatula to spread half of the chocolate filling evenly over the entire surface, leaving a ½-inch margin at the top of the rectangle furthest from you.
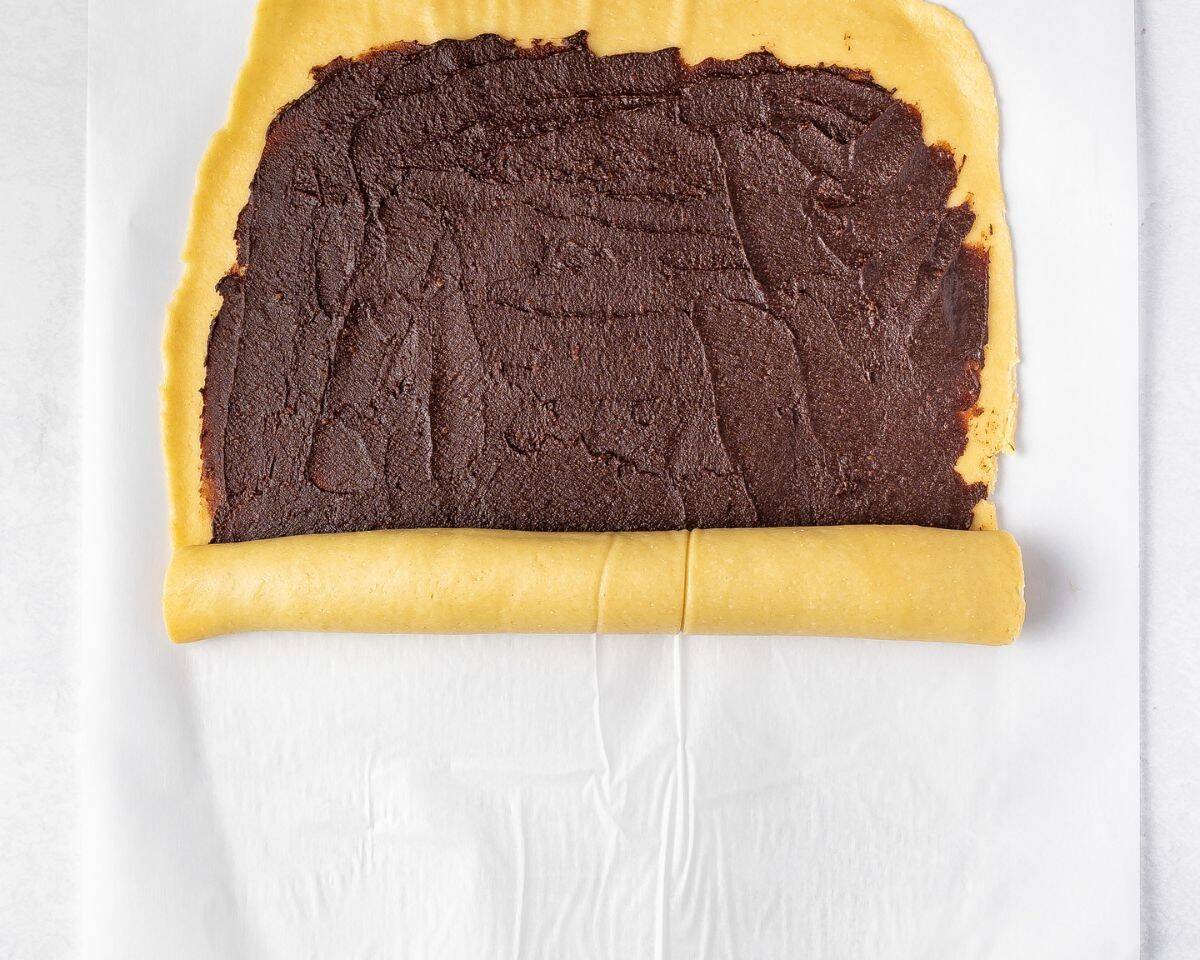
Roll the dough: Start from the short side closest to you, and use both hands to tightly roll the rectangle into a log, pressing to seal where the seam is.
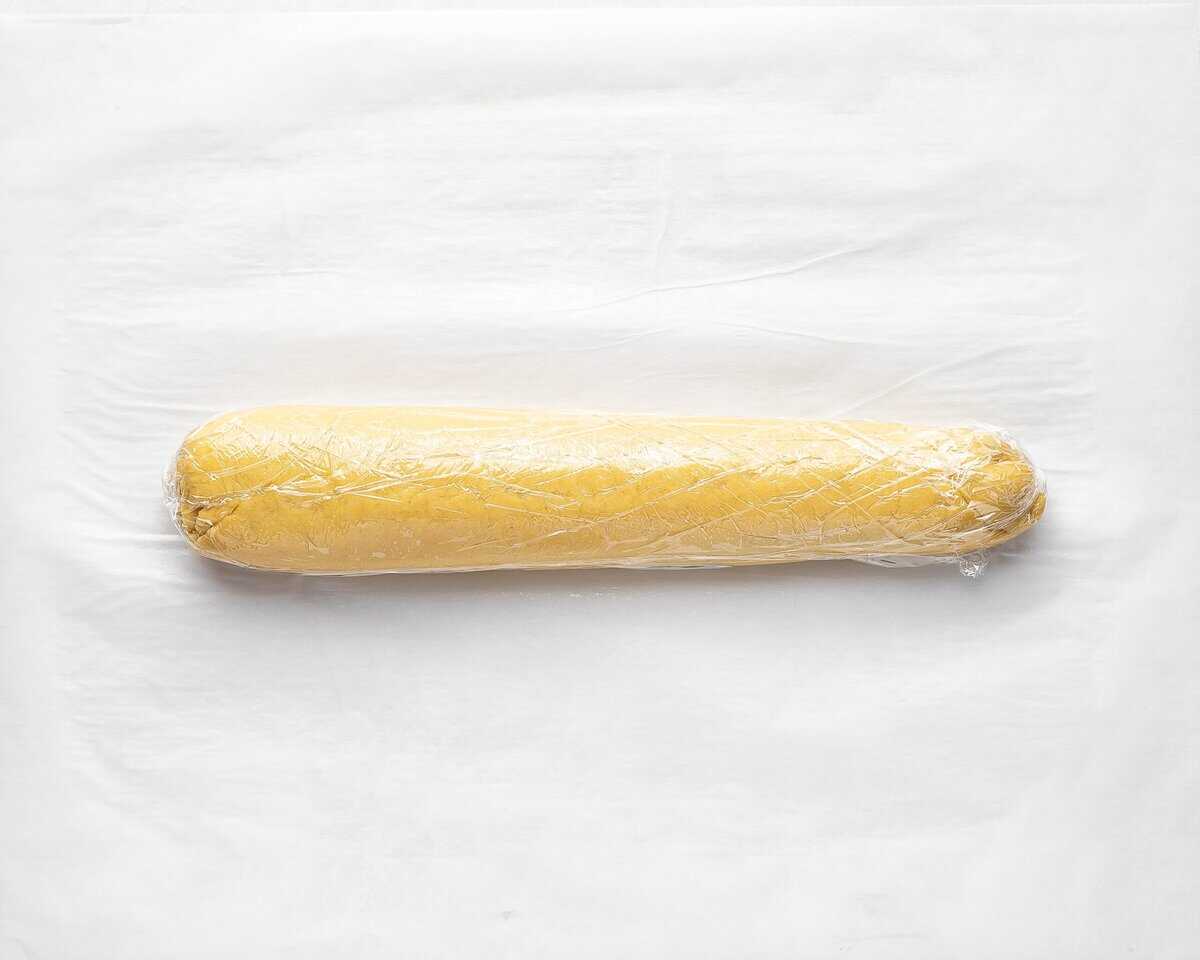
Wrap the log in plastic wrap and transfer it to the fridge. Repeat with the other half of the dough and the chocolate filling.
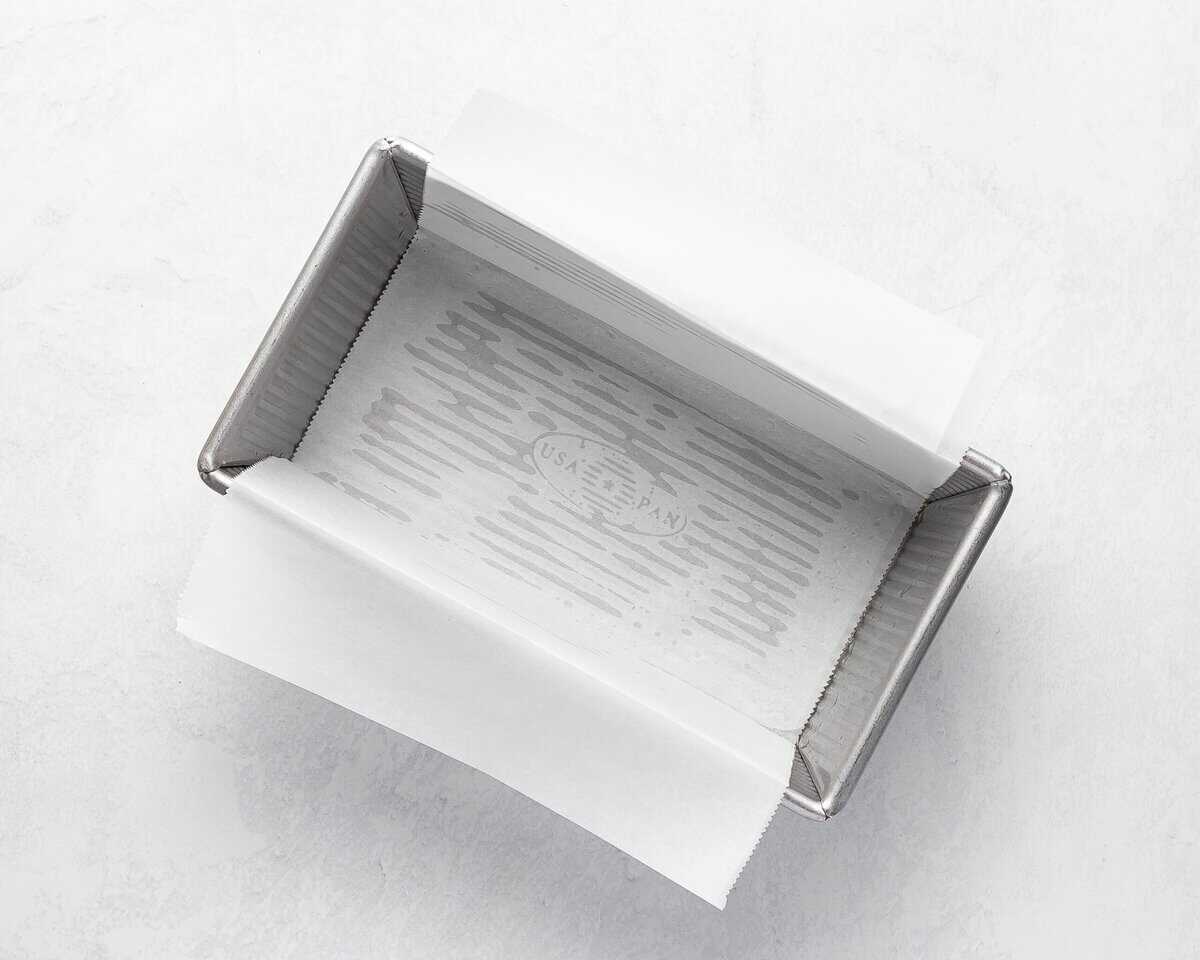
Prep the pans: Grease 2 loaf pans with oil, use either 9×5-inch or 8×4-inch, then line them with parchment paper, leaving a couple of inches of overhang on the long sides, for easy removal once baked. Set aside.
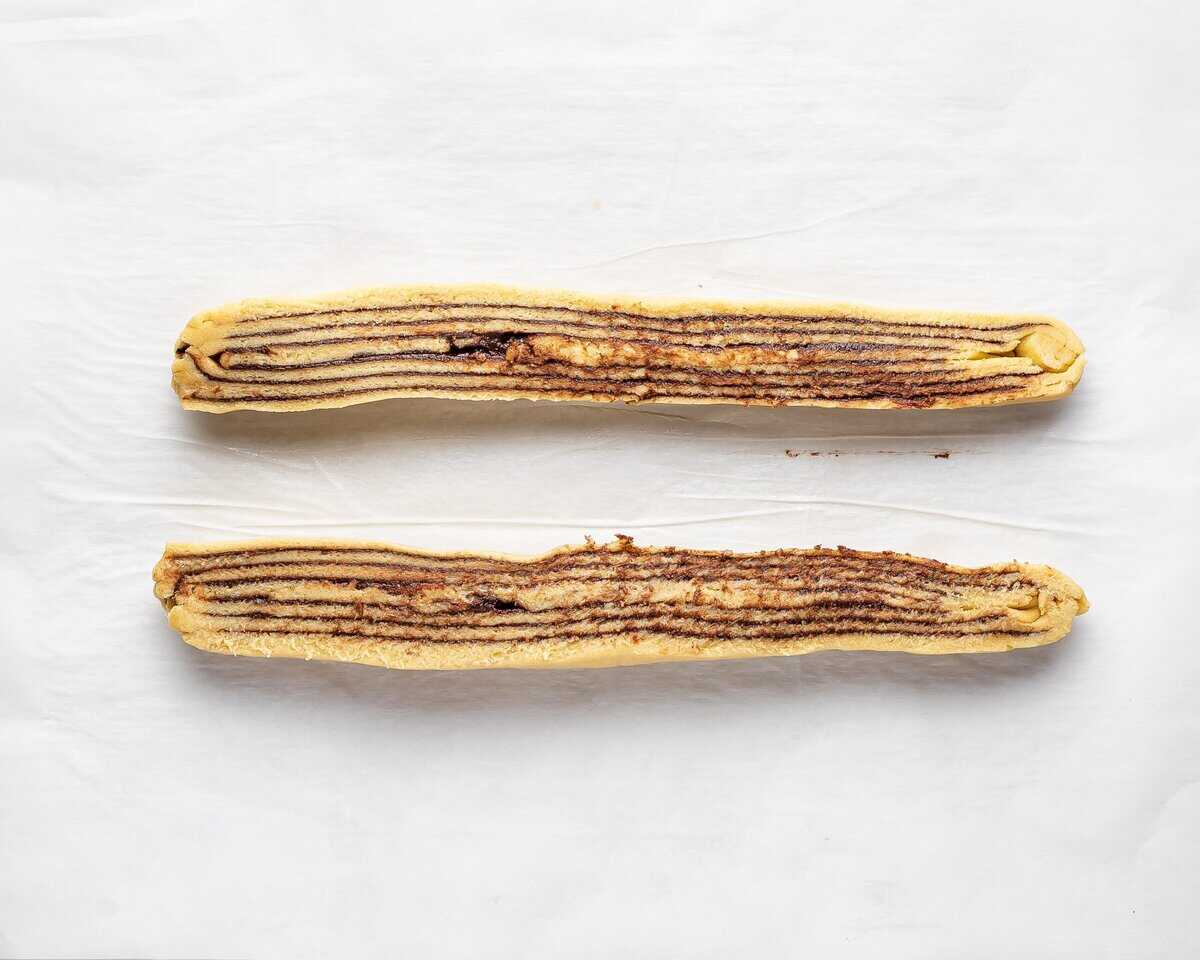
Twist the babka: Remove one log from the fridge and, using a large serrated knife, gently cut the roll in half lengthwise, starting at the top, so you have 2 long, even halves.

Position the halves side by side with the cut sides and chocolate layers facing up. Twist the halves together a few times, keeping the cut sides facing up. Gently squeeze the ends together and tuck them under.
Transfer to the pans and bake: Transfer the dough to the prepared pans. Cover the pans with plastic wrap and allow the dough to rise at room temperature for 1-2 hours, until just about doubled in size. The dough should end up puffy and have risen to about ½ an inch below the rim of the pan.
About 15 minutes before the end of rising, preheat the oven to 350°F with a rack in the middle position.
Remove the plastic wrap and bake the babka for 30-35 minutes or until golden brown on top. A toothpick inserted deep into the loaf should come out clean. To check for exact doneness, you’re aiming for an internal temperature of 190°F with an instant thermometer.
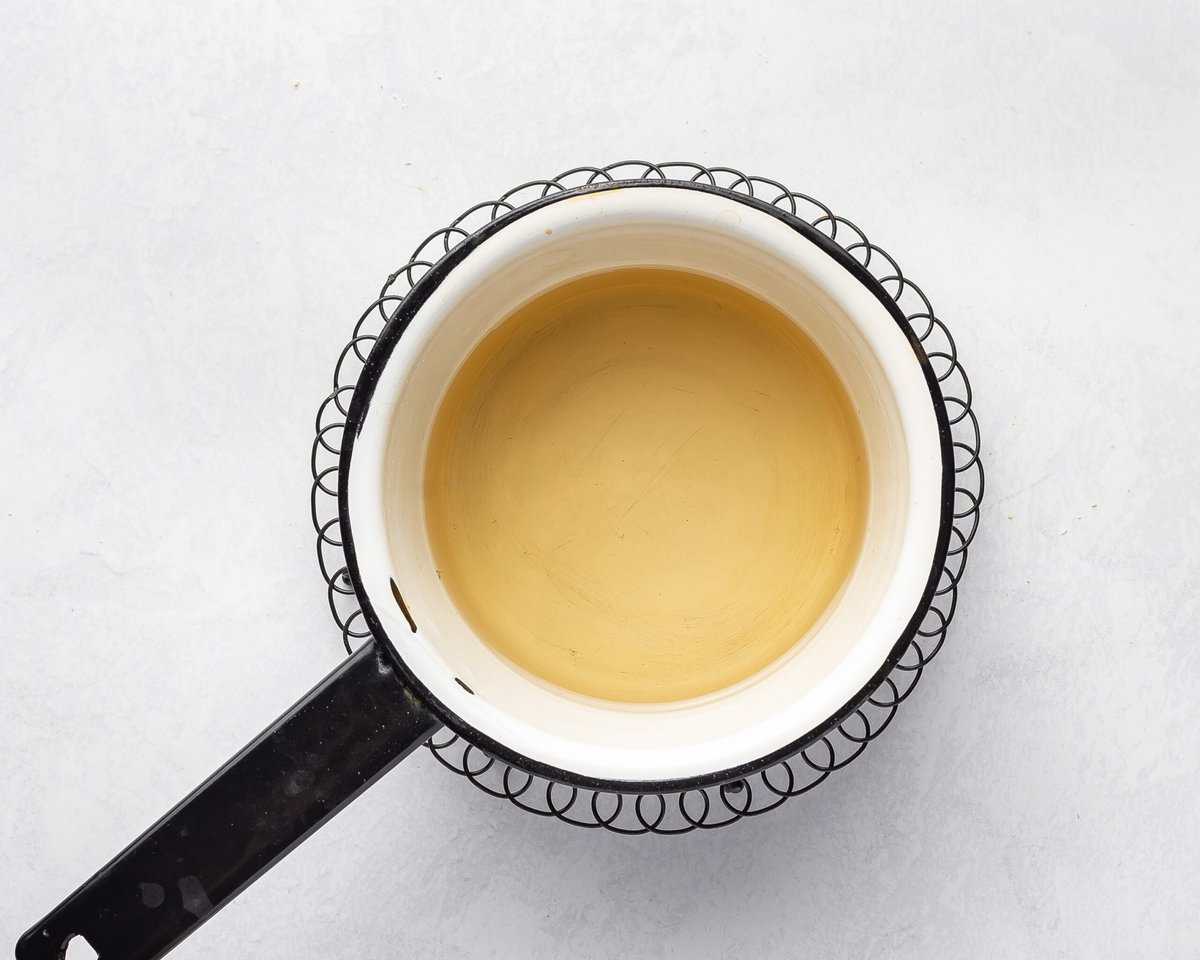
Make the syrup: Bring ½ cup water and ½ cup sugar to a bubble. Once the sugar has dissolved, remove from the heat and stir in 1 tsp vanilla.

Drizzle the syrup on top: Pierce the top of the loaves in several places with a fork. Brush the syrup all over the bread. It may look like a lot of syrup, but use all of it as it helps keep the babka moist and adds a nice shine.
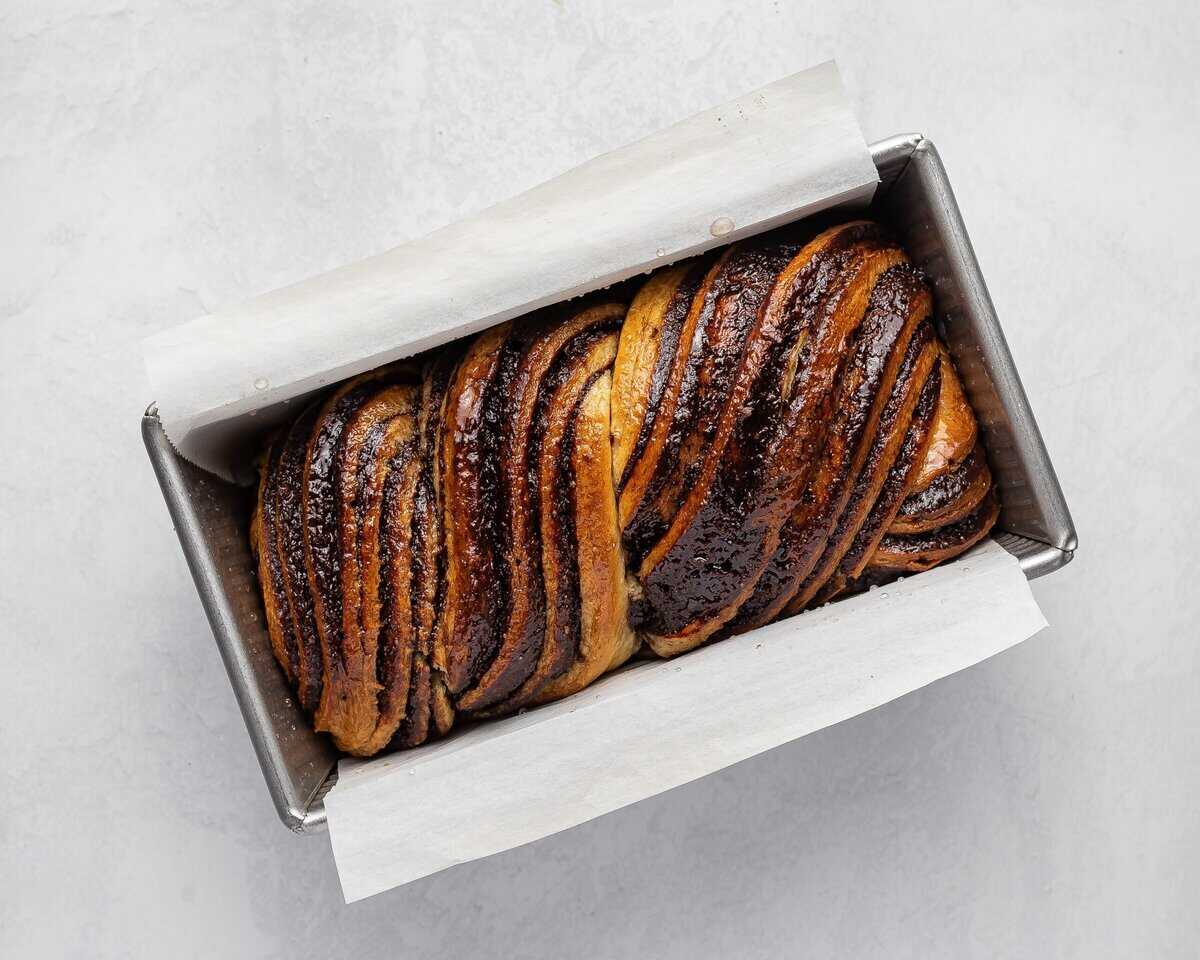
Cool: Let the loaves cool in the pans for 10 minutes, then transfer to a wire rack to cool completely. Allow to cool to room temperature before slicing.
Recipe Variations
While chocolate is one of the traditional babka fillings, there are many other things you can add or even replace the chocolate with.
- Cinnamon: Add to the chocolate.
- Chocolate chips: Any kind, not melted.
- Nuts: Pecans, walnuts, or other nuts.
- Dried fruit: Raisins, currants, cranberries
- Cream cheese: Mix with the filling ingredients.
- Nutella: Instead of the chocolate filling.
How to Store
Babka is best eaten within 24 hours of baking, as it will have the freshest flavor and texture. Serve your babka slightly warm or at room temperature. I like to enjoy it for breakfast or in the afternoon with coffee or tea.
It will keep for up to 3 days if stored in an airtight container. Always store at room temperature. Baked babka should not go in the fridge. If you have more than you can eat in a few days, freeze the extras.
This recipe makes two loaves, which is perfect for having an extra to freeze. To freeze a loaf, allow it to cool completely, then wrap it in plastic wrap. Wrap again in foil and freeze for up to two months. To thaw, leave it on the counter for 2 hours or in the fridge overnight.

What to Serve with Chocolate Babka
I like to prepare this showstopper of a recipe for holiday brunches. To round things out, I’ll prepare this crescent roll breakfast or a feta and spinach casserole along with a batch of air fryer bacon. A nice fruit salad on the side makes the meal complete.
More Jewish Food
- Challah Bread
- Chocolate Challah Bread
- Rugelach
- Sufganiyot (Jelly Donuts)
- Cheese Blintz
- Matzo Toffee


This babka was so incredible, I just made it yesterday and I loved it. I’m guessing it was the fault of my oven, but I ended up having to bake the loaves for around 40-45 minutes, but they baked up beautifully with a lovely chocolate swirl! My family loves them too.
This is absolutely stunning! Thank you so much for all the pictures and video. Great post!