Scones Master Recipe
Updated
Updated

This scone recipe is my go-to master recipe for tender, flaky scones that I can easily customize with different add-ins for endless flavor variations. I serve them for breakfast, brunch, or sneak one in with a cup of tea in the afternoon. I used to shy away from making scones at home, but now I realize they aren’t that difficult and taste way better than anything I get at the coffee shop. The dough does require some resting time, so it usually takes me about 45 minutes or so from start to finish.

Pin this now to find it later
Pin ItThis post may contain affiliate links. If you click on one and make a purchase, we may earn a small commission at no extra cost to you. We only recommend products we genuinely love.
5-Star Review
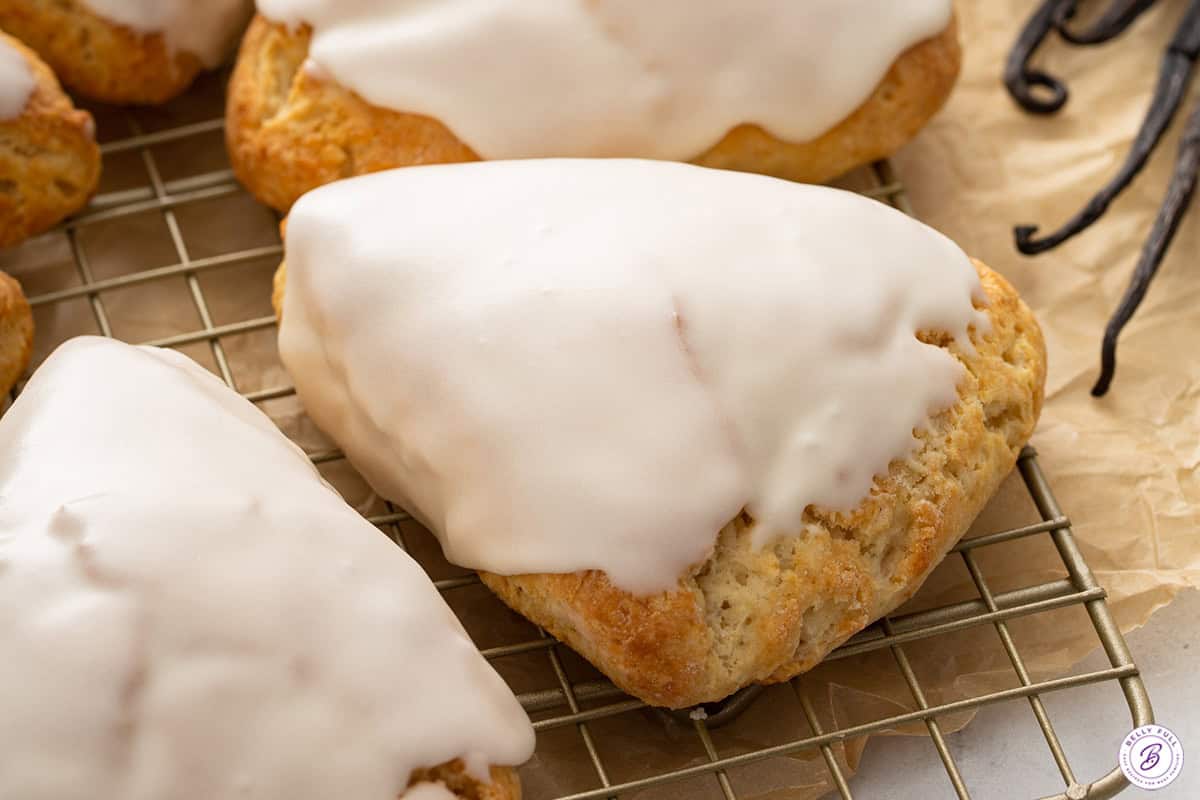
Easy Scones Master Recipe
I’ve shared so many scone recipes over the years, but never a master one, which all the others are based on. So here it is! Making scones is easier than you think, and you can vary the flavors as you like, so each batch tastes different.
Thankfully, scones don’t require yeast or kneading; just baking powder to help them rise, so they’re fairly simple to make, and with this recipe, they turn out a little crispy around the edges, tender and flaky throughout, and practically melt in your mouth.
I follow this recipe all the time, and depending on my mood, I’ll throw in chocolate chips, berries, and lemon or orange zest. I always frost my scones so they are a nice sweet treat, but you don’t have to add icing. I find scones are perfect as a morning treat or make a great addition to my brunch buffet table.
Helpful Tips
- Scoop and sweep when measuring the flour. This way, you get an accurate amount. Scooping and dumping may lead to too much flour, which will make the scones dry.
- Cold ingredients are key. Cold ingredients help create the light, flaky texture by releasing steam while baking.
- Use full-fat milk. Avoid low-fat milk, which will result in dry, flat baked scones.
- Don’t overwork the dough. Overworking could lead to tough dough. Avoid using a food processor, which overworks the dough and makes the scones tough.
Scones Master Recipe

Ingredients
For the Scones
- 2 cups all-purpose flour
- 3 tbsp granulated sugar
- 1 tbsp baking powder
- ½ tsp salt
- 6 tbsp chilled unsalted butter*, cut into tiny cubes
- 1 cup half and half
- 1 tsp vanilla
For the Icing**
- 2 cups powdered sugar
- ¼ cup half and half
- 1 tsp vanilla
Instructions
- Line a baking sheet with parchment paper; set aside.
- In a large mixing bowl, whisk together flour, baking powder, sugar, and salt. Add cold butter and cut in with a pastry blender (or your hands) until mixture resembles fine crumbs.
- Pour in the half and half and vanilla; fold together gently until the mixture just begins to come together, everything is moist, and forms a soft dough. (Do not knead or over mix!)
- Turn dough out onto a floured surface and sprinkle with a little flour on top, so it's not so sticky. If it seems too dry, add 1-2 more tablespoons of half and half. Gently mold and pat into a 1/2-inch thick circle, without kneading. Try to use as few strokes as possible.
- With a sharp knife or bench scraper, cut the circle into 6 equal wedges.
- Place scones onto prepared baking sheet and transfer to the refrigerator for 15 minutes. (If you can't fit a baking sheet in your refrigerator, place the scones on a plate and then transfer them to the sheet once chilled.)
- While scones are chilling, preheat your oven to 400°F.
- Place baking sheet in the oven and bake 14-17 minutes until no longer wet, lightly golden, and cooked through. (If your oven runs hot, start checking at 14 minutes. Keep an eye on them – if they’re golden on top and bottom, they’re done.)
- Transfer scones to a cooling rack and allow to cool for at least 20 minutes before icing them.
- Make glaze by whisking together powdered sugar, half and half, and vanilla until smooth. (If glaze is too thick, add a bit more half-n-half. If it’s too thin, add more powdered sugar.)
- You can either gently submerge the tops in the glaze or just drizzle over the top. Glaze will firm up when scones are completely cool.
- Eat and enjoy!
Video
Notes
Nutrition
Nutritional information given is an automatic calculation and can vary based on the exact products you use and any changes you make to the recipe. If these numbers are very important to you, I would recommend calculating them yourself.
How to Make Scones Step by Step
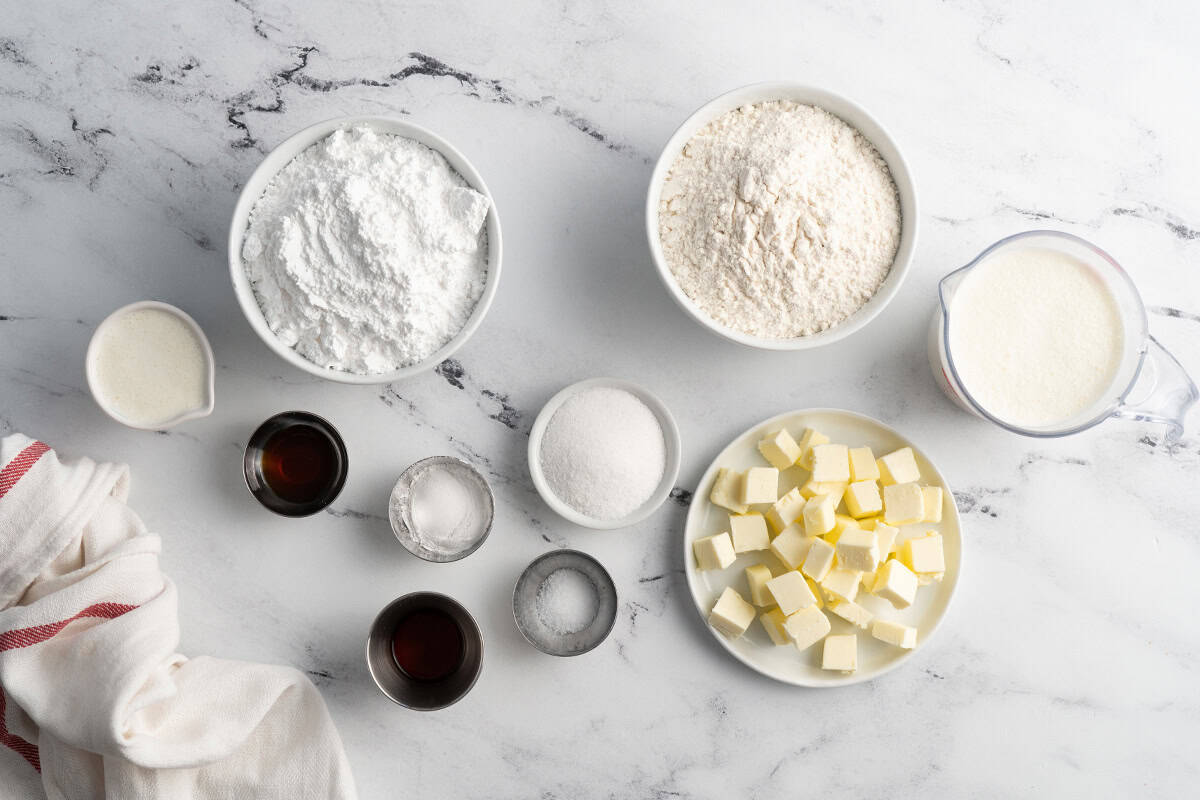
Gather the ingredients and line a baking sheet with parchment paper.
Combine the dry ingredients: Get out a big mixing bowl and, using a whisk, mix 2 cups all-purpose flour, 3 tbsp granulated sugar, 1 tbsp baking powder, and ½ tsp salt together until thoroughly blended.

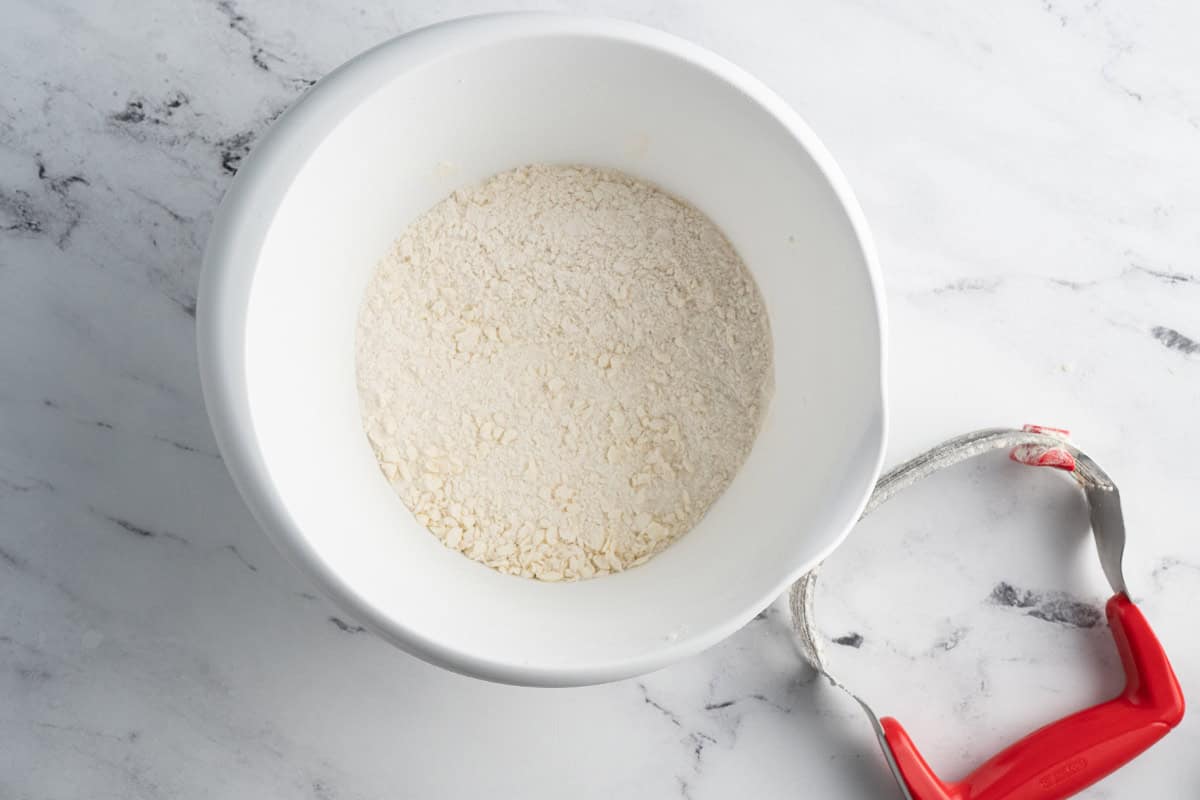
Cut in the butter. A bench scraper (or your hands!) is the best tool for combining butter with the dry ingredients. Add 6 tbsp chilled unsalted butter, cut into tiny cubes, and cut in with a pastry blender (or your hands) until mixture resembles fine crumbs.
Add the liquid: Add 1 cup half and half and 1 tsp vanilla and mix until just combined. The dough should be moist.
Form the dough: Turn the dough out onto a floured surface and sprinkle it with a little flour so it’s not sticky. If it seems a bit dry, add 1-2 more tablespoons of half and half. Gently shape the dough into a ½ inch thick circle, without kneading.
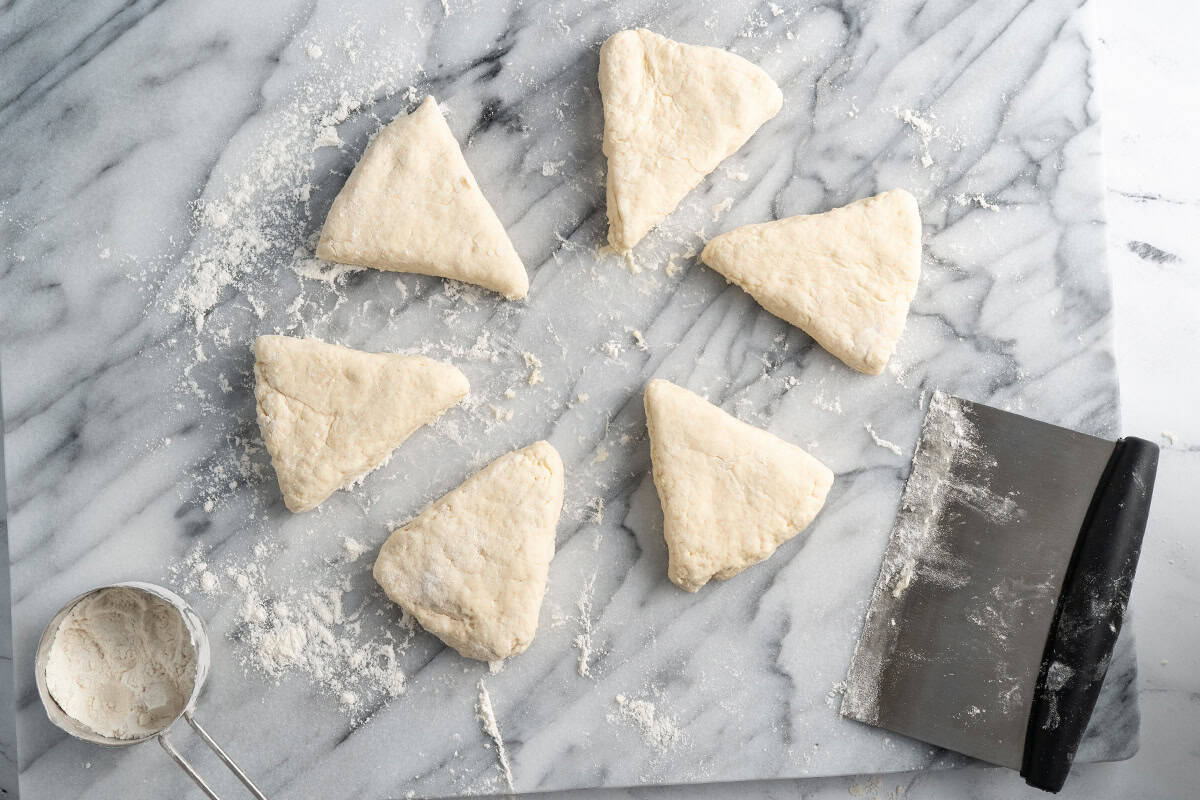
Cut into wedges: With a sharp knife or bench scraper, cut the dough circle into 6 equal wedges.
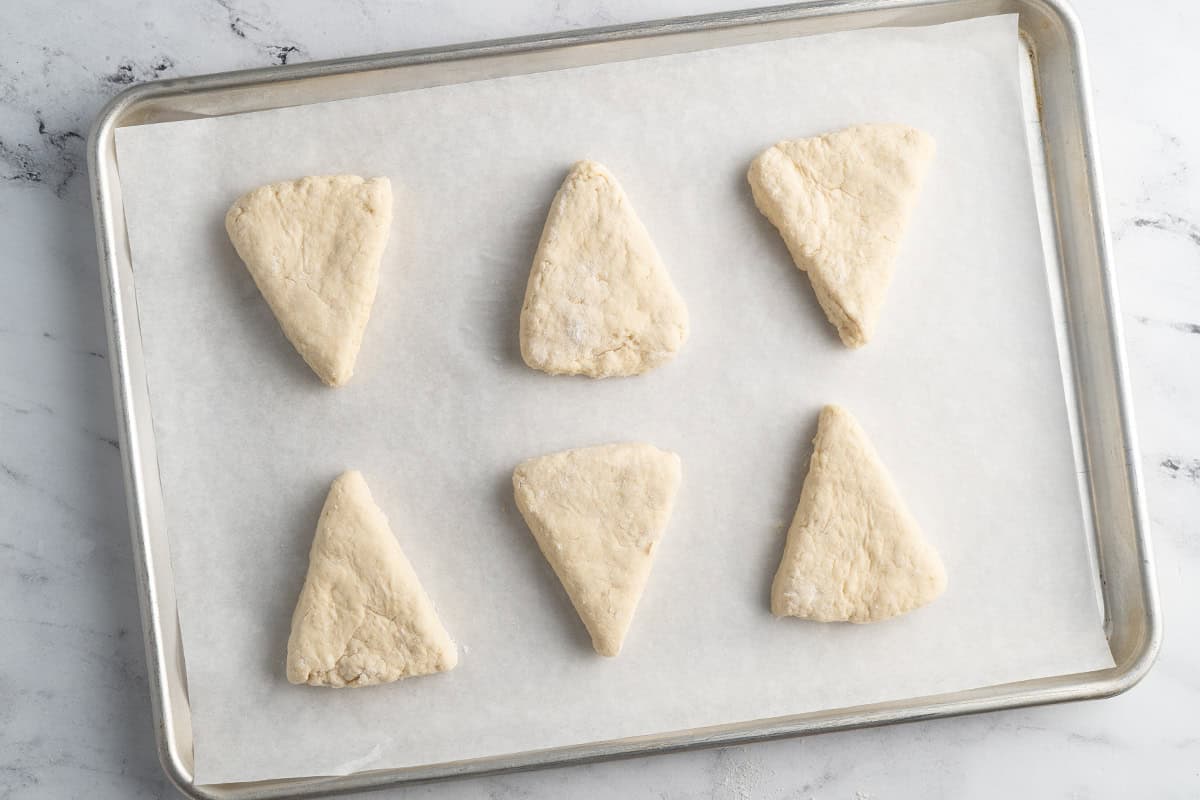
Chill: Transfer the dough to the parchment-lined baking sheet and chill in the fridge for 15 minutes. This helps avoid over-spreading while they bake. If you can’t fit a baking sheet in your refrigerator, just put them on a plate, then transfer to the sheet once chilled.
Bake: Bake for about 15 minutes in an oven preheated to 400°F until golden on top and bottom.
Cool: Transfer the scones to a cooling rack to cool for at least 20 minutes before icing them.
Make the icing: Whisk together 2 cups powdered sugar, ¼ cup half and half, and 1 tsp vanilla until smooth. If the glaze is too thick, add a bit more half-n-half, or if it’s too thin, add more powdered sugar.
Glaze and enjoy: Either gently submerge the tops in the glaze or drizzle the glaze over the top of the scone. The glaze will firm up when the scones are completely cool.
Scone Ideas and Variations
When I’m looking to change things up, I’ll stir in up to ¾ cup of extras right after cutting in the butter, before adding the wet ingredients. Some of my favorite scones are:
- Lemon Blueberry Scones: These scones are bursting with juicy fresh blueberries and a bright, sweet lemon glaze.
- Strawberry Shortcake Scones: Packed with fresh strawberries, with a sweet glaze that makes them taste just like strawberry shortcake.
- Pumpkin Scones: Soft, tender pastries drizzled with white and pumpkin glaze, packed with cozy pumpkin pie flavor, and taste just like the popular Starbucks version.
- Cranberry Orange Scones: Bursting with tart cranberries, bright orange zest, and sweet citrus glaze, these scones make the perfect homemade treat.
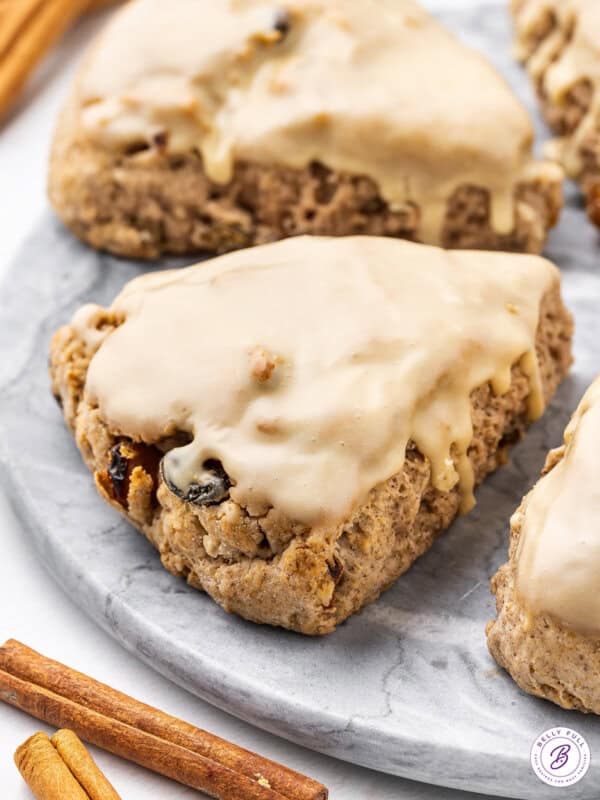
- Gingerbread Scones: Filled with warm spices and sweet golden raisins, then finished with a rich molasses glaze for the ultimate cozy treat.
Serving Suggestions
For a quick weekday breakfast, I’ll pair a scone with a banana coffee smoothie. On slower weekends, I love serving them alongside a hearty sheet pan frittata, fresh fruit, and coffee for a cozy brunch spread that feels a little extra special. When I’m craving a sweet treat come mid-afternoon, nothing beats a warm scone and creamy boba tea. They’re also perfect for holiday breakfasts, brunch gatherings, baby showers, or casual afternoons when you want something homemade to snack on while catching up with friends.
How to Store Scones
- Fridge or counter. Leftover scones keep well at room temperature in an airtight container for 2 days or in the refrigerator for up to 4 days.
- Freeze. I used to be against freezing for fear of the scones drying out, but after many trials, I’ve changed my tune.
- Freeze the dough: Flash freeze scone dough wedges on a plate or baking sheet for about 1 hour. Once solid, layer them in a freezer-safe bag. Bake from frozen, adding a few minutes to the bake time. Or thaw overnight, then bake as directed.
- Freeze the scones: Allow baked scones to cool completely, and freeze before topping with icing. Transfer to a freezer-safe bag and freeze for up to 2 months. To thaw, leave on the counter for a few hours or overnight in the refrigerator.
- Reheat. Warm in the microwave for about 20 seconds or on a baking sheet, tented with foil, in a 325°F oven for 5-10 minutes.
Other Scone Recipes To Try
- These Almond Blueberry Scones are tender and flaky, with blueberries, almonds, sweet coconut flakes, and a sweet and silky glaze.
- Orange Creamsicle Scones taste just like creamsicles with orange zest and an orange glaze.
- Bruschetta Scones: These Bruschetta Scones are tender, flaky savory pastries filled with sun-dried tomatoes, fresh basil, and feta cheese, making them perfect for breakfast, brunch, or serving alongside dinner.


So easy to make and just delicious. I added the two tablespoons of extra sugar because I didn’t frost them. I made a strawberry shortcake with my scones. So much better than the little sponge cakes.
I was wondering if they could be frozen after they are made and then brought out and baked
Yes. Instructions for that are included in the article at the bottom under “how to store scones”
Absolutely PERFECT scones!! Thank you so much for sharing this recipe, as well as your tips for savory and variations. I cut mine in 8 pcs (just because I forgot to cut into 6 lol) and halved the glaze recipe for less sugar. Just what I was looking for!!
Finally a scone that is delicious and not dry or crumbly. I used grated frozen butter and just tossed it with my hands. It worked great. I also tried your lemon blueberry scones and they were fantastic too.
Loved this recipe. I used maple flavoring and added walnuts to one batch. Yum
Soft, tender, and delicious. Homemade scones from now on for me! Thank you so much for this lovely recipe.
This recipe looks delicious and easy. I rarely have cream in the refrigerator only 3.5 % cream. Can I add a dollop of greek yogurt to thicken up the milk?
This recipe has only been tested as written, so I can’t vouch for those results, sorry!