Scones Recipe {Any Flavor!}
Published
Published

This scone recipe is a great base for perfectly tender, flaky scones that can easily be spruced up with add-ins to vary the flavors each time. They are wonderful for breakfast, brunch, or with a cup of tea in the afternoon.
Don’t fear making scones at home – they’re actually quite easy and not those flavorless hockey pucks you get at coffee houses.

Pin this now to find it later
Pin ItThis post may contain affiliate links. If you click on one and make a purchase, we may earn a small commission at no extra cost to you. We only recommend products we genuinely love.
I’ve shared so many scone recipes with you over the years, but never a master one (which all the others are really based off of.) So today is the day where I’m talking about the base formula, helpful tips, and frequently asked questions. You ready? Ya, you are!
What is a Scone?
Depending where you live, a scone might look and taste a little different. English scones are round, made with softened butter, light with no more than currants added and served with preserves and clotted cream. At first glance, they look more like an American biscuit. American scones, on the other hand, are a flaky dough made with very cold butter, baking powder, usually triangular shaped wedges, a little on the heavier side, and definitely sweeter. Here in the U.S., we like to doctor them up with all sorts of goodies!
Scones don’t require yeast or kneading; just baking powder to help them rise. They’re so easy to make. The best scones are a little crispy around the edges, tender and flaky throughout, and practically melt in your mouth.
My favorite are these lemon blueberry scones, while my kids beg for strawberry scones every weekend. You can’t go wrong with any of my scones, and you won’t be disappointed with this scone recipe, either!
Scone Recipe
You only need 7 pantry ingredients for my foolproof scone recipe.
- Flour: I always use all-purpose flour. You’ll need flour for the dough, plus a little extra for your work surface and sprinkling on top of the dough if it’s sticky.
- Sugar: This recipe is for sweet scones, which calls for granulated sugar.
- Baking Powder: This is what helps the dough rise.
- Salt: Enhances the other flavors.
- Butter: Butter is an essential ingredient in scones, providing that flaky texture and wonderful flavor we’re after. It should be unsalted, very well chilled, and cut into a bunch of small cubes (or grated.) Why tiny pieces of butter? The finer the pieces of cold butter, the less the scones spread. Why cold butter? As the cold butter melts in the oven, it creates steam pockets which help the scones rise and lend to a flakier baked good. You can even use frozen butter. The colder, the better! Why unsalted butter? Because the amount of salt in salted butter tends to vary so wildly between brands and it’s better to have control over the saltiness.
- Half n Half or Heavy Cream: The best tasting baked goods are made with a thick liquid, like heavy cream or half n half (which is equal parts whole milk and heavy cream.) Unless you want dry, flat, flavorless scones, avoid thin liquids – I’m lookin’ at you skim milk.
- Vanilla: A little bit of vanilla extract adds another layer of flavor to a sweet scone. Don’t skip it!
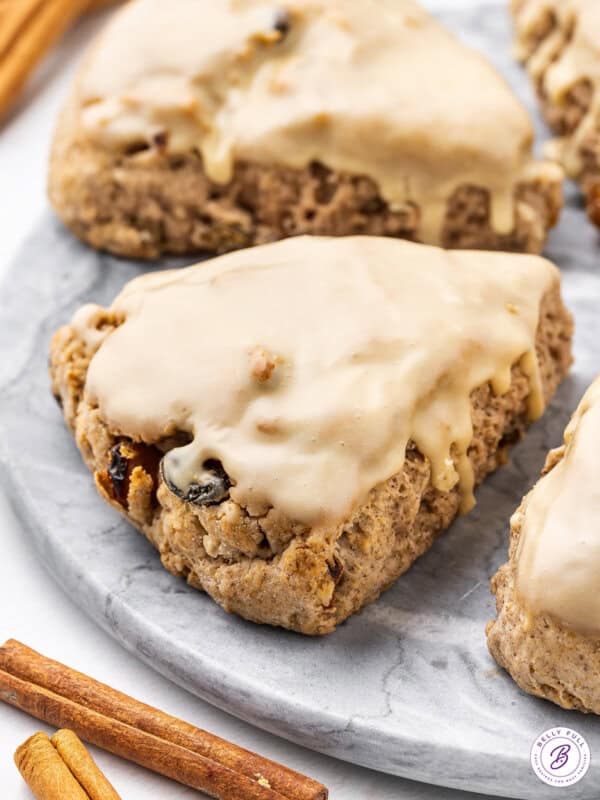
From here, you can play with add-ins, such as chocolate chips, berries, and lemon or orange zest. My scones are always adorned with some type of icing! (See variations below for making savory scones.)
Wait, no egg? Nope! Not in this scone recipe.
How to Make Scones
Here’s a brief summary of how to make this scone recipe. (Scroll down for the detailed printable recipe card.)
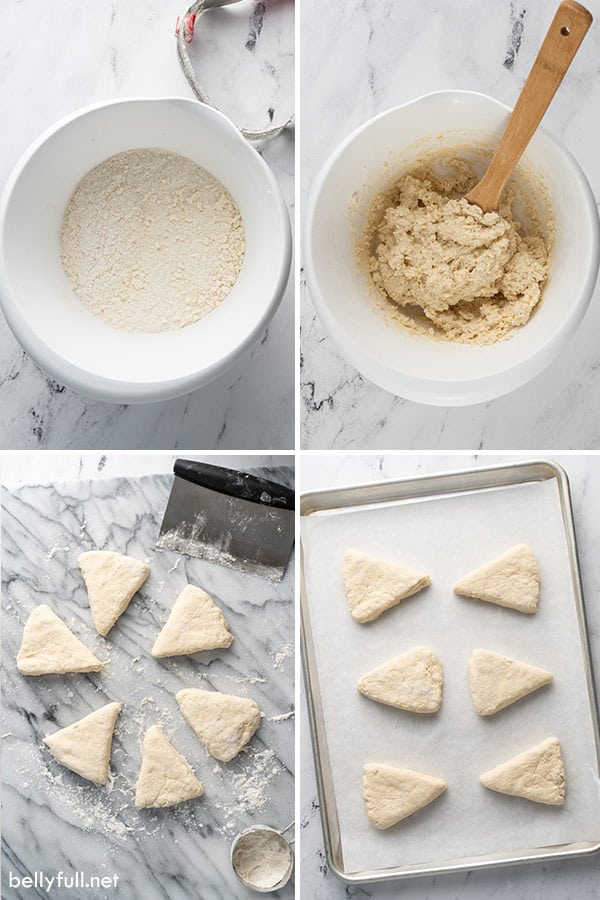
- Whisk together the dry ingredients: Get out a big mixing bowl and using a whisk, mix all the dry ingredients together so it’s thoroughly blended.
- Cut in the cold butter. A bench scraper (or your hands!) are the best tools for combining butter with the dry ingredients. The mixture should resemble fine crumbs when you’re done. (Avoid using a food processor, which tends to overwork the dough and makes the baked scones tough.)
- Add in the liquid: Add in the half n half and vanilla and mix together until just combined, everything seems moist, and you have a soft dough.
- Form the dough: Turn dough out onto a floured surface and sprinkle with a little flour on top, so it’s not so sticky. If it seems a bit dry, add 1-2 more tablespoons of half-n-half. Gently mold and pat into a 1/2-inch thick circle, without kneading. Try to use as few strokes as possible.
- Cut into wedges: With a sharp knife or bench scraper, cut the circle into 6 equal wedges.
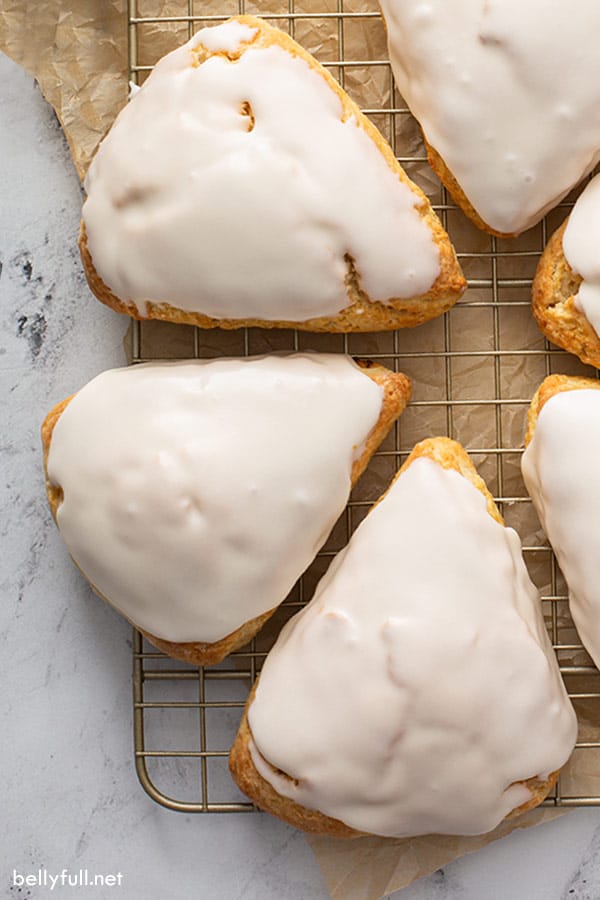
- To Baste or Not? I always finish off my baked scones with icing, but if you prefer them more “naked”, I recommend brushing the tops with a little half-n-half or sprinkle with sugar before baking, which will give them an extra crisp and crumbly exterior.
- Chill: transfer the dough wedges to a parchment-lined baking sheet and chill in the fridge for 15 minutes. This helps avoid over-spreading while they bake. If you can’t fit a baking sheet in your refrigerator, just put them on a plate, then transfer to the sheet once chilled.
- Bake: bake on the parchment-line baking sheet until golden on top and bottom. This scone recipe bakes for about 15 minutes in a 400 degree F preheated oven.
Tips for Perfect Scones
Recipe Variations
Now that you’ve got your base, you can add in all sorts of goodies to change the flavor every time! You can mix in up to 3/4 cup of extras. I suggest mixing in these ingredients right after you cut in the butter and before you mix in the wet ingredients. Here are some of my favorite combinations:
- Blueberries and a bit of lemon zest
- Shredded apple and ground cinnamon
- Chocolate chips and grated zucchini
- Dried cranberries and orange zest
If you want to make savory scones, reduce the sugar in this recipe to only 2 tablespoons and omit the vanilla. Add up to 1 cup of savory add-ins, like shredded cheese with a bit of herbs, right after you’ve worked in the butter, and before adding the liquid.

How to Store Scones
How long do scones last? Leftover scones keep well at room temperature in an airtight container for 2 days or in the refrigerator for up to 4 days.
Can you freeze scones? Yes! Once upon a time I was very against this, afraid the baking powder would stop working and also risk the scones drying out, but after many trials, I’ve changed my tune.
Can you freeze scone dough? Yes!
Freeze Scone Dough: Flash freeze scone dough wedges on a plate or baking sheet for about 1 hour. Once pretty solid, you can layer them in a freezer-safe bag. Bake from frozen, adding a few minutes to the bake time in the recipe below. Or thaw overnight, then bake as directed.
Freeze After Baking: Allow baked scones to cool completely, and freeze before topping with icing. Transfer to a freezer-safe bag and freeze for up to 2 months. To thaw, leave out on the counter for a few hours or overnight in the refrigerator. Warm in the microwave for about 20 seconds or on a baking sheet, tented with foil, in a 325 degrees F oven for 5-10 minutes.
How to Make Scones Video
Other Scones We Love!
I hope you love this delicious and simple recipe – be sure to give it a review below! Also don’t forget to follow Belly Full on Facebook, Instagram, Pinterest, and YouTube!
Scones Recipe

Ingredients
For the Scones
- 2 cups all-purpose flour
- 3 tablespoons granulated sugar, (*see note)
- 1 tablespoon baking powder
- 1/2 teaspoon salt
- 6 tablespoons chilled unsalted butter, , cut into a bunch of tiny cubes
- 1 cup half n half, (*see note)
- 1 teaspoon vanilla
For the Icing
- 2 cups powdered sugar
- 1/4 cup half n half
- 1 teaspoon vanilla
Instructions
- Line a baking sheet with parchment paper; set aside.
- In a large mixing bowl, whisk together flour, baking powder, sugar, and salt. Add cold butter and cut in with a pastry blender (or your hands) until mixture resembles fine crumbs.
- Pour in the half-n-half and vanilla; fold together gently until the mixture just begins to come together, everything is moist, and forms a soft dough. (Do not knead or over mix!)
- Turn dough out onto a floured surface and sprinkle with a little flour on top, so it's not so sticky. If it seems too dry, add 1-2 more tablespoons of half-n-half. Gently mold and pat into a 1/2-inch thick circle, without kneading. Try to use as few strokes as possible.
- With a sharp knife or bench scraper, cut the circle into 6 equal wedges.
- Place scones onto prepared baking sheet and transfer to the refrigerator for 15 minutes. (If you can't fit a baking sheet in your refrigerator, place the scones on a plate and then transfer them to the sheet once chilled.)
- While scones are chilling, preheat your oven to 400 degrees F.
- Place baking sheet in the oven and bake 14-17 minutes until no longer wet, lightly golden, and cooked through. (If your oven runs hot, start checking at 14 minutes. Keep an eye on them – if they’re golden on top and bottom, they’re done.)
- Transfer scones to a cooling rack and allow to cool for at least 20 minutes before icing them.
- Make glaze by whisking together powdered sugar, half-n-half, and vanilla until smooth. (If glaze is too thick, add a bit more half-n-half. If it’s too thin, add more powdered sugar.)
- You can either gently submerge the tops in the glaze or just drizzle over the top. Glaze will firm up when scones are completely cool.
- Eat and enjoy!
Video
Notes
Nutrition
Nutritional information given is an automatic calculation and can vary based on the exact products you use and any changes you make to the recipe. If these numbers are very important to you, I would recommend calculating them yourself.


So easy to make and just delicious. I added the two tablespoons of extra sugar because I didn’t frost them. I made a strawberry shortcake with my scones. So much better than the little sponge cakes.
I was wondering if they could be frozen after they are made and then brought out and baked
Yes. Instructions for that are included in the article at the bottom under “how to store scones”
Absolutely PERFECT scones!! Thank you so much for sharing this recipe, as well as your tips for savory and variations. I cut mine in 8 pcs (just because I forgot to cut into 6 lol) and halved the glaze recipe for less sugar. Just what I was looking for!!
Finally a scone that is delicious and not dry or crumbly. I used grated frozen butter and just tossed it with my hands. It worked great. I also tried your lemon blueberry scones and they were fantastic too.
Loved this recipe. I used maple flavoring and added walnuts to one batch. Yum
Soft, tender, and delicious. Homemade scones from now on for me! Thank you so much for this lovely recipe.
This recipe looks delicious and easy. I rarely have cream in the refrigerator only 3.5 % cream. Can I add a dollop of greek yogurt to thicken up the milk?
This recipe has only been tested as written, so I can’t vouch for those results, sorry!