Butter Cookies
Updated
Updated
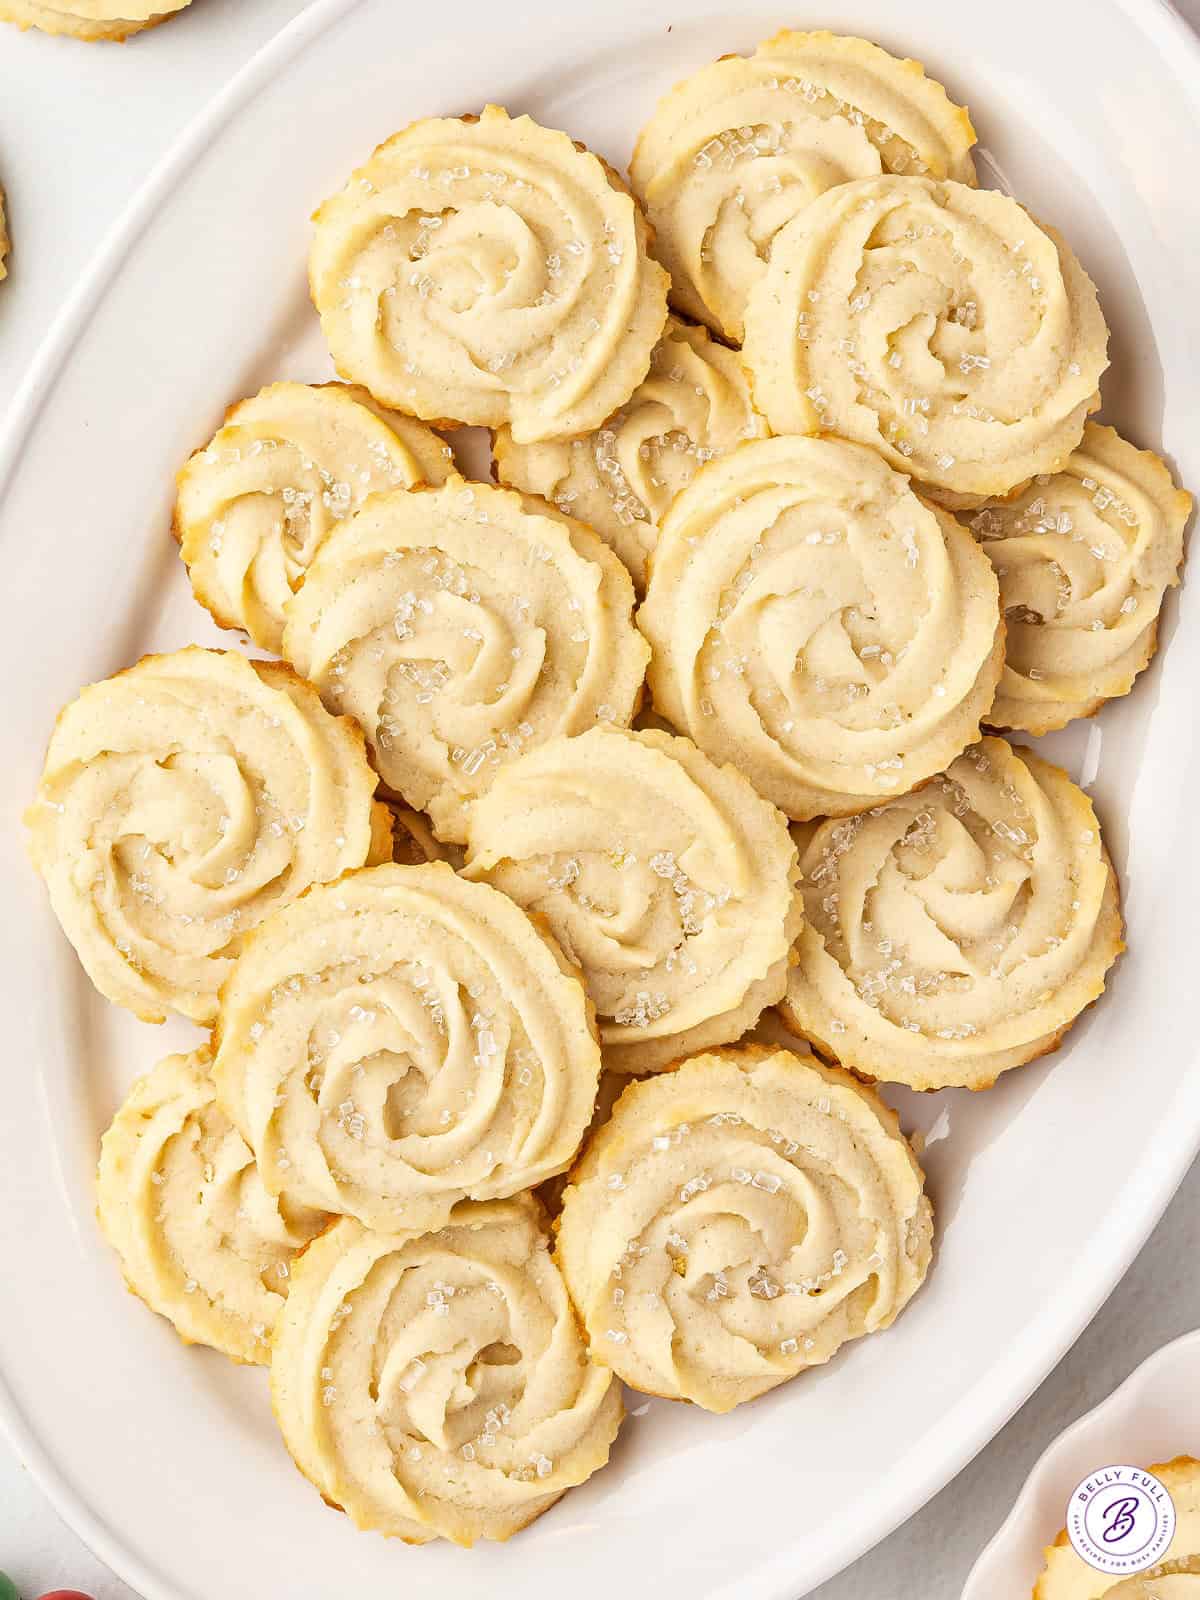
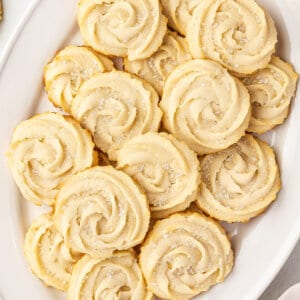
Remember those tins of cookies at your Grandma’s house around the holidays, filled with crispy, crumbly Butter Cookies with a dusting of sugar on top? Ahh, I remember them well! I’ve recreated them so you can give a batch to Grandma this holiday season as a fun, nostalgic DIY gift! My time-tested recipe uses a handful of pantry staples to create the lightest, most buttery, melt-in-your-mouth cookies every time.
Pin this now to find it later
Pin ItThis post may contain affiliate links. If you click on one and make a purchase, we may earn a small commission at no extra cost to you. We only recommend products we genuinely love.
5 STAR REVIEW
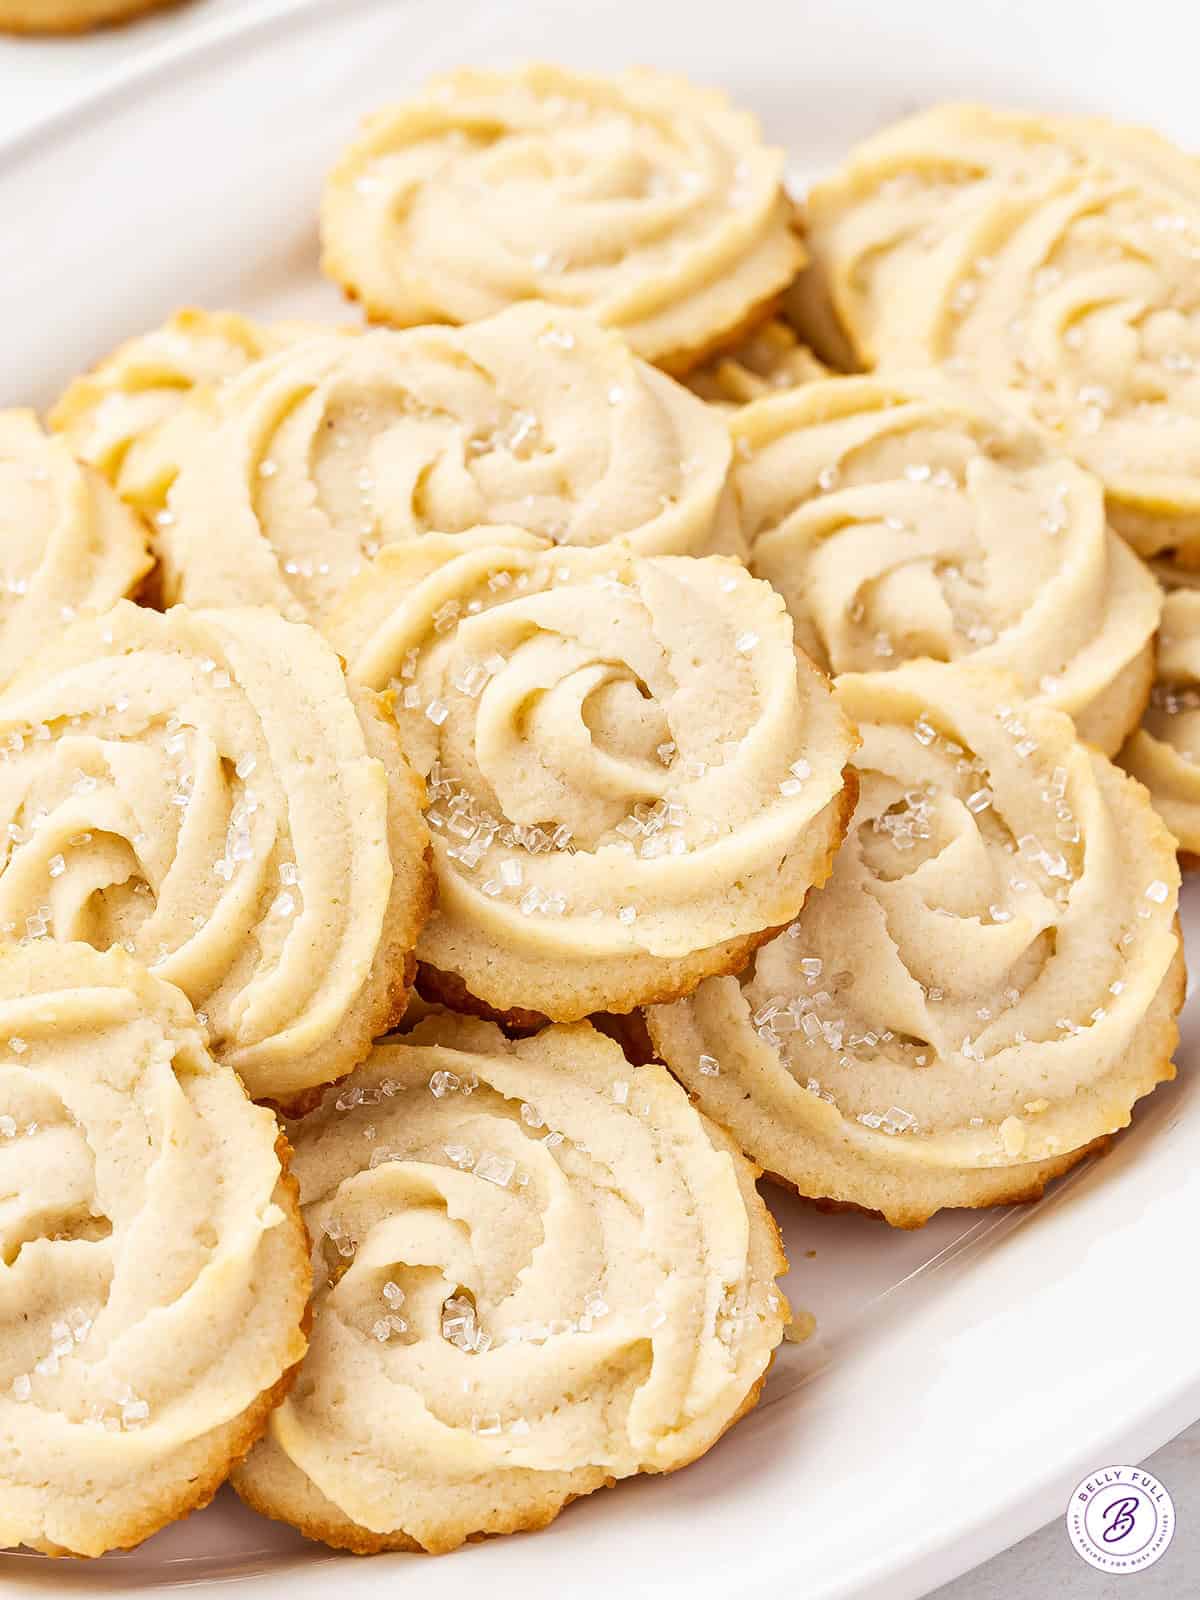
Easy Butter Cookie Recipe
I love a good sugar cookie or thumbprint cookie around the holidays, but no cookie takes me back to my childhood like these homemade butter cookies. They’re simple yet delicious, made with flour, butter, egg yolks, sugar, and milk.
Originally hailing from Denmark, these little treats will always be a Christmas classic for me! I use a piping bag to create the signature swirl shape and finish them off with a sprinkling of sanding sugar. They’re also ready in just 45 minutes (including chill time!) and store beautifully.
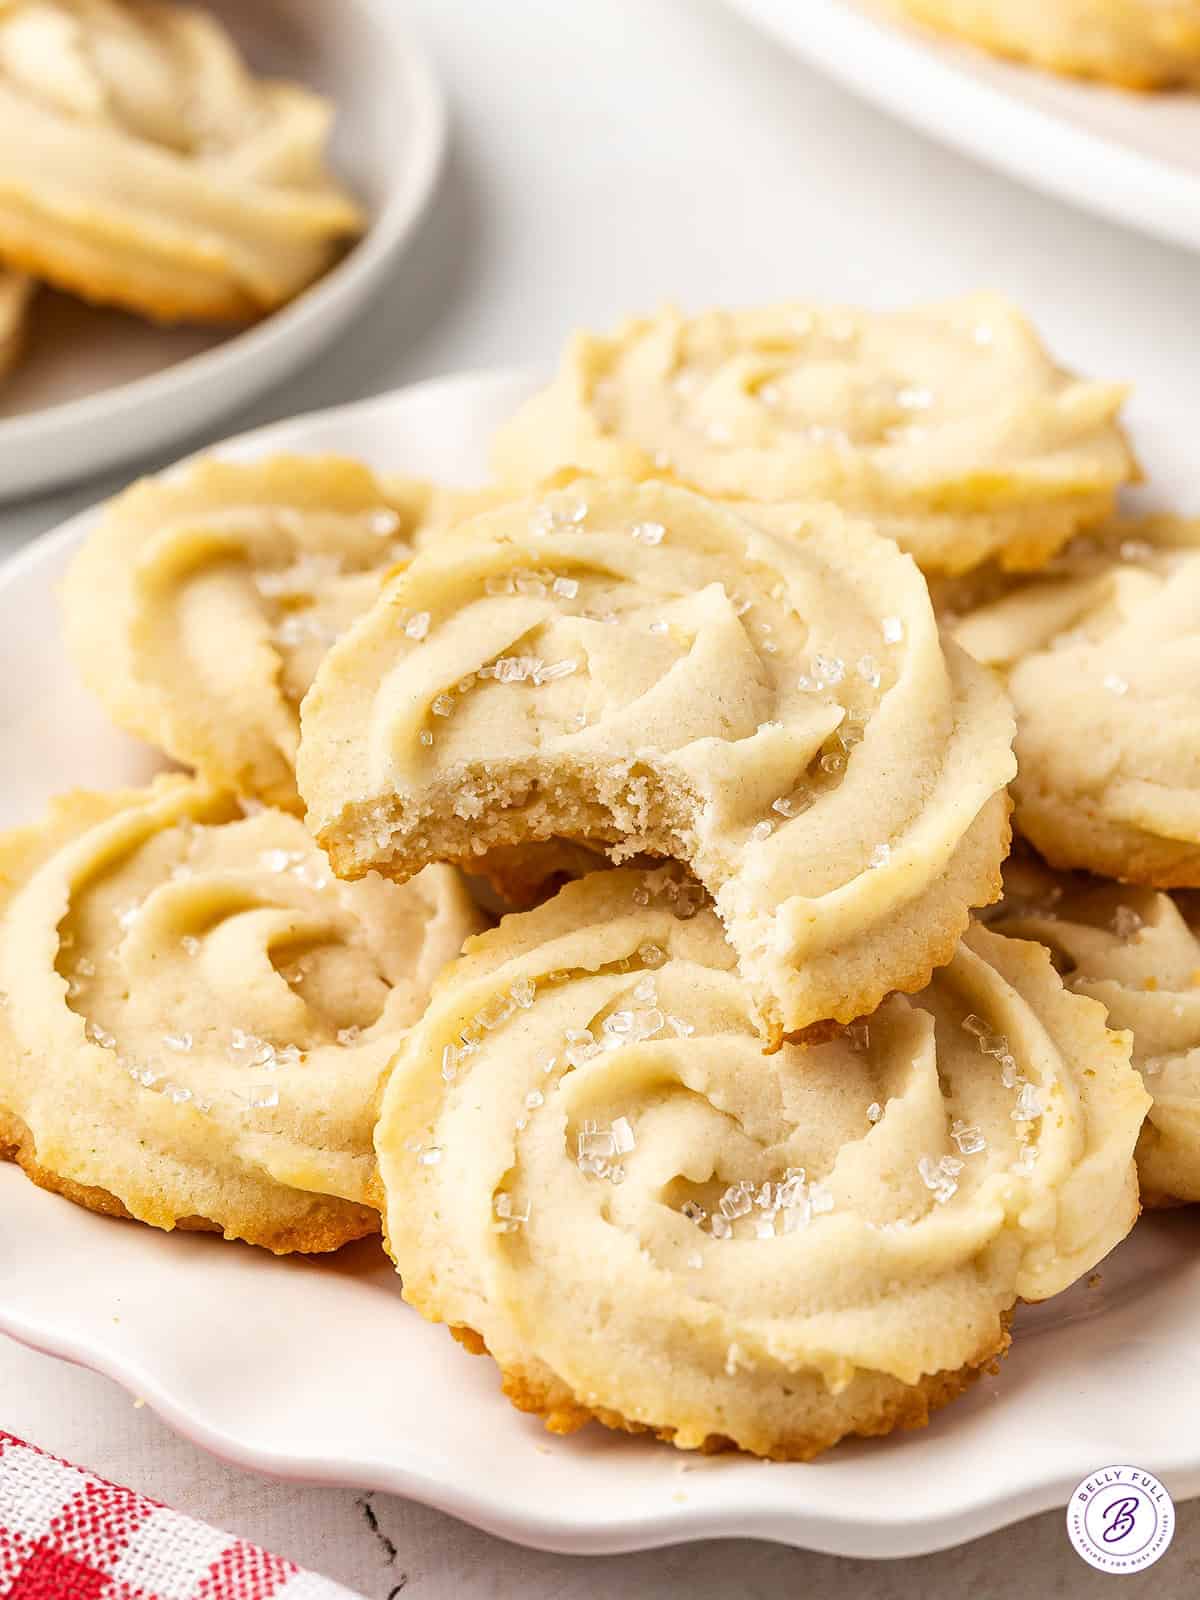
Not to be confused with shortbread, butter cookies share that rich, buttery flavor, but the two cookies are different. Butter cookies have crisp edges, a softer center, hold their shape well, and are made with eggs. Shortbread, on the other hand, is denser and more crumbly due to its higher butter-to-flour ratio and the absence of eggs. It’s also typically baked longer at a lower temperature. However, both cookies are delicious additions to any holiday cookie tray.
Tips for Success
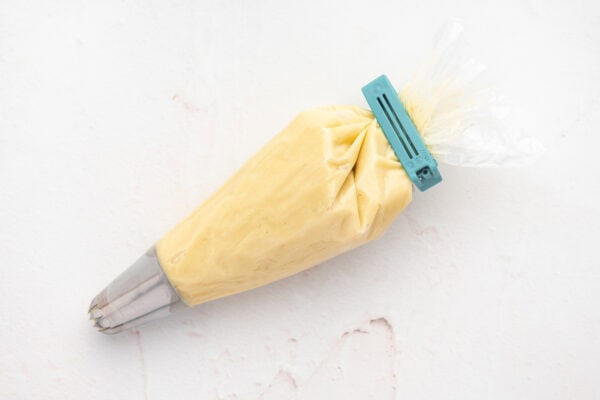
- Use a sturdy piping bag. I can’t stress the importance of using a sturdy piping bag. This is a pretty thick dough, and a flimsy piping bag (or a makeshift one like a Ziploc with the corner cut off) will make piping difficult and messy.
- Use only the egg yolk. I only add the egg yolks, not the whites, to the dough. The yolk adds tenderness and color to the baked cookies (from the beta-carotene in egg yolks). Use your leftover egg whites to make meringue cookies.
- Be careful not to overmix. This can cause the gluten in the flour to develop too much, creating tough and chewy cookies. I stop mixing once the desired consistency is reached.
- Don’t overbake. Your cookies are baked when the edges start to turn a light golden color. The centers will still be pale in comparison. Overbaking = overly crispy, potentially dry cookies.
- Use room-temperature butter. I know my butter is at room temperature when I can slightly indent it with my finger, but it’s not so soft that my finger slides right through.
- The best piping tip. It’s really important to use the right piping tip when making these cookies. I use the Ateco #849 piping tip, which is large and star-shaped. Any tip that is at least ½” wide and star-shaped will work.
Butter Cookies Recipe
Ingredients
- 1 cup granulated sugar
- ½ tsp salt
- 1¼ cups unsalted butter, room temperature (10 oz.)
- 3 egg yolks
- 1 tsp vanilla extract
- 2½ cups flour, divided
- ¼ cup + 2 tbsp whole milk
- ¼ cup sanding sugar or additional granulated sugar, optional topping
Instructions
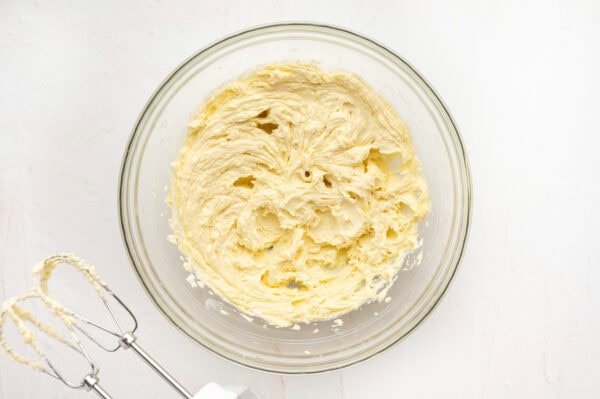
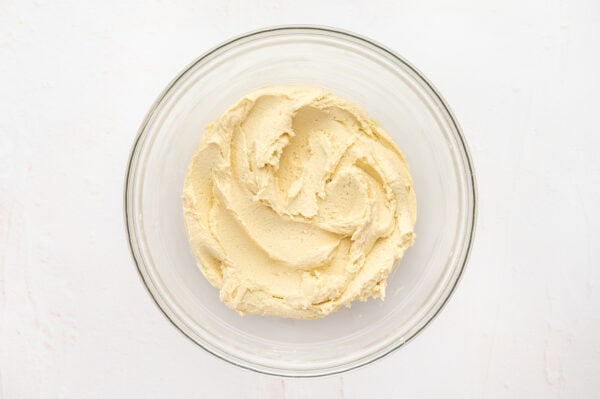
- Preheat the oven to 350°F. Combine 1 cup sugar, ½ tsp salt, and 1¼ cups (10 oz.) of room temperature butter in a mixing bowl and cream with a hand mixer on medium-low speed.

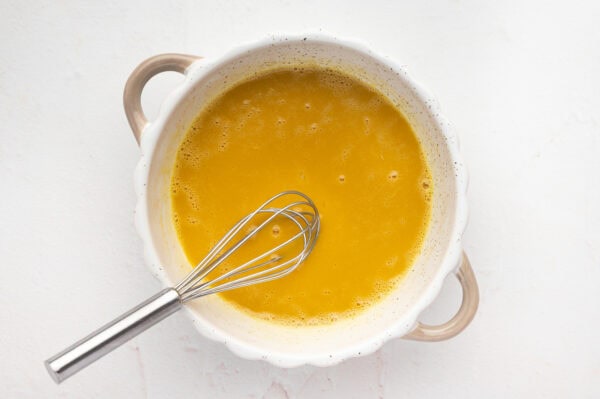
- In a separate bowl, beat 3 egg yolks and 1 tsp vanilla extract together.
- Add vanilla egg mixture to creamed sugar and butter and mix until combined.
- Add 2½ cups of flour (¼ cup at a time) to the wet mixture until a sticky, thick dough forms.
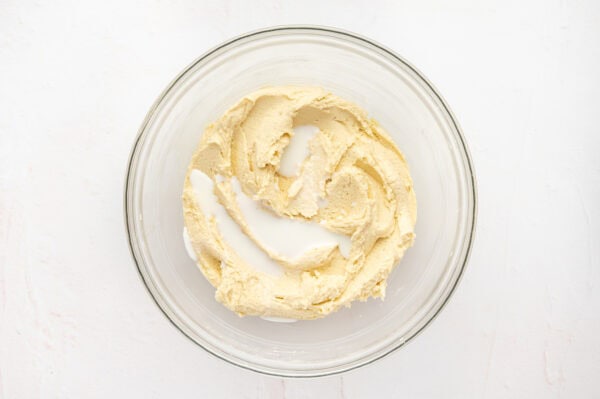
- Then, add ¼ cup of milk and mix on medium-low speed until combined.
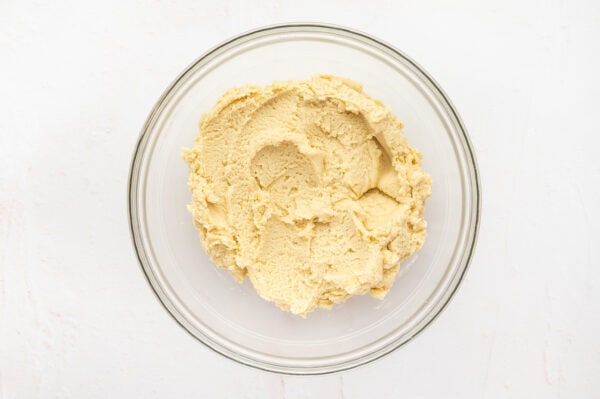
- Add milk, a teaspoon at a time, until your dough mixture is the consistency of Play-Doh. (I used 2 tbsp of additional milk total.)
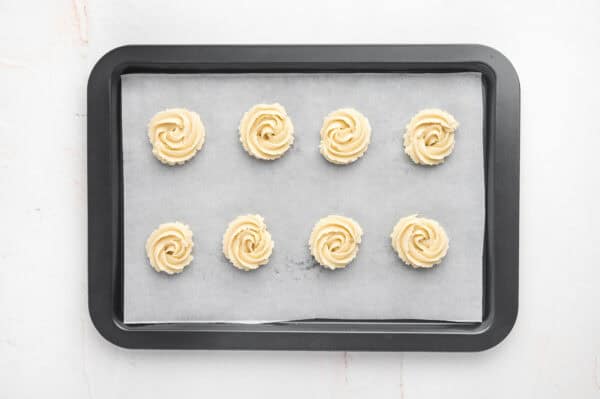
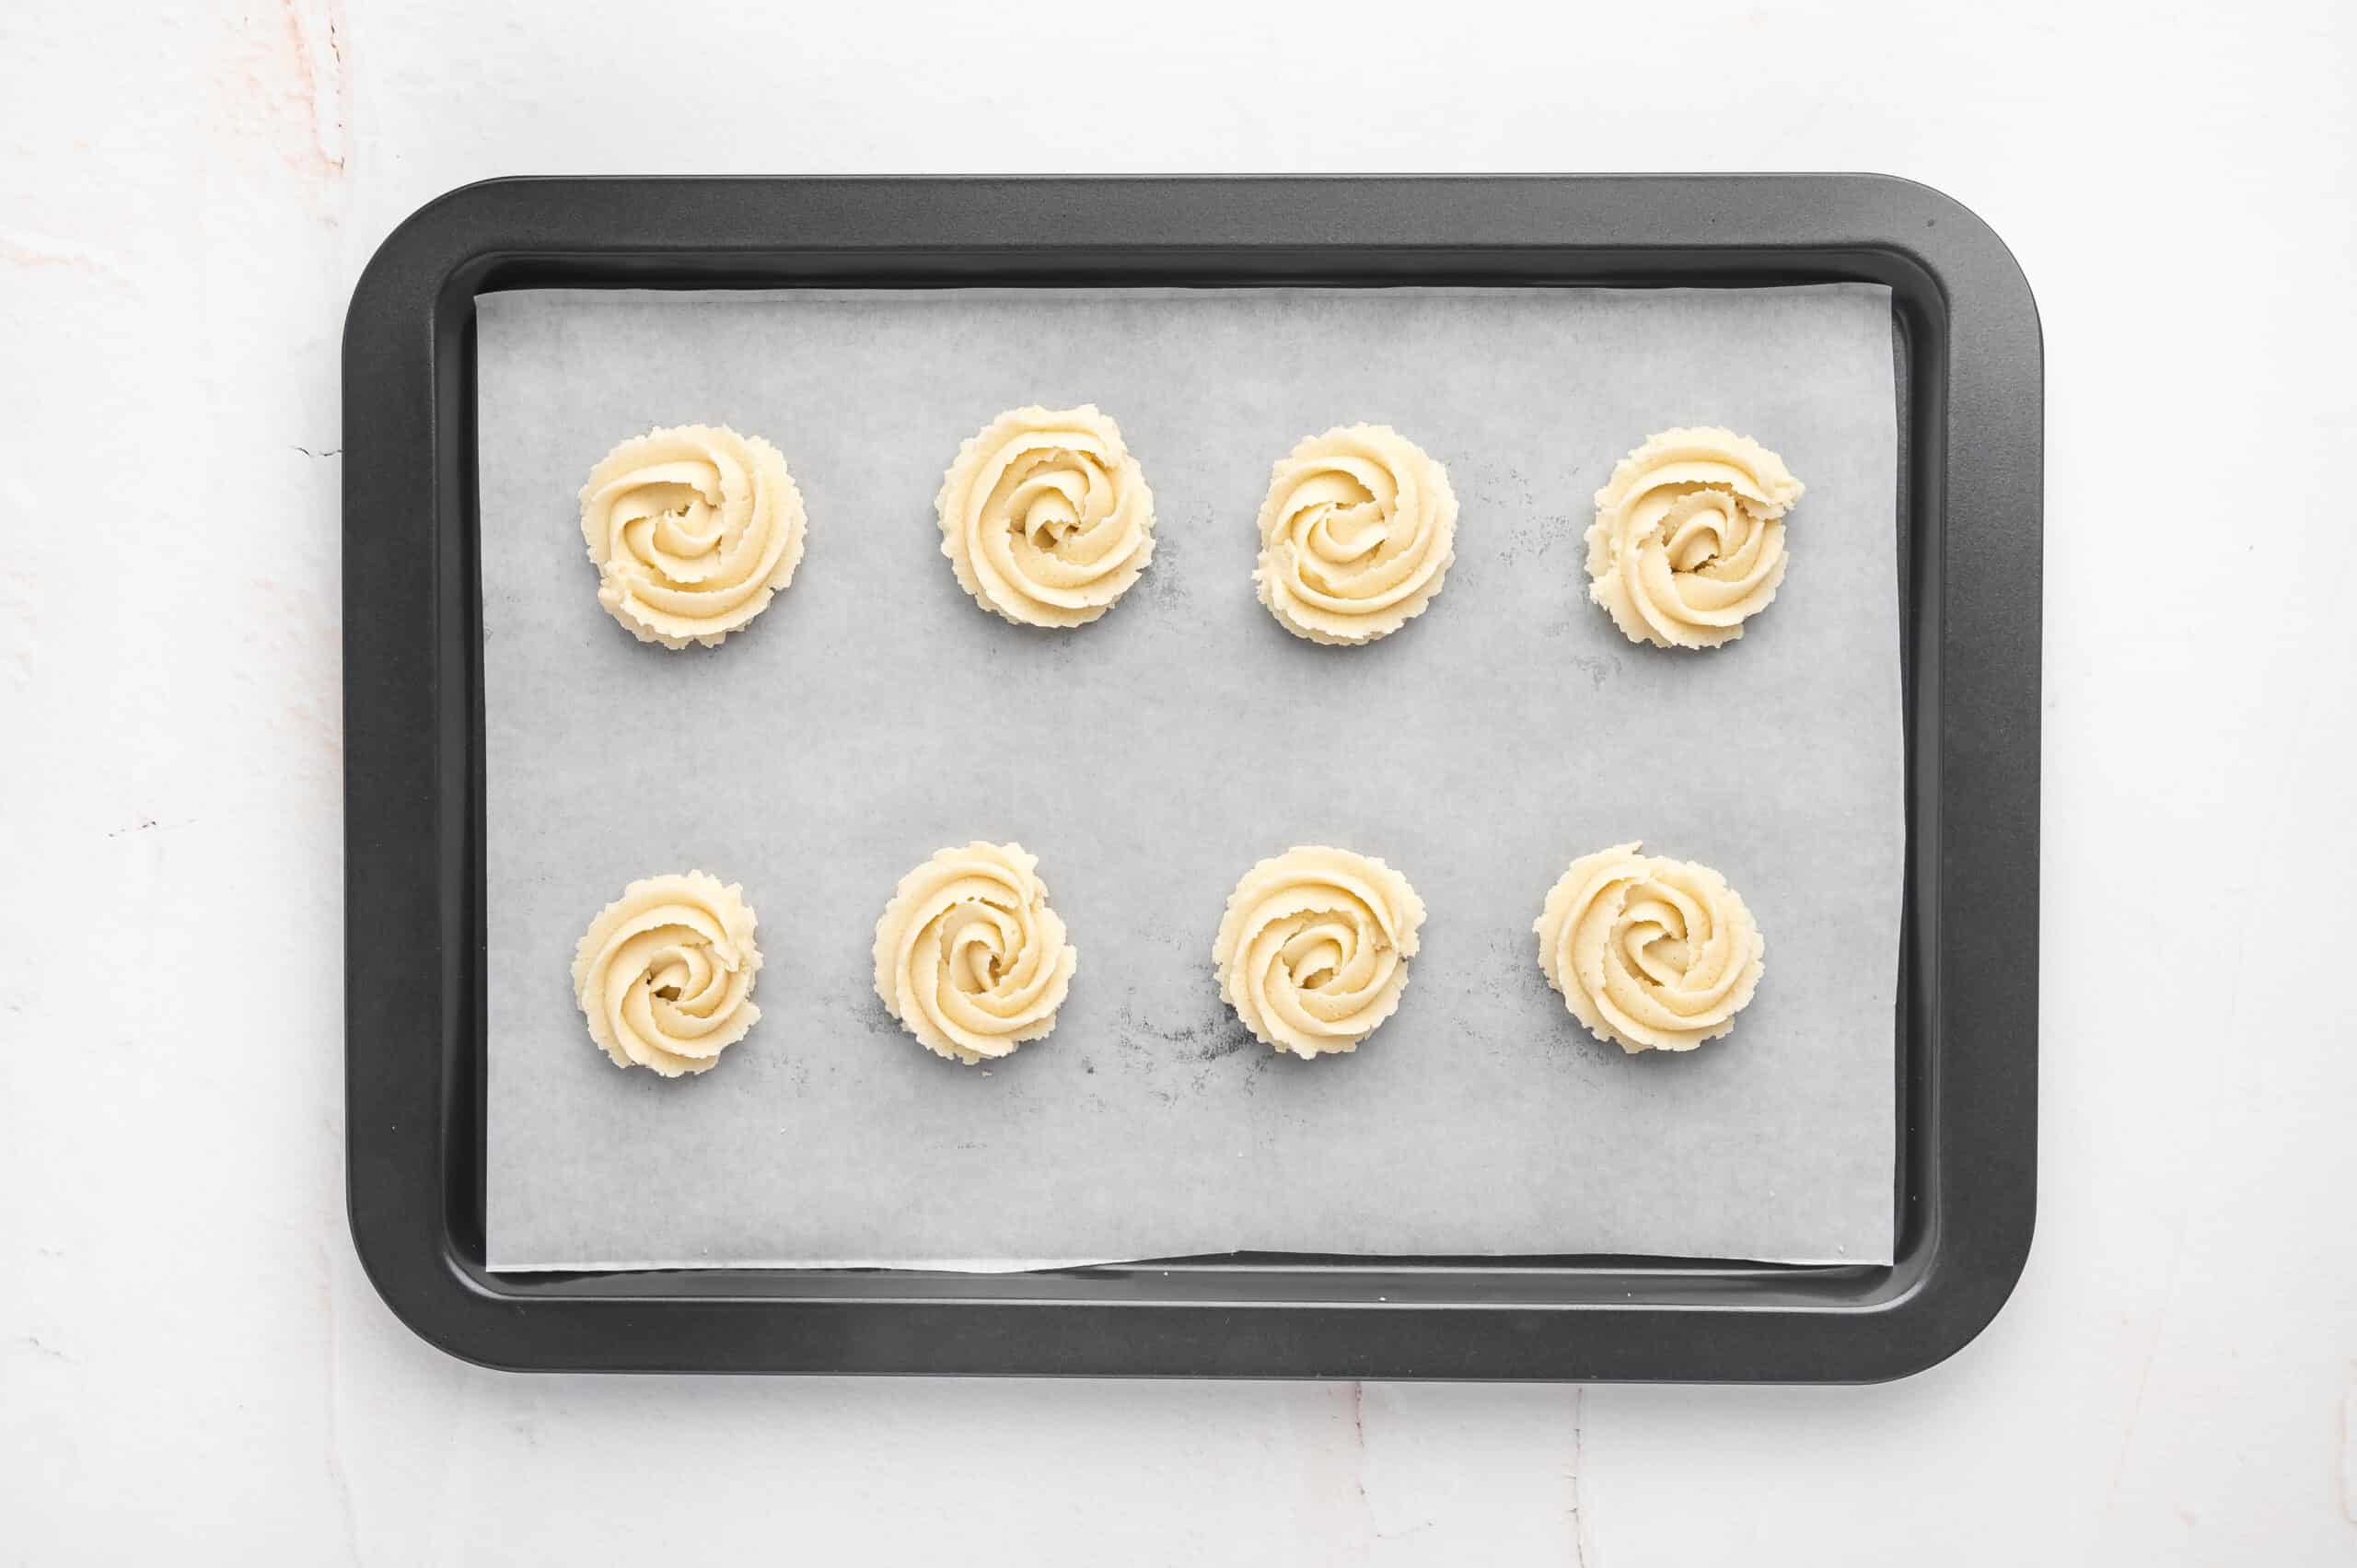
- Line your cookie sheets with parchment paper and test your cookie dough consistency by adding ¼ cup of dough to your piping bag. If it’s still too thick to pipe, put the dough back in the bowl and add another teaspoon of milk, mix, and try again.

- Chill the piped/shaped cookies for 5-10 minutes in the refrigerator before baking to ensure they hold their shape.
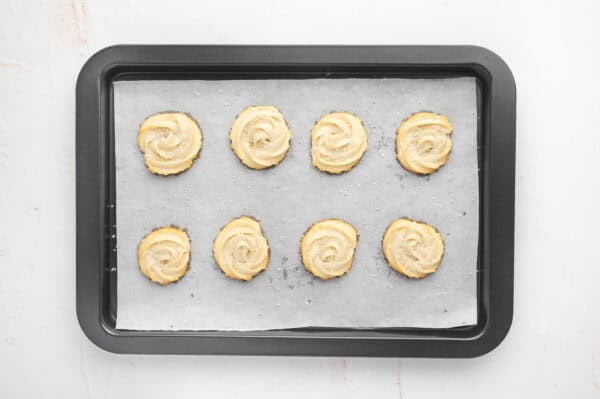
- Bake the chilled cookies for 15 minutes or until the edges are just beginning to turn golden. This is a dense cookie, so I don’t recommend underbaking or going for the soft center you’d want with a chewy cookie.
- While your cookies are fresh out of the oven, sprinkle ¼ cup sanding sugar or additional granulated sugar on top to give it a sparkly, festive look and added texture.

Video
Nutrition
Nutritional information given is an automatic calculation and can vary based on the exact products you use and any changes you make to the recipe. If these numbers are very important to you, I would recommend calculating them yourself.
How to Make Butter Cookies Step by Step
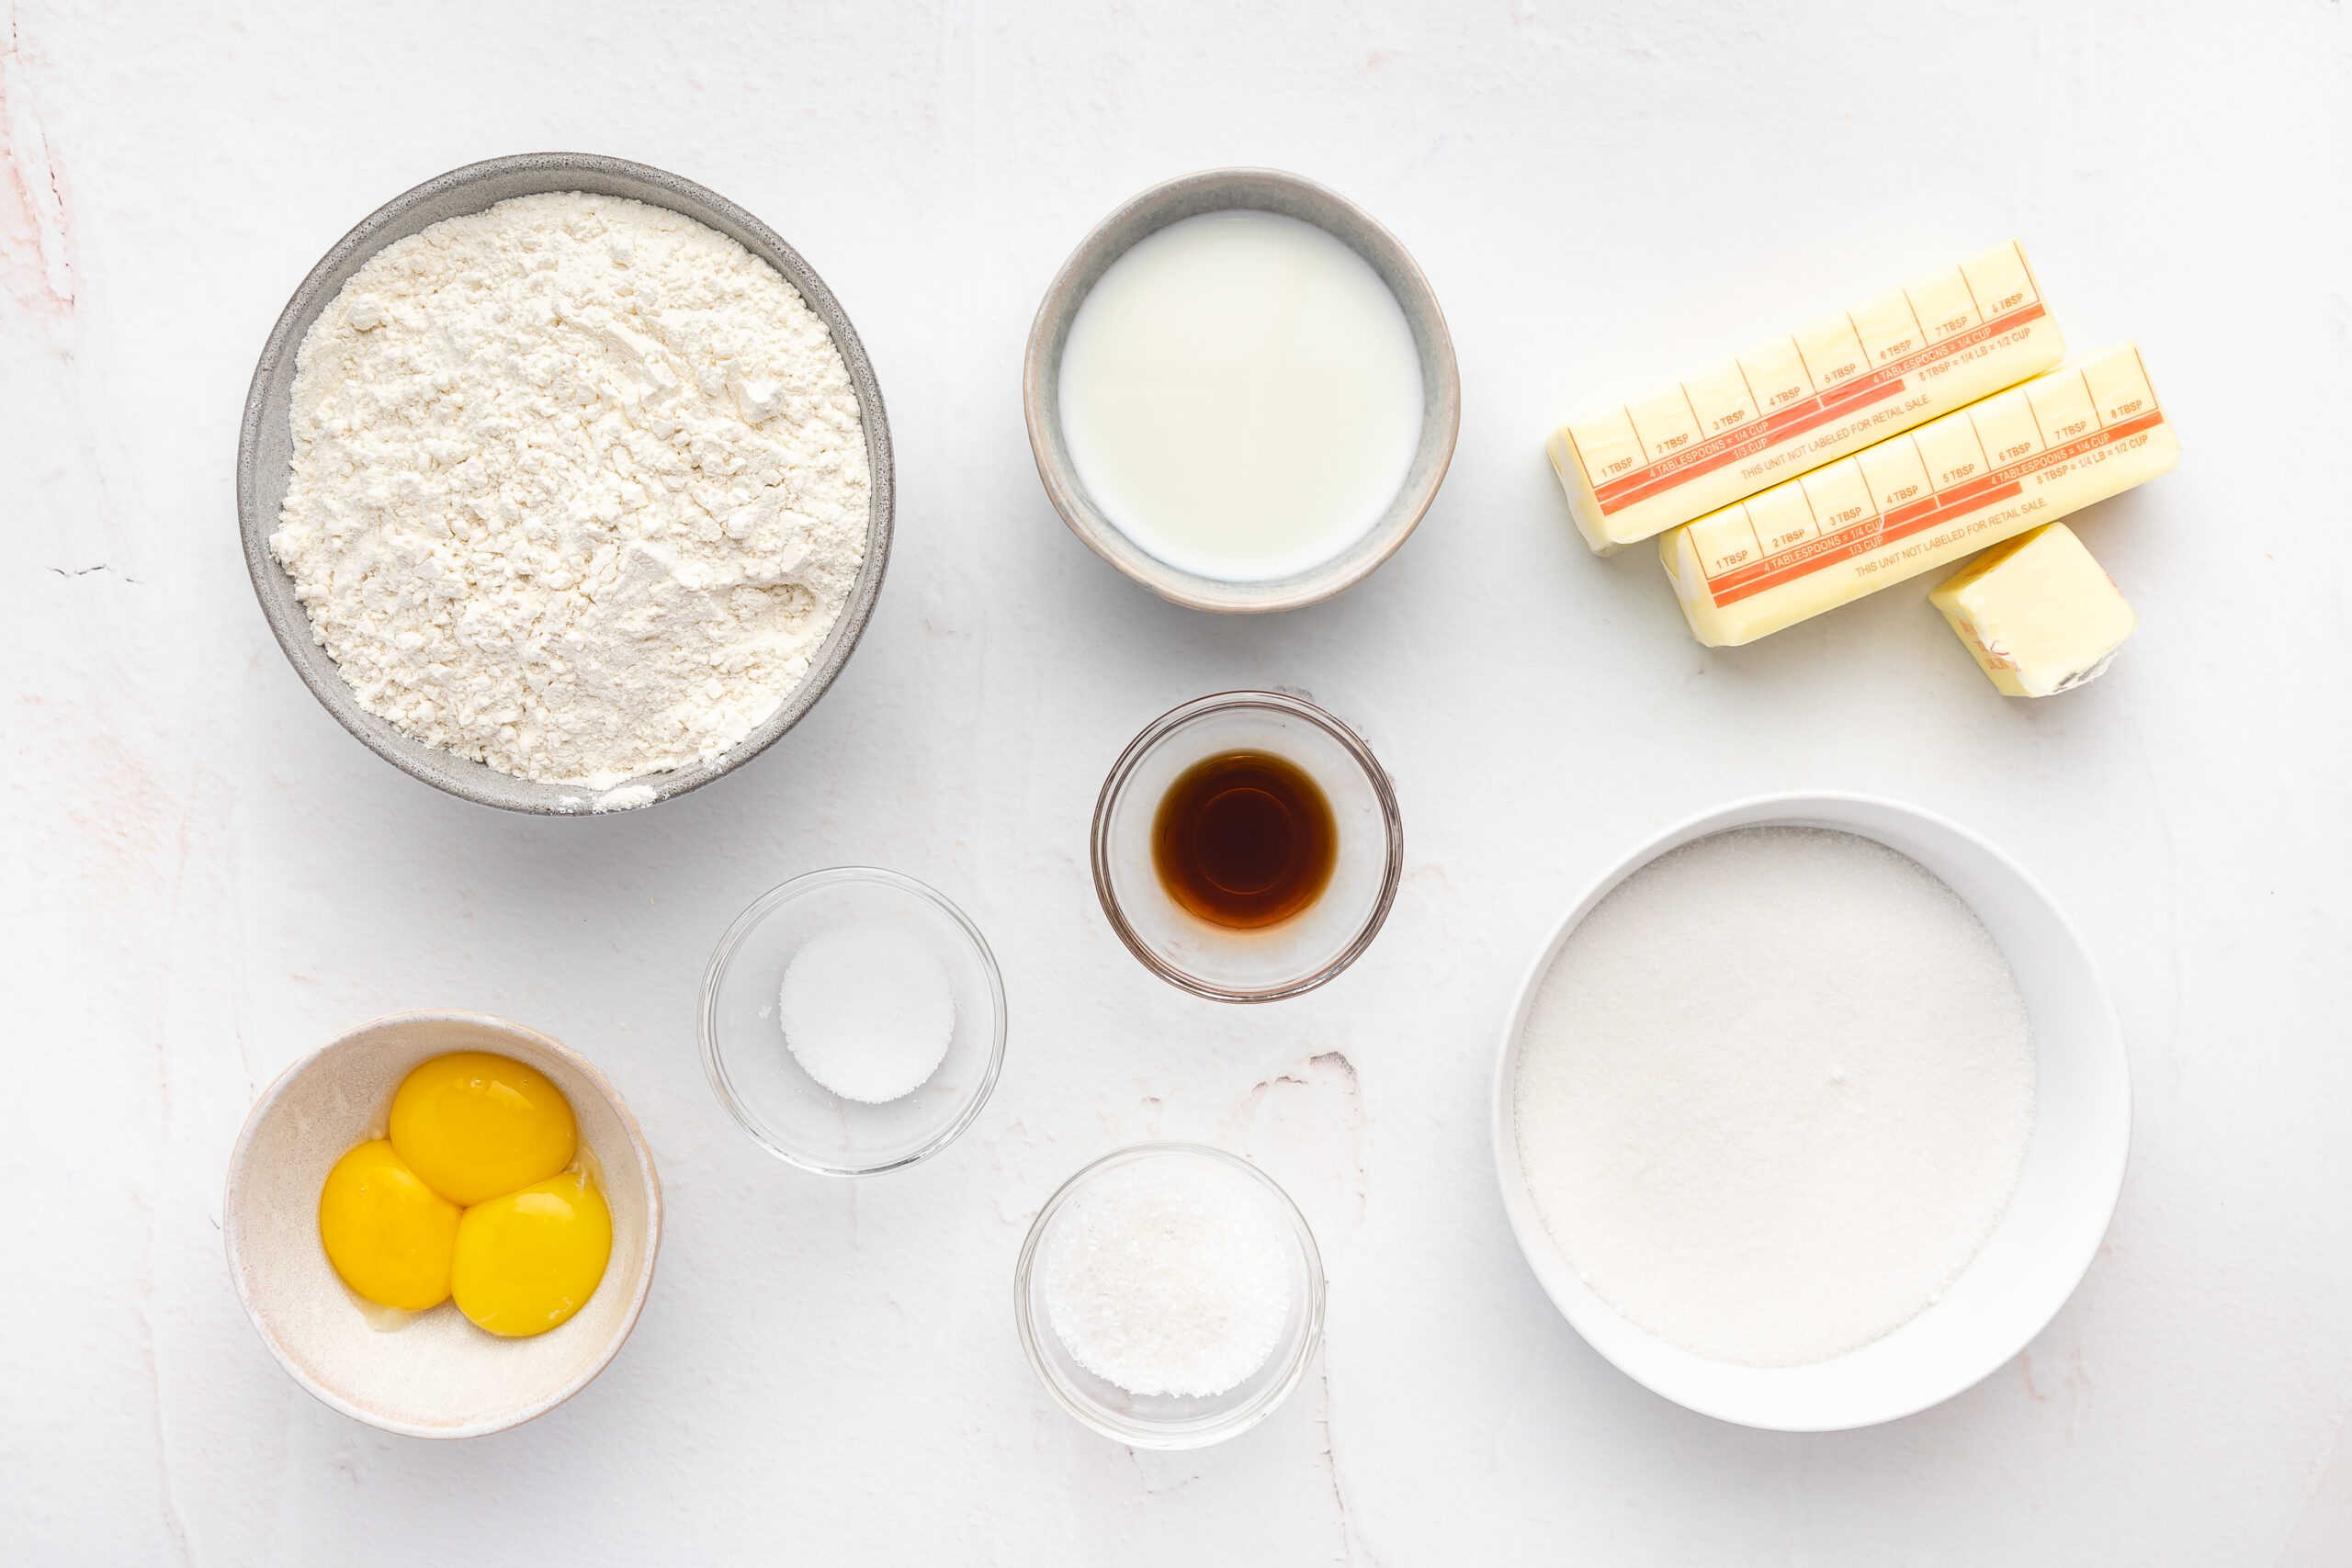
Gather your ingredients.
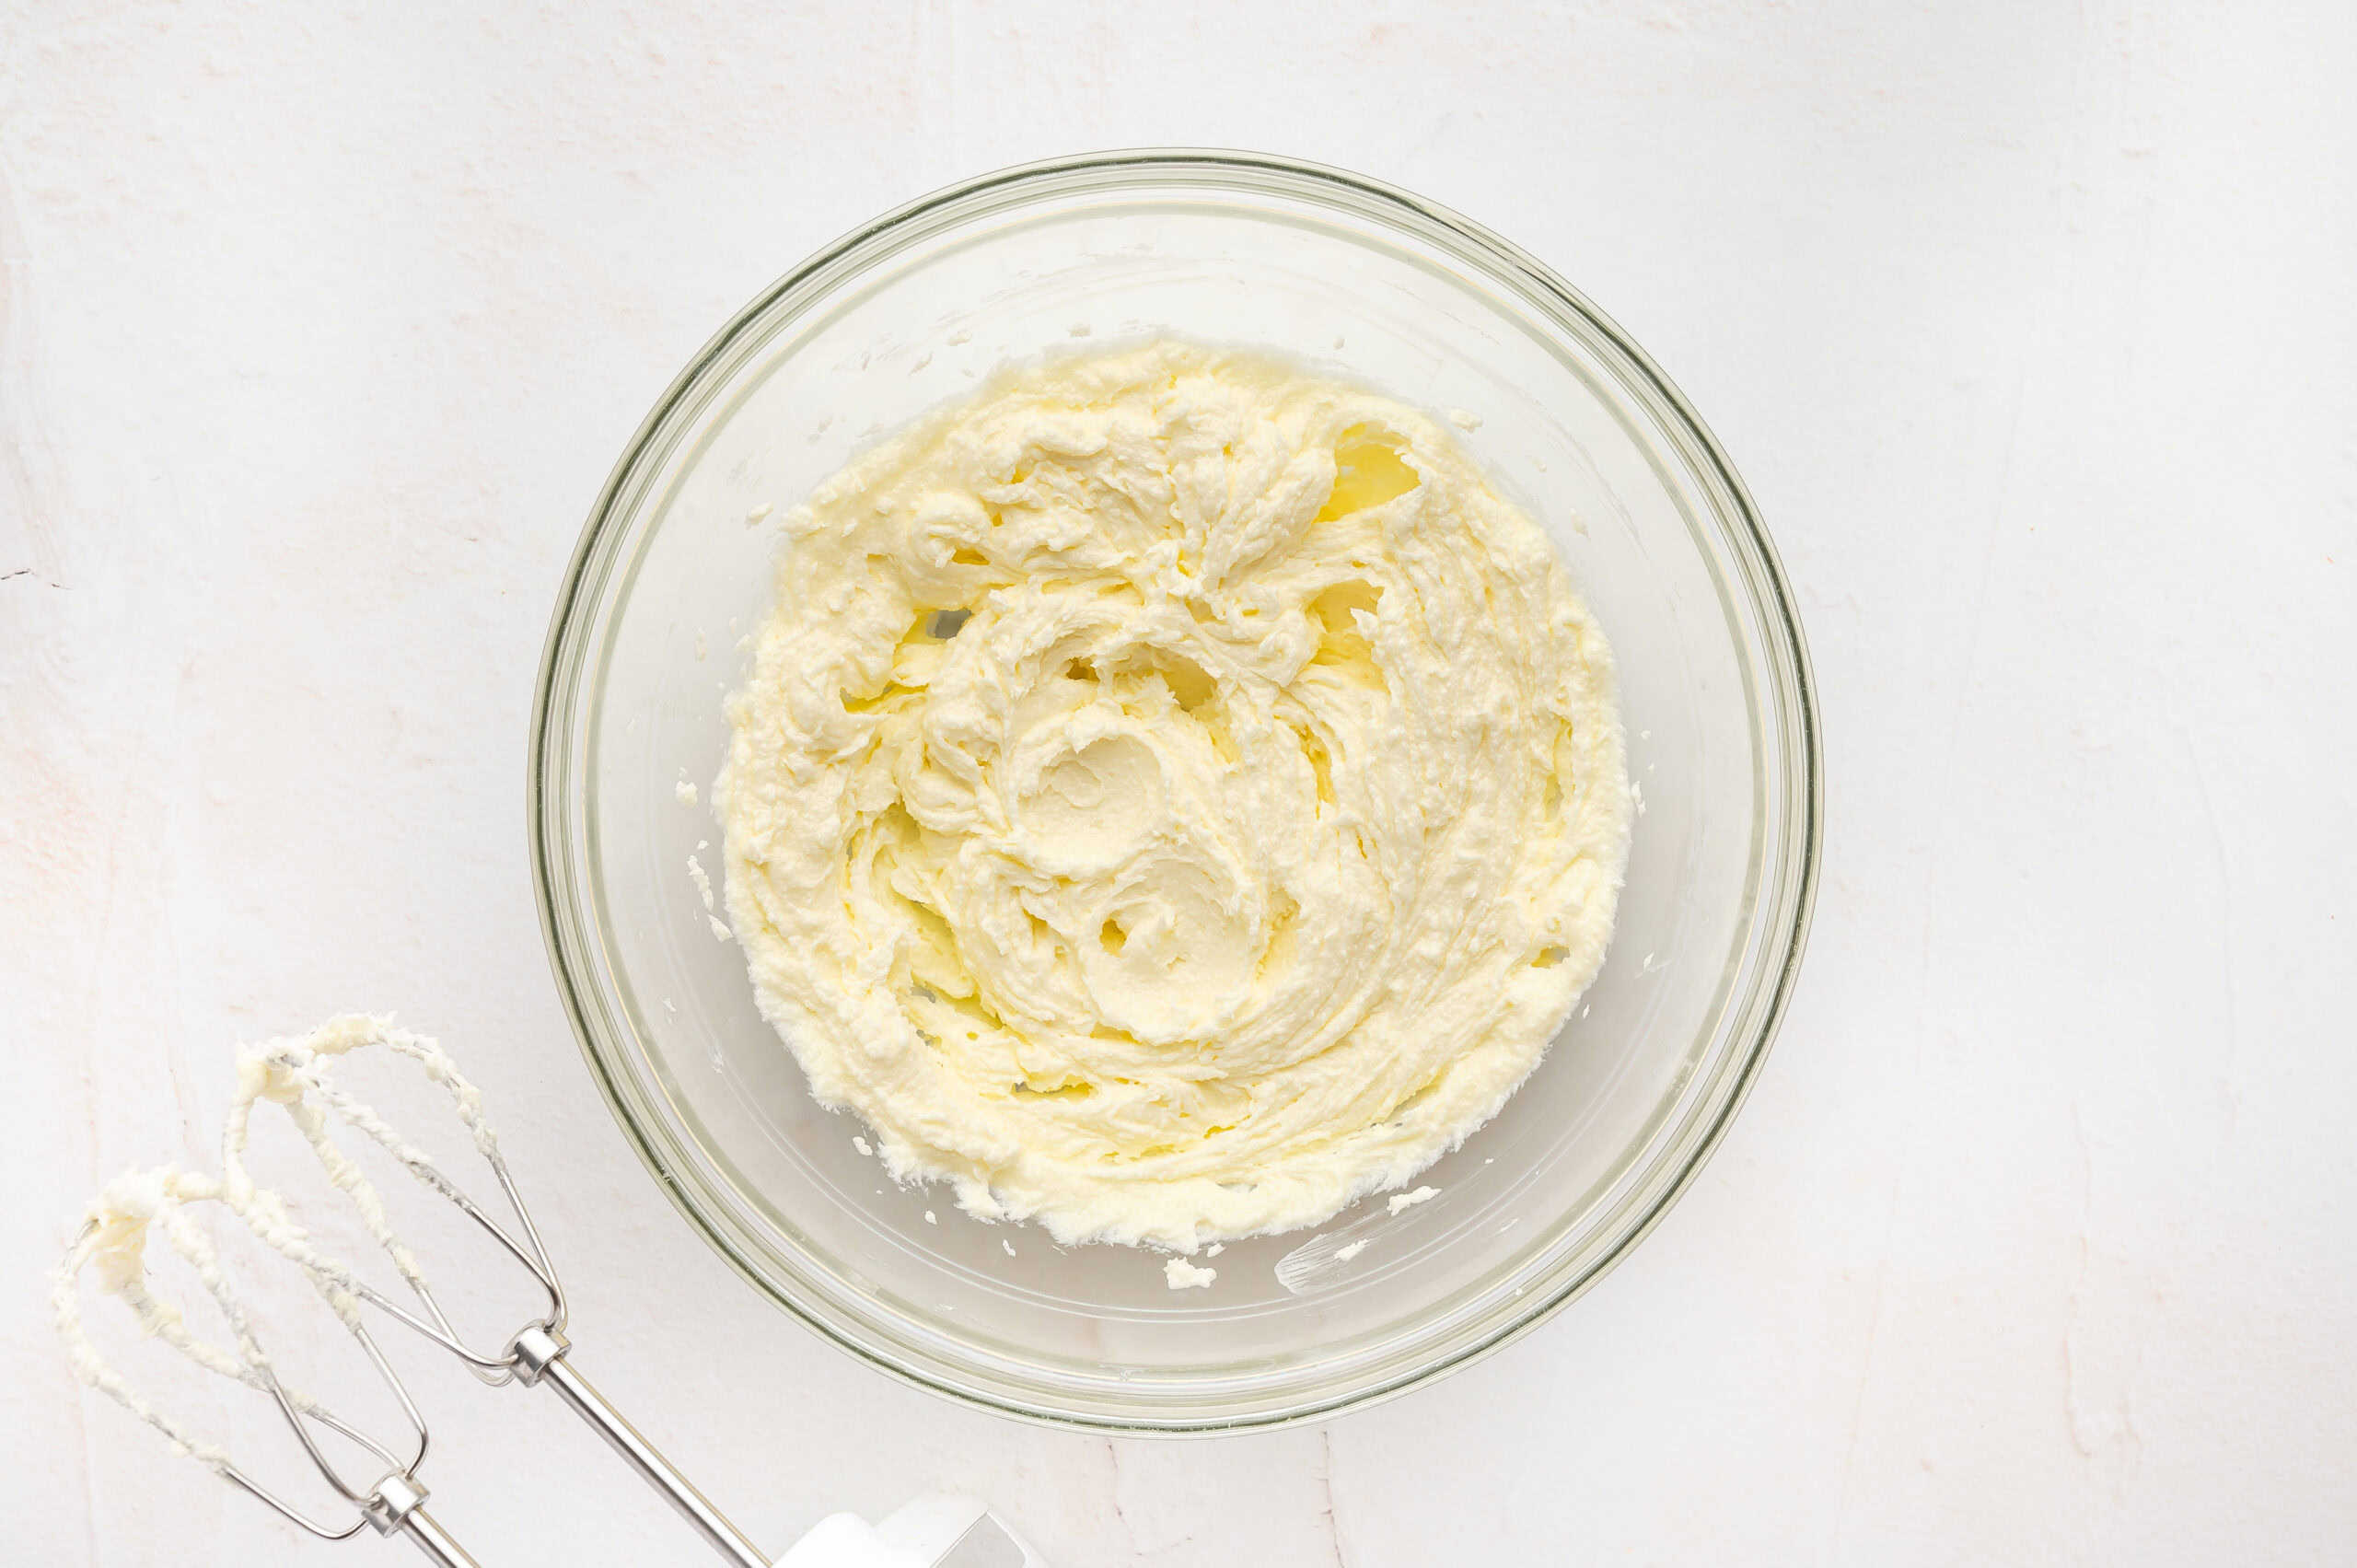
Get the oven going and cream the butter and sugar: Preheat oven to 350°F. Place 1 cup of sugar, ½ tsp salt, and 1¼ cups of room temperature butter into a mixing bowl and cream with a hand mixer on medium-low speed.
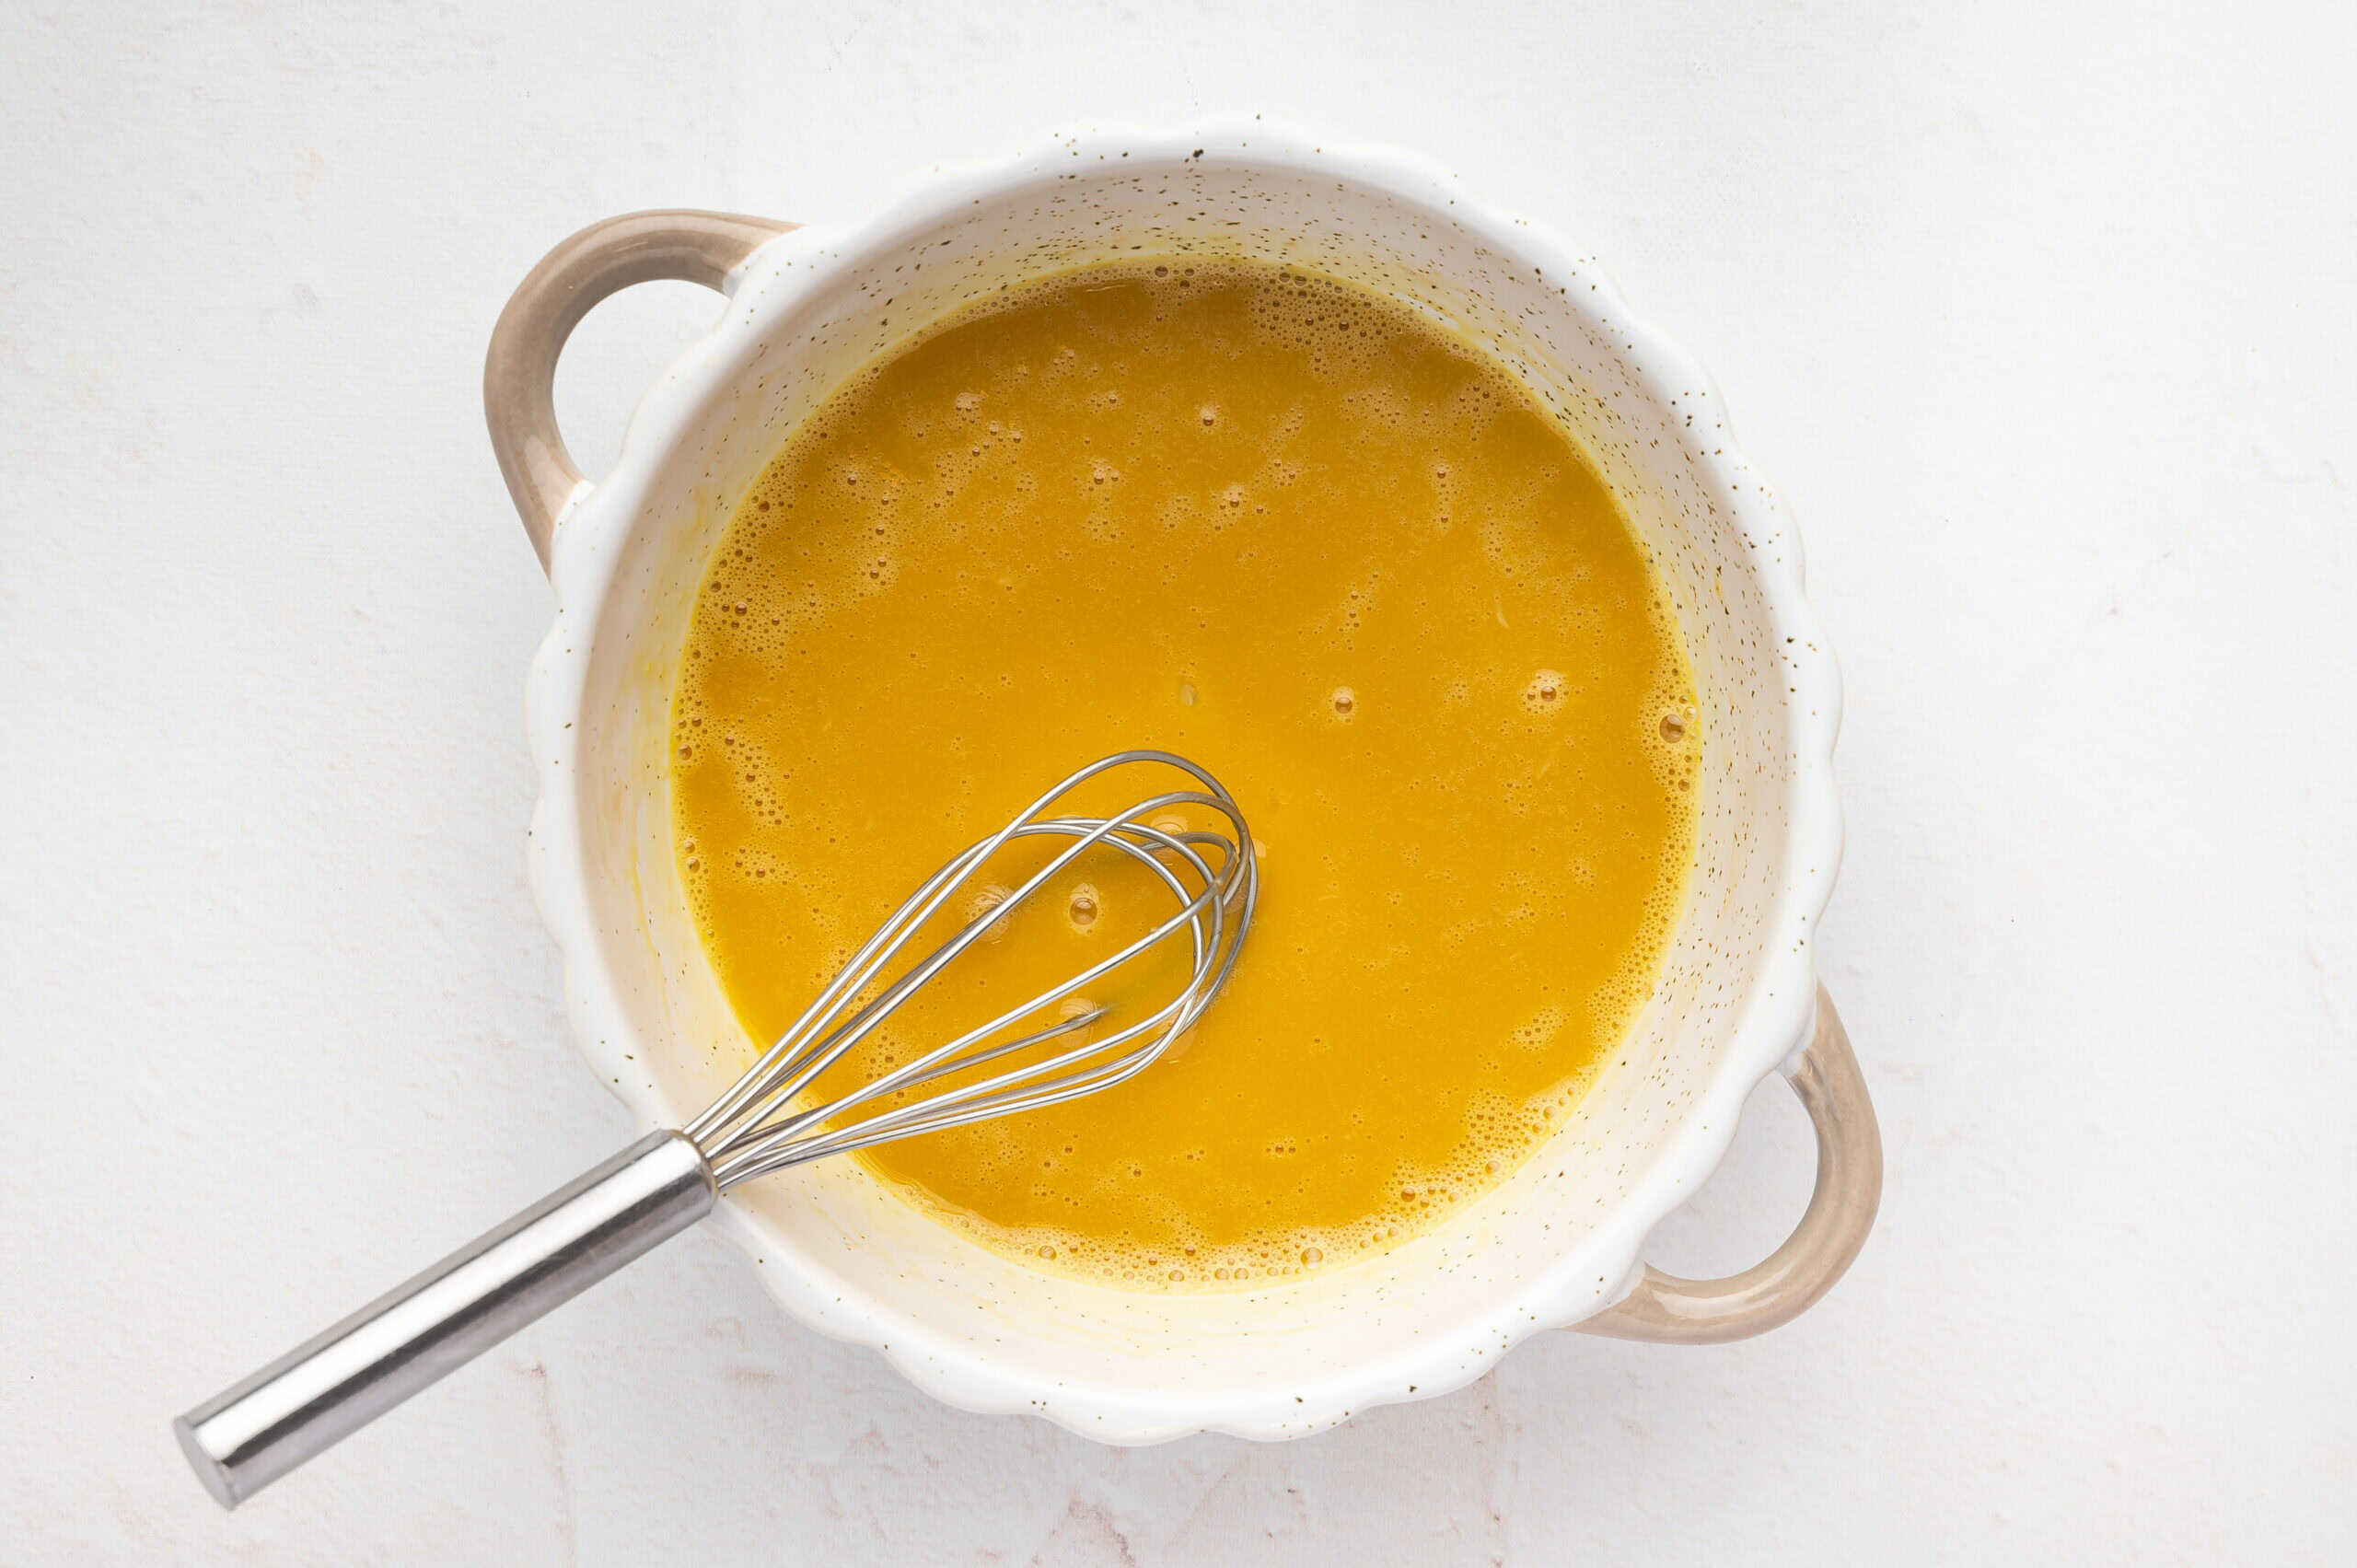
Beat the eggs: In a separate bowl, beat 3 egg yolks with 1 tsp vanilla extract.

Combine eggs with butter mixture: Add vanilla-egg mixture to the creamed butter and sugar and mix until combined.
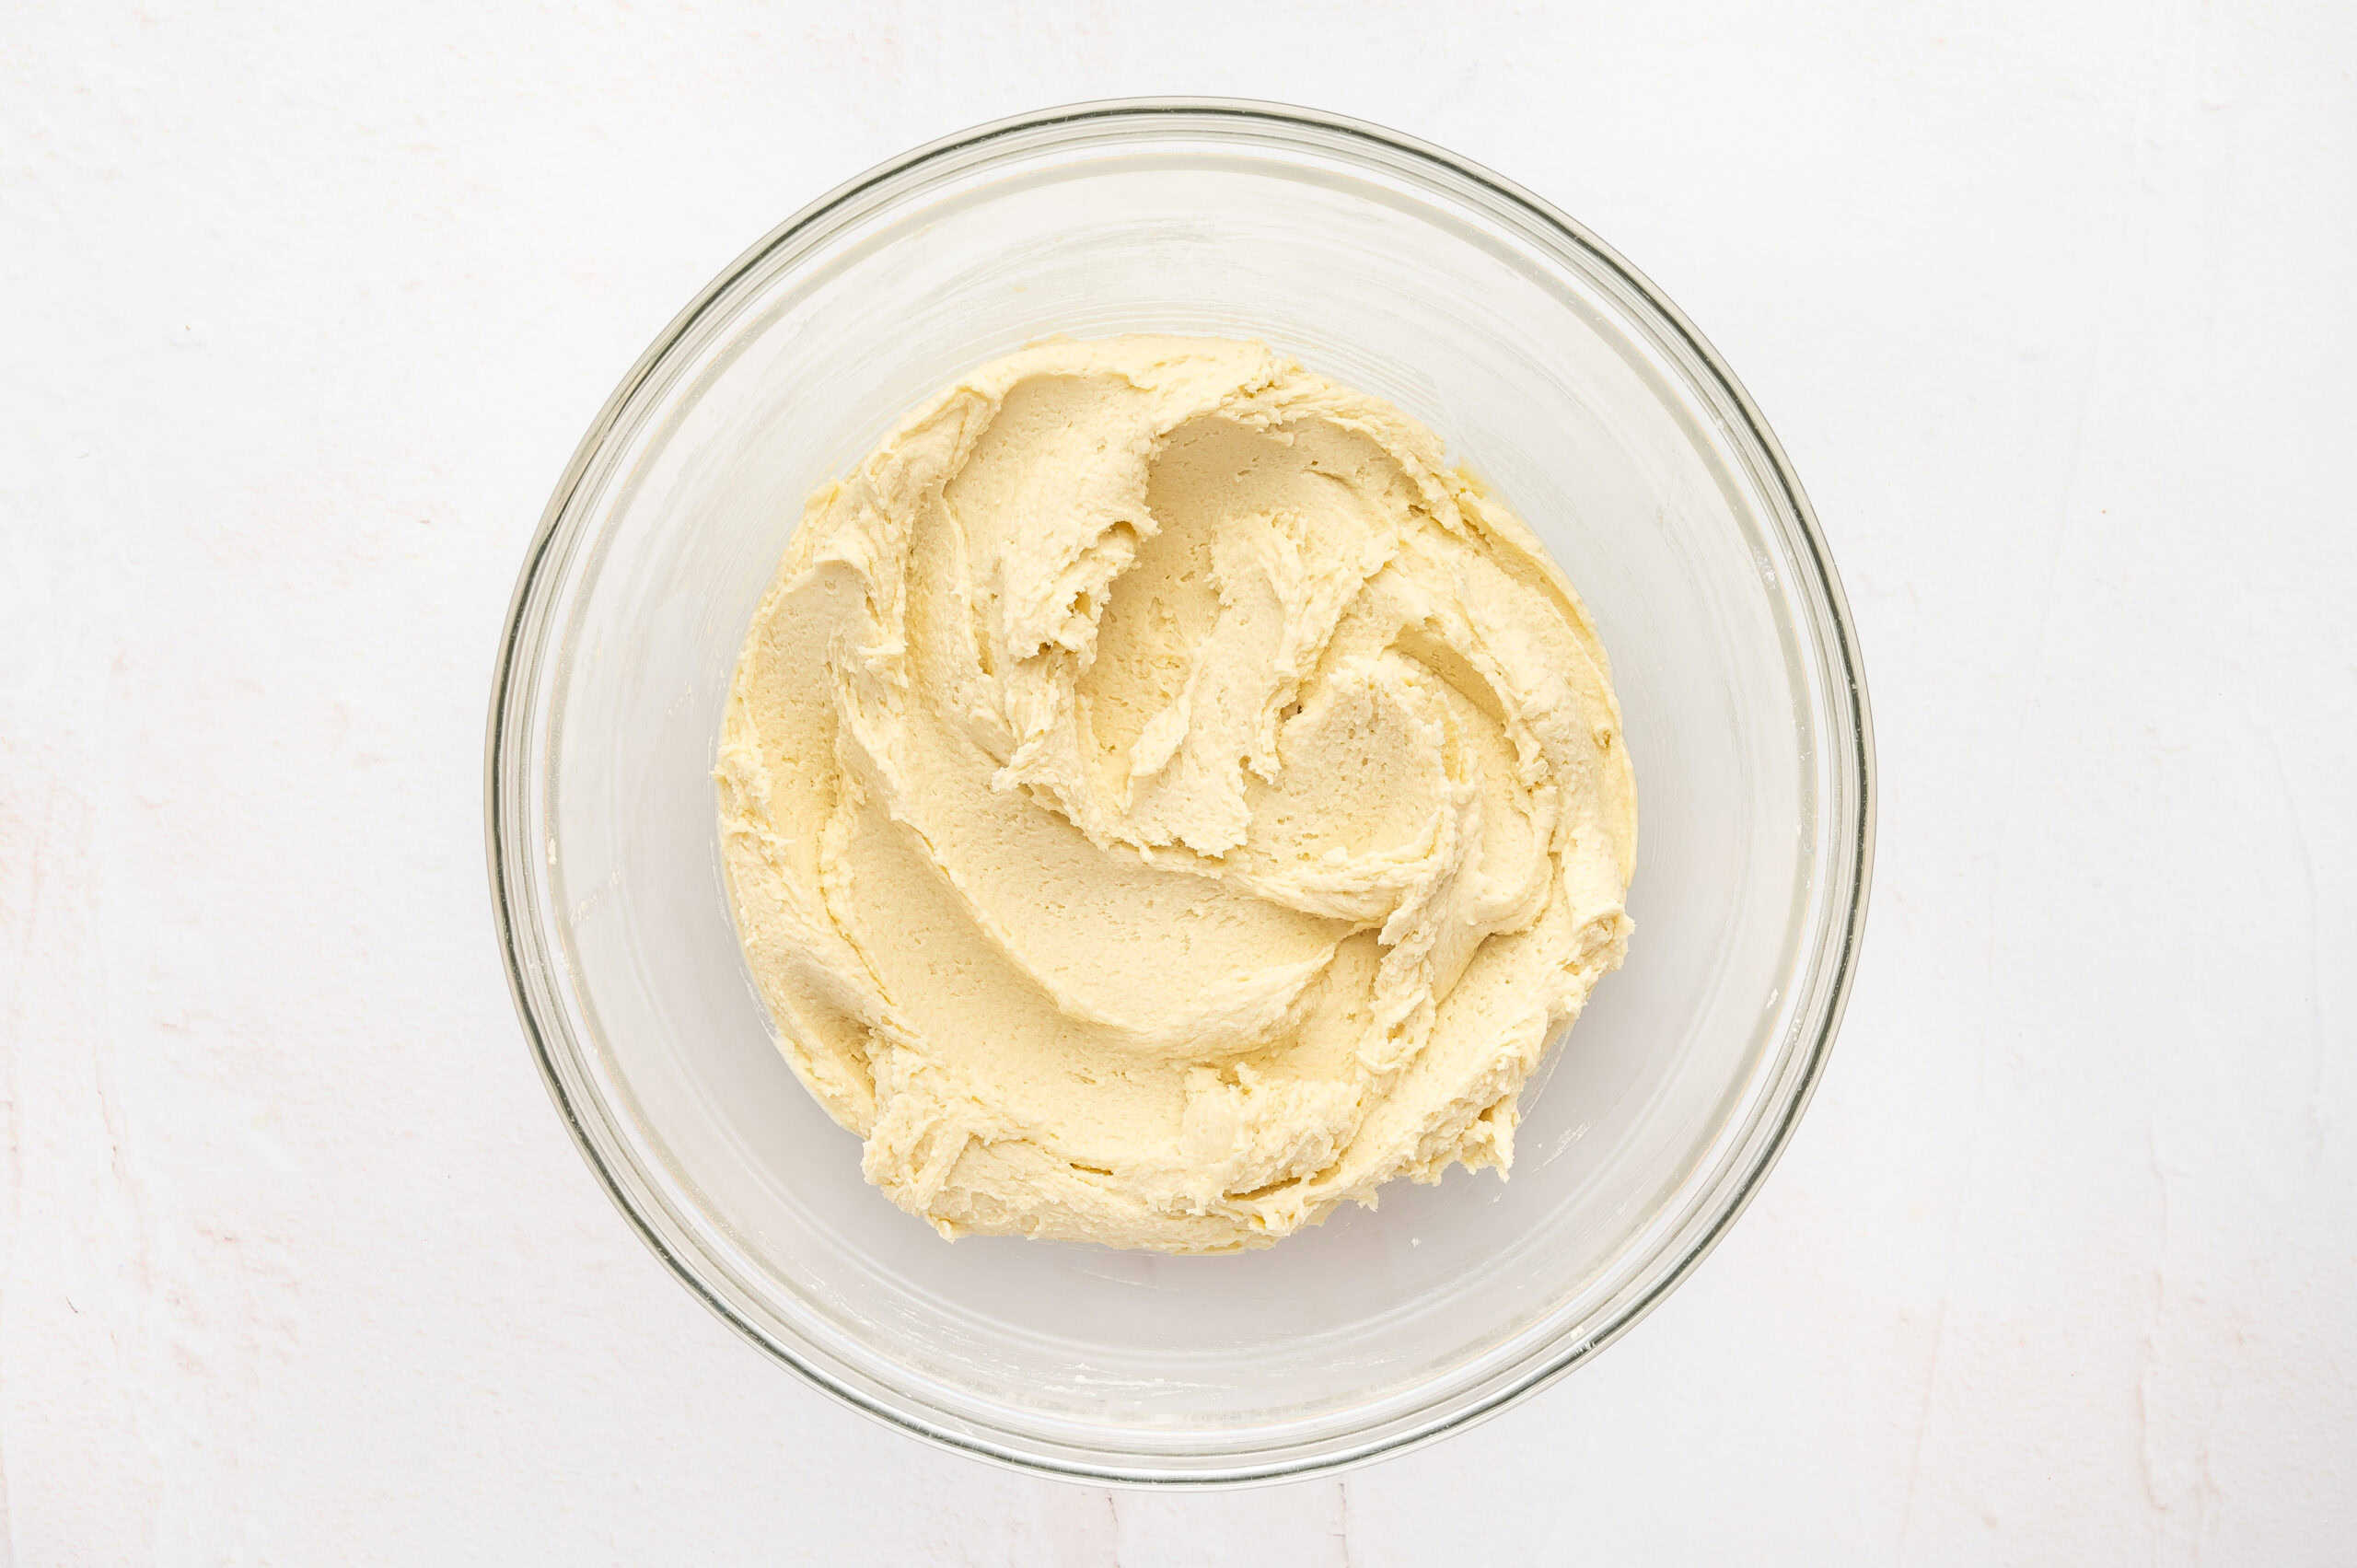
Add the flour: Add 2½ cups of flour, ¼ cup at a time, to the wet mixture until a sticky, thick dough forms.

Pour in the milk: Add ¼ cup of milk and mix on medium-low speed until combined.
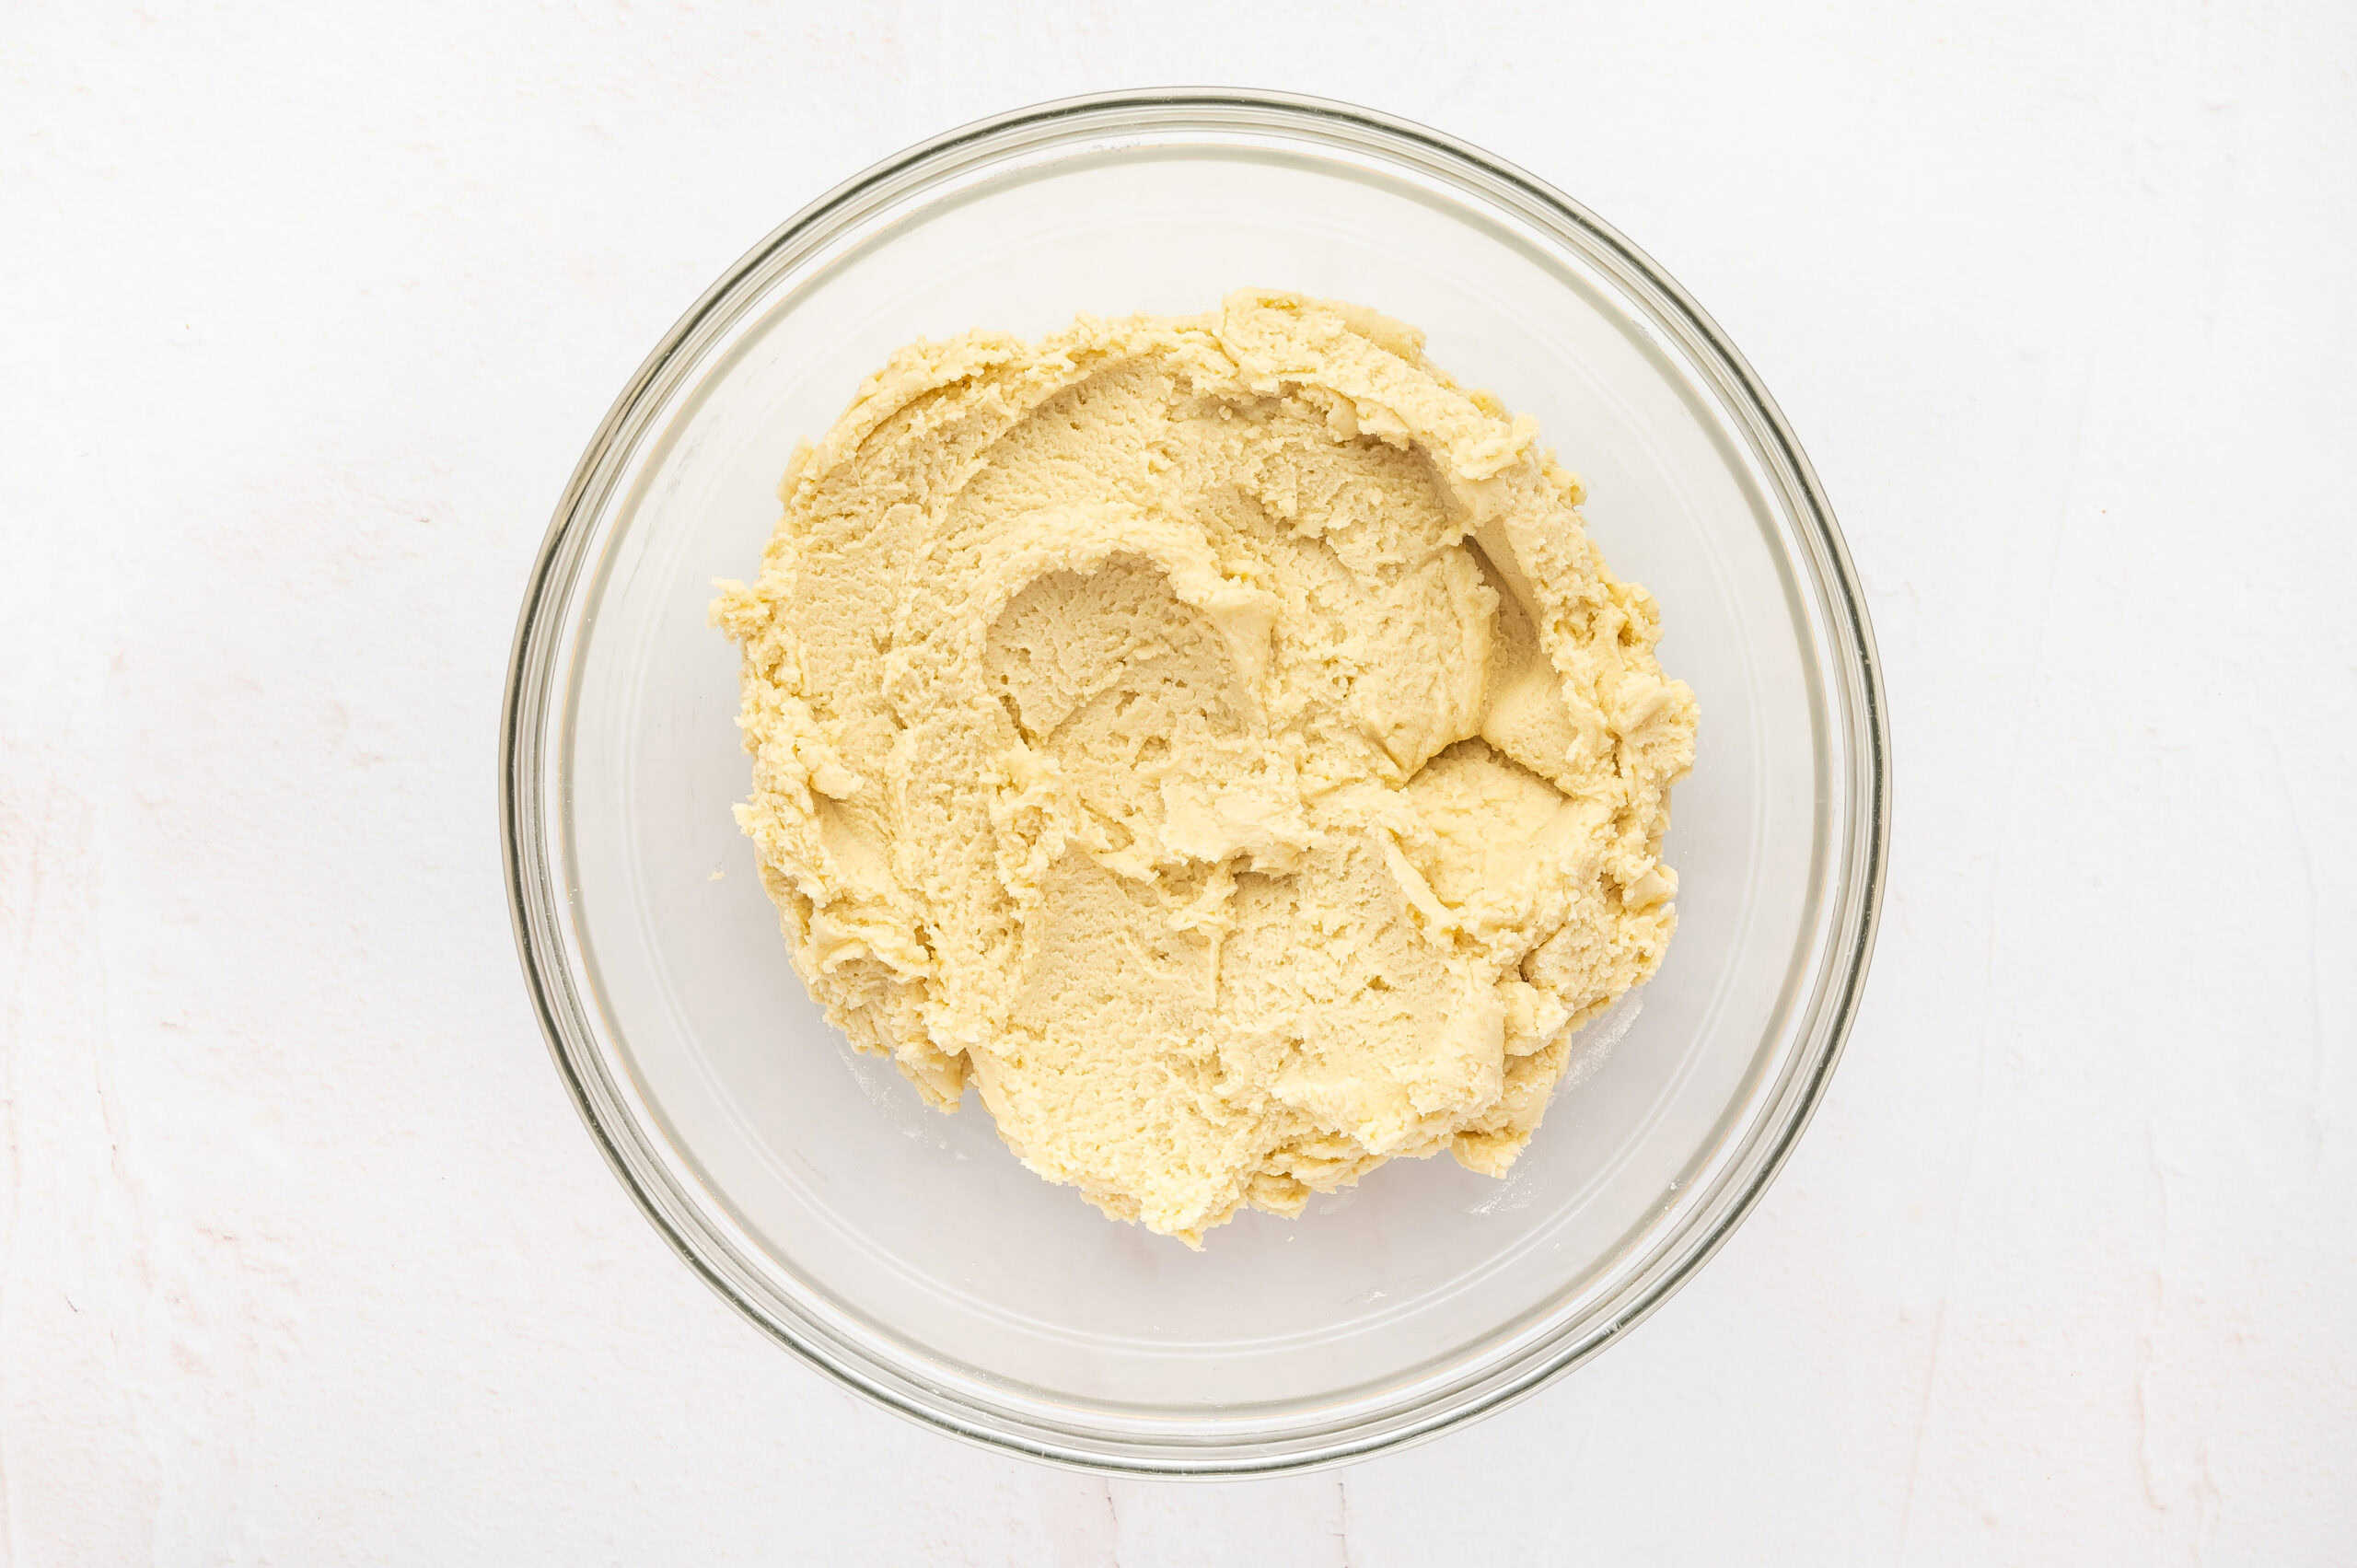
Add more milk, a teaspoon at a time, until your dough mixture is the consistency of Play-Doh. (I used 2 tbsp of additional milk total.)
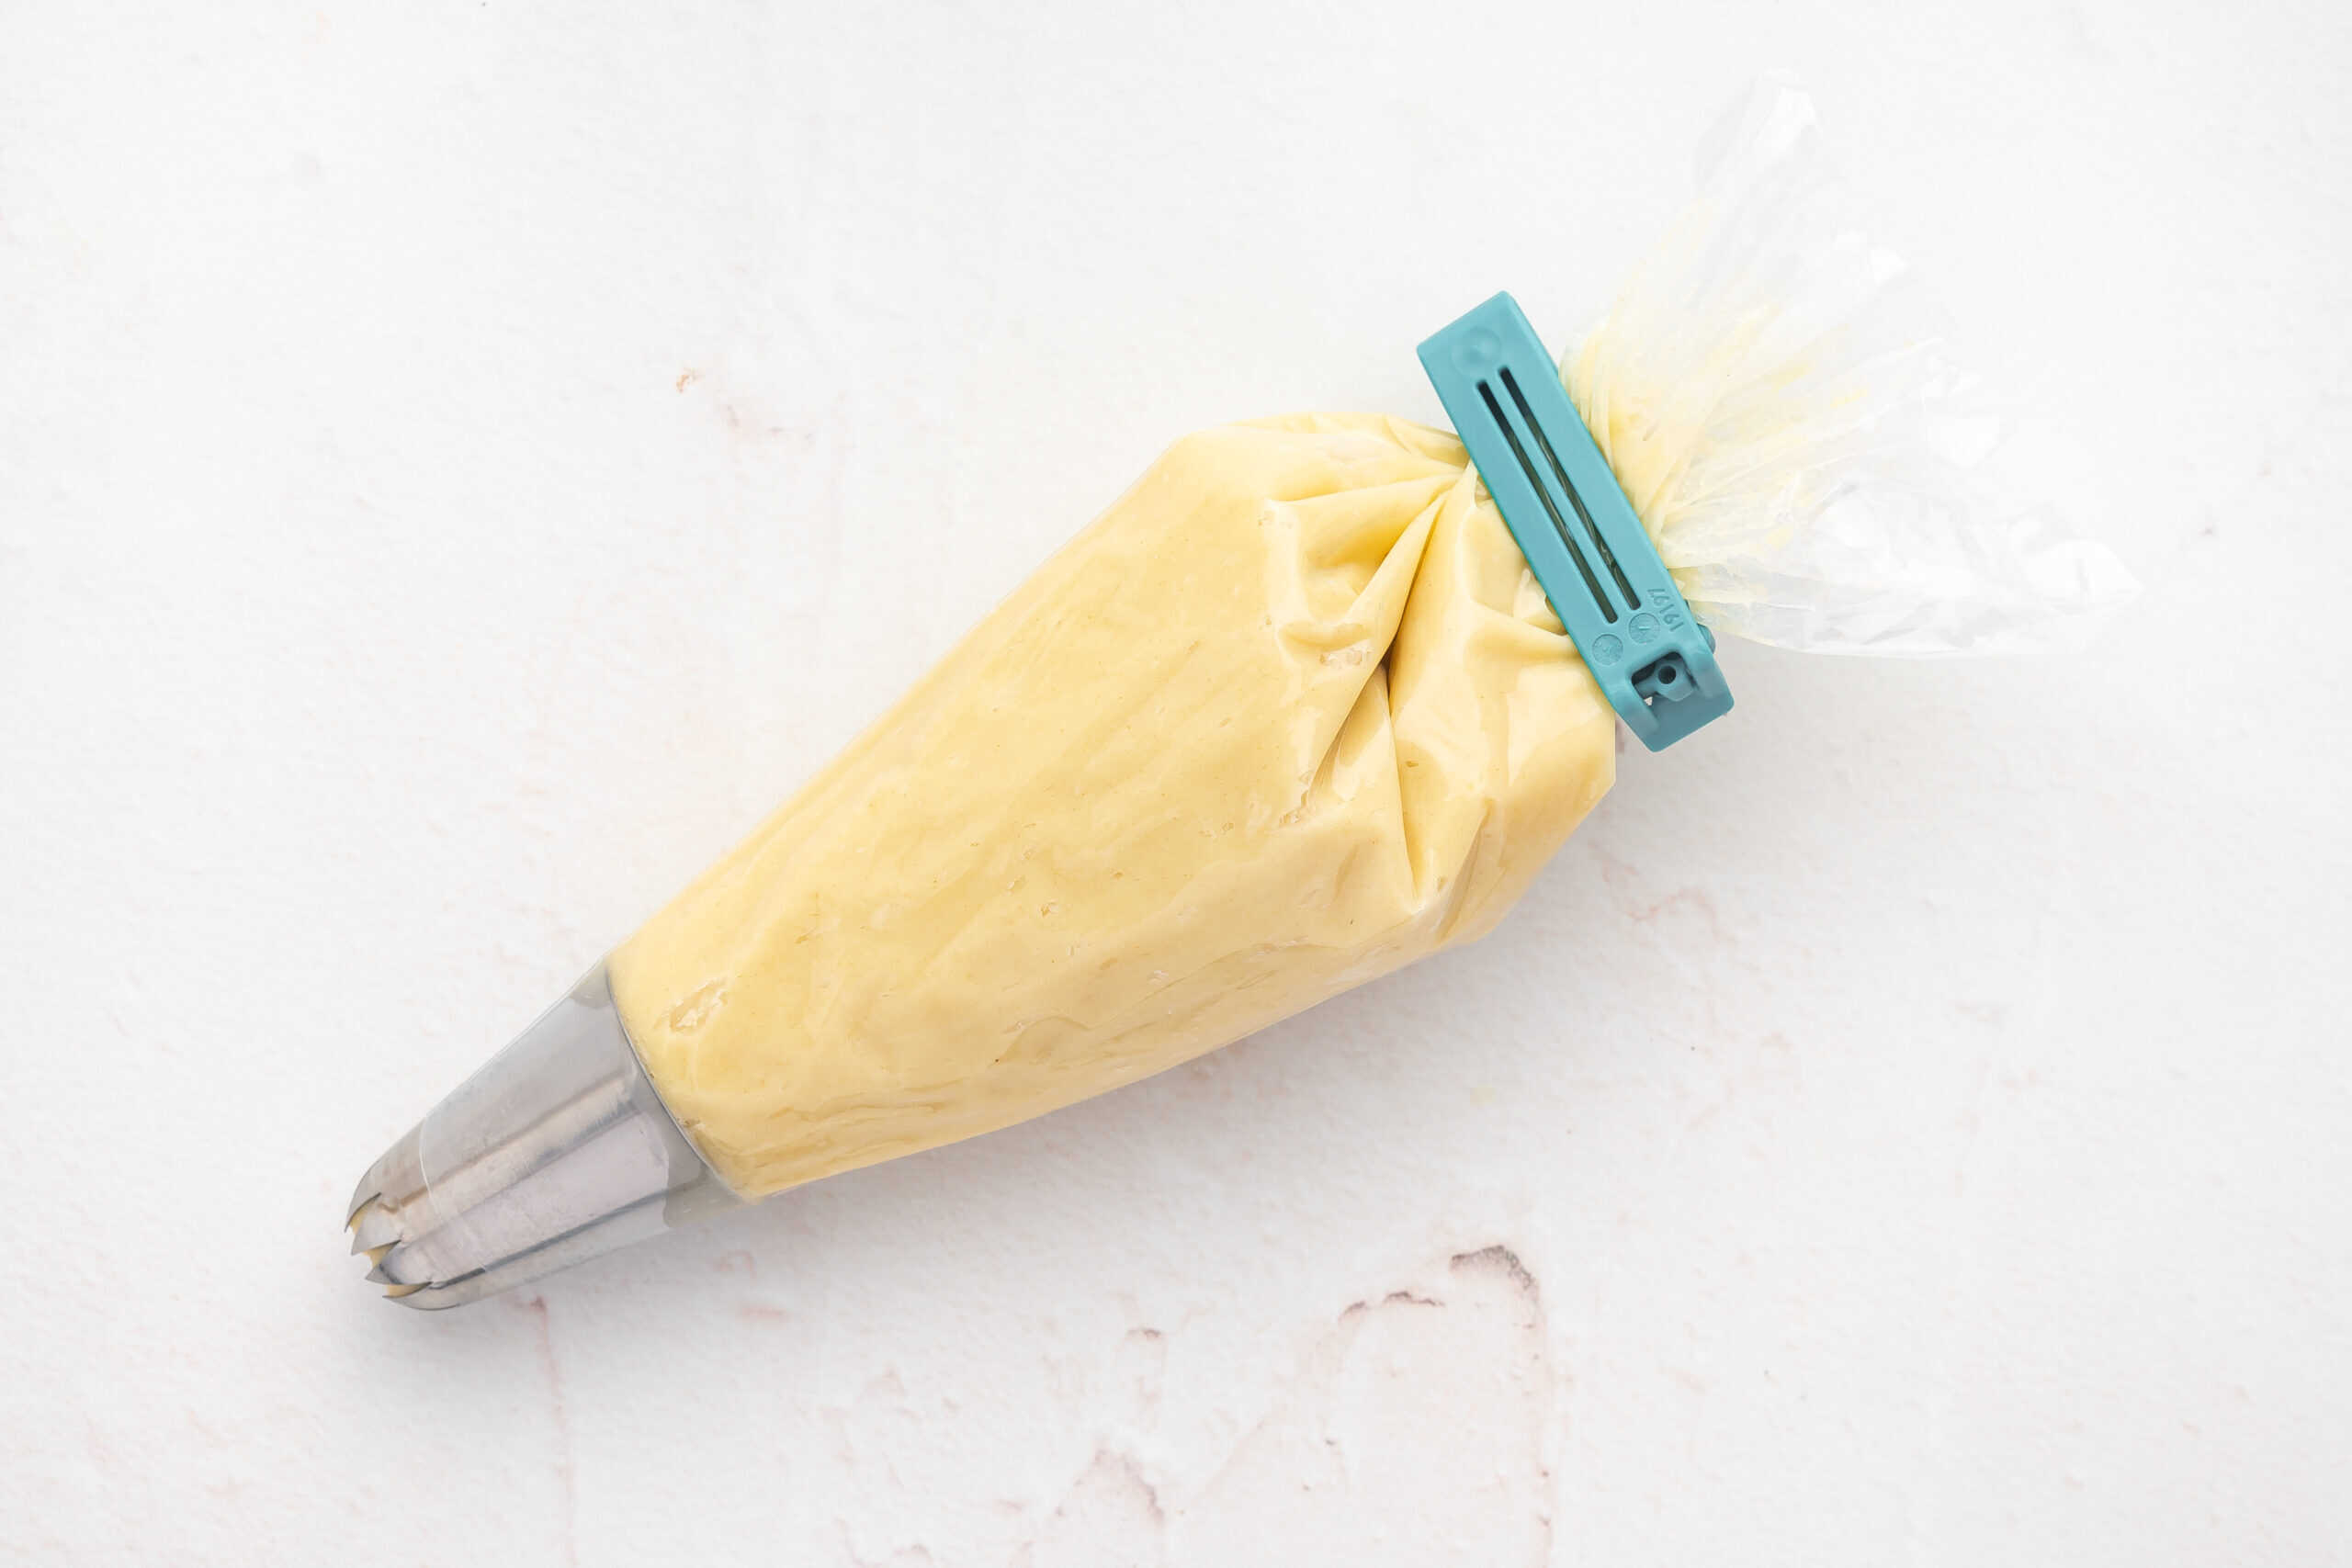
Test the dough: Line your cookie sheets with parchment paper and test your cookie dough consistency by adding ¼ cup of dough to the piping bag. If it’s too thick to pipe, put it back in the bowl and add another teaspoon of milk, mix, and try again.
Chill the dough: Chill the piped/shaped cookies for 5-10 minutes in the refrigerator before baking to ensure they hold their shape.
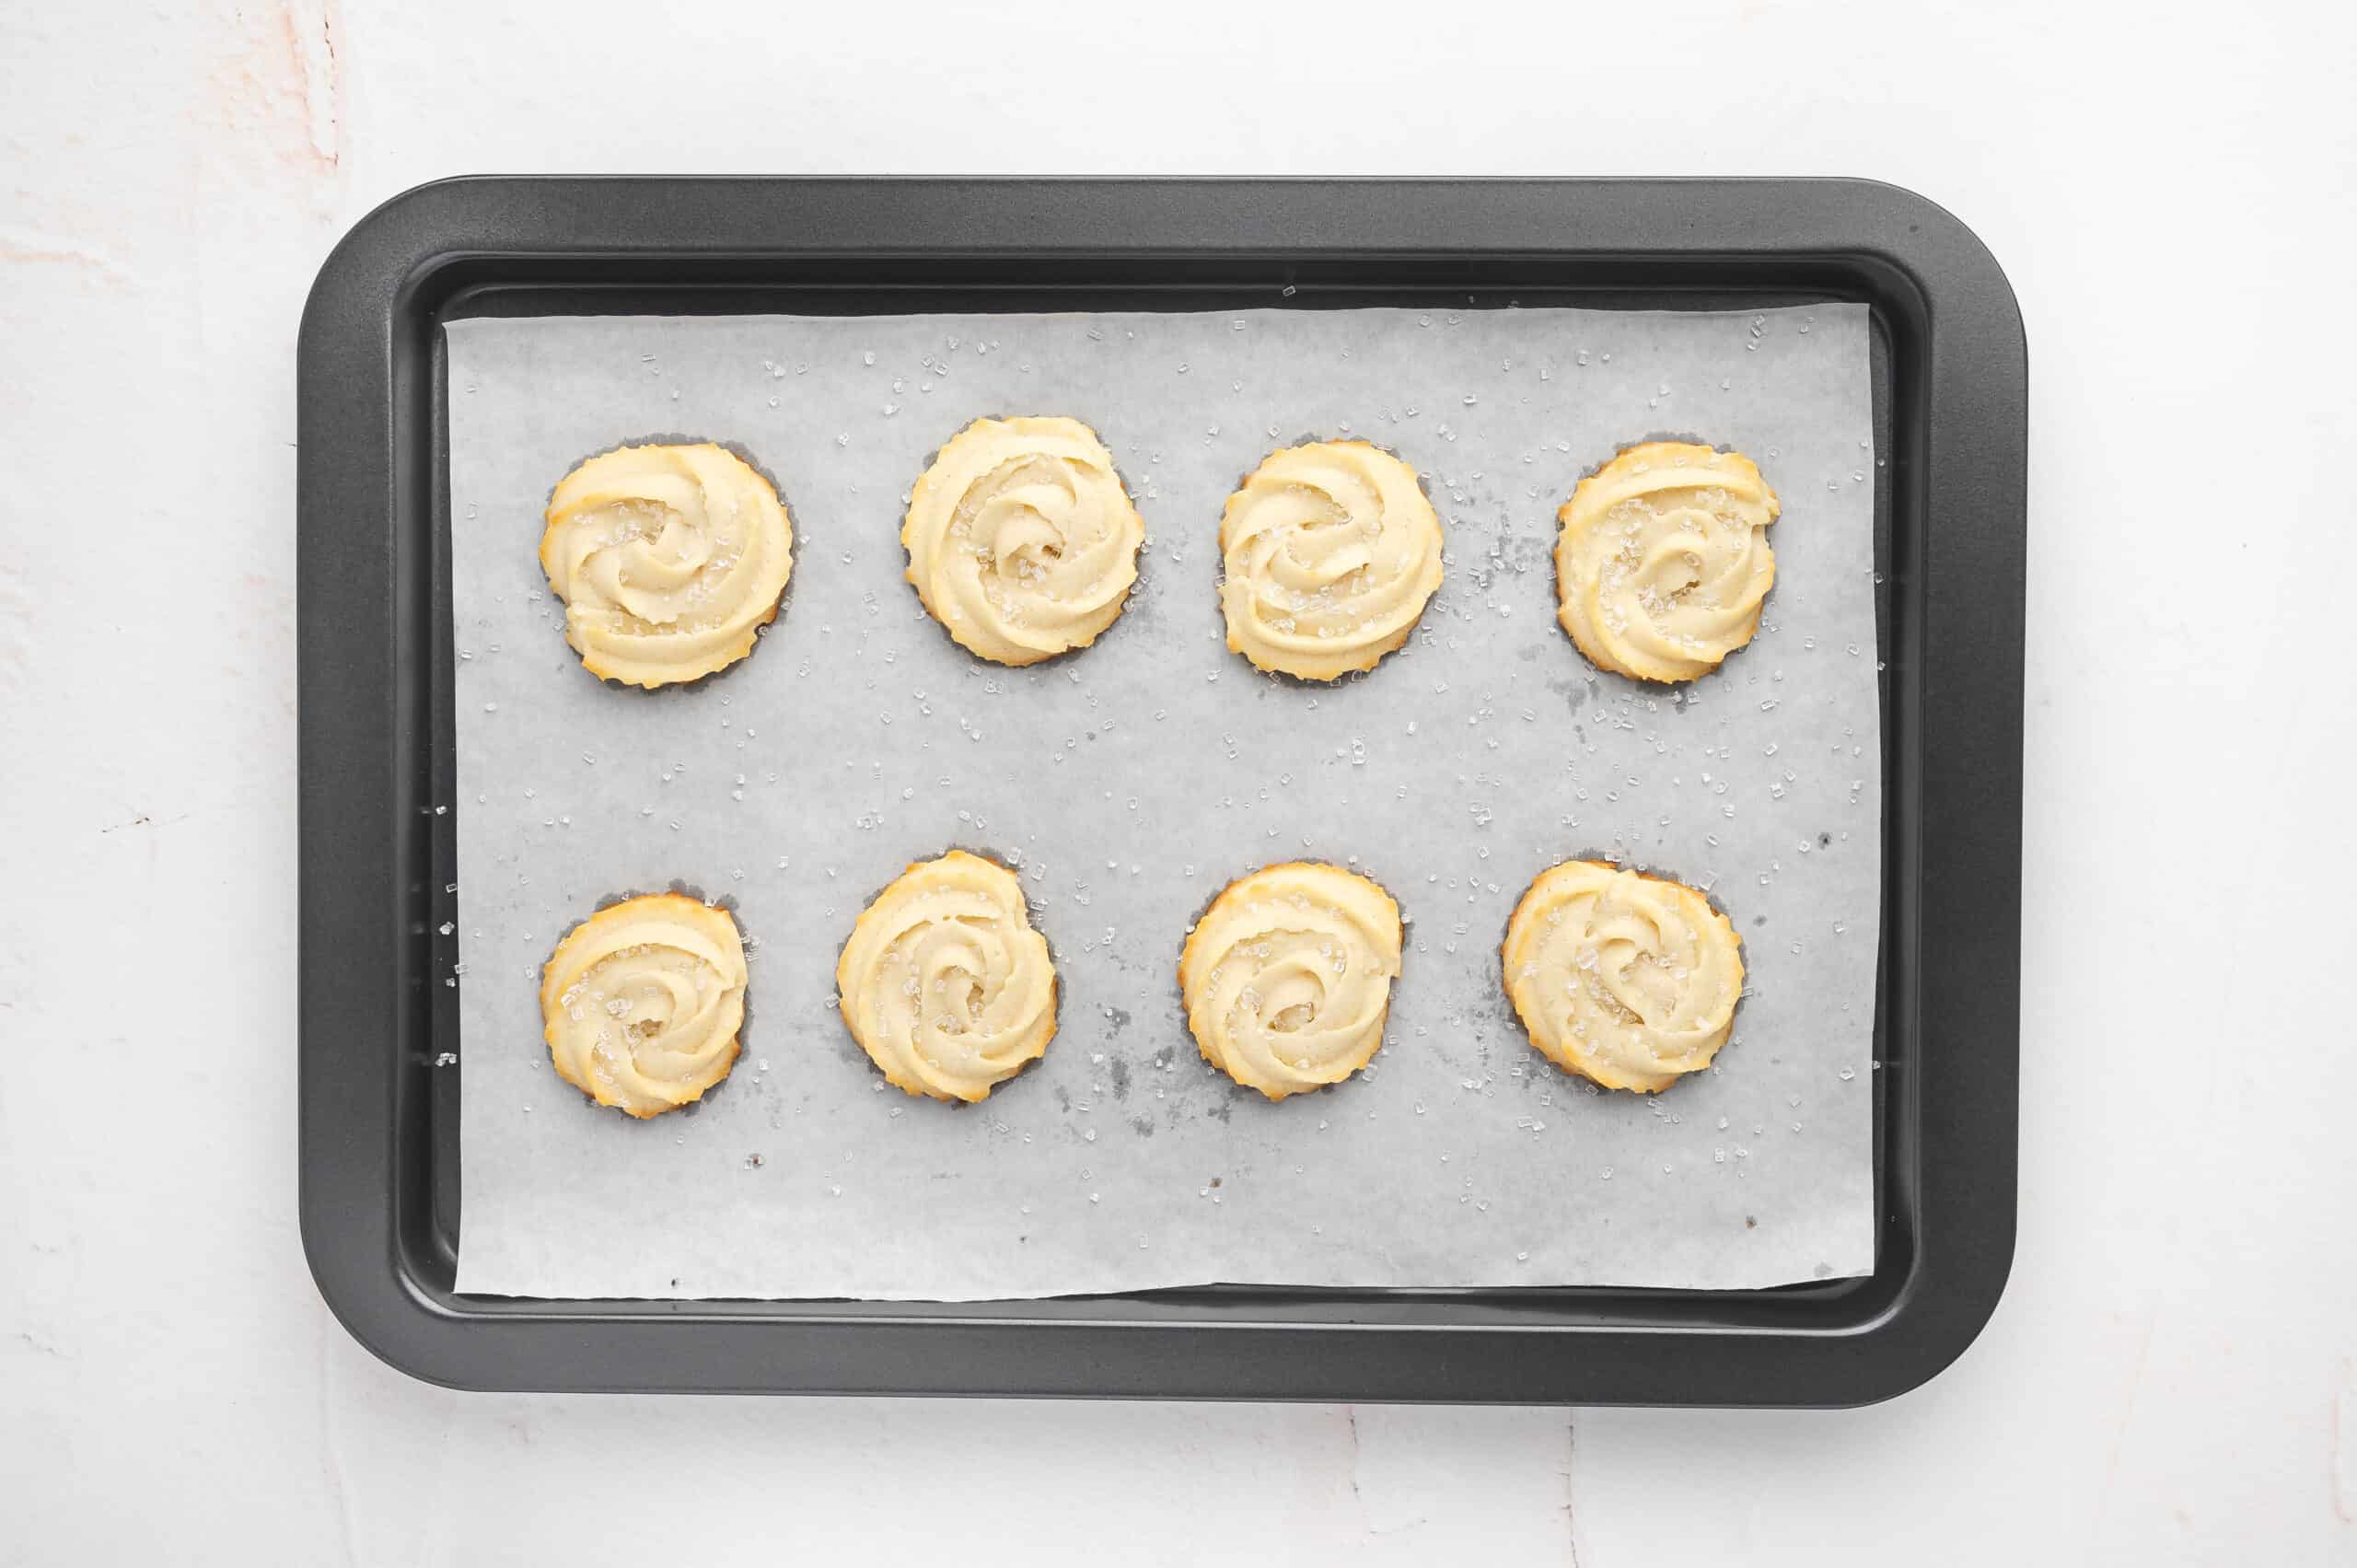
Bake: Bake the cookies for 15 minutes or until the edges are just beginning to turn golden. This is a dense cookie, so I don’t recommend underbaking or going for the soft center you’d want with a chewy cookie.
Add sugar and serve: While your cookies are warm out of the oven, sprinkle ¼ cup sanding sugar or granulated sugar on top to give them a sparkly, festive look and added texture. Serve and enjoy.
Recipe Variations
I’ve tested this simple recipe more times than I can count to create the perfect flavor, but I have some fun variations to share, too!
- Dip the cookies. Try dipping your baked and cooled butter cookies in melted chocolate and top with sprinkles for a festive twist.
- Use cookie cutters. I also tried rolling out the dough and using cookie cutters, which works well, but I recommend reducing the amount of milk and lowering the cooking time to 10 minutes.
How to Store
Baked butter cookies keep well in an airtight container at room temperature for up to 1 week. If gifting, I’d tell the recipient to store them in a cool, dry place.
They can also be frozen for up to 3 months in a freezer-safe bag or container. Thaw at room temperature before enjoying.
You can also try freezing your cookie dough after piping it into shapes. Line your baking sheet with parchment paper and directly pipe the dough onto the sheet. Freeze until solid, then transfer to a freezer-safe bag or container for up to 2 months. I’d bake them directly from frozen, adding a minute or two to the baking time. They probably won’t spread as much, but they’ll still be delicious.
What to Serve with Butter Cookies
I love creating fun and decadent cookies for my cookie platter every year. Along with these butter cookies, I like to bake traditional gingerbread cookies, these fun Grinch cookies, and a batch of crockpot candy.


We made these last year and plan to make them again this year. So easy and delicious.
Made this recipe twice – the first time I added too much liquid and they spread like crazy even though I chilled them. The second time I paid really close attention to adding the milk and the consistency of Play-Doh as mentioned. The dough did not need any extra milk. I chilled per instructions and they came out perfectly without losing their shape. SO, as always, it’s important to pay attention to the notes (and tips in the article.) Thanks Amy, I love your recipes!
These were lovely and perfect. Reminds me of my grandma at Christmas time.
Can these cookies be made in advance and be frozen thank you
Yep. All of that information is included in the article. Enjoy!