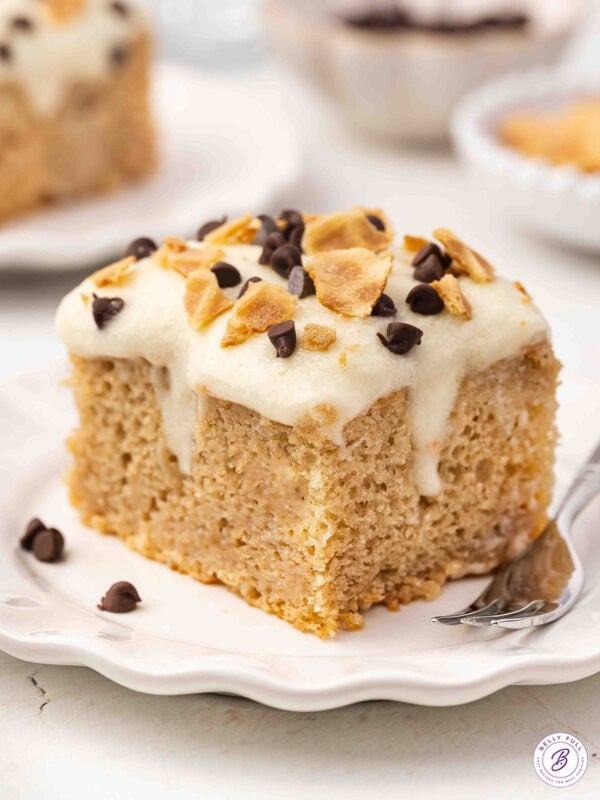
Sugar Cookie Campfire Cones
Published
Published

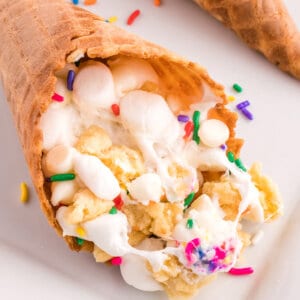
Featuring waffle cones stuffed with marshmallows, white chocolate chips, and sugar cookie pieces, these Sugar Cookie Campfire Cones are a fun, easy campfire treat. Directions for baking & grilling also included. You’ll want to make these all summer long!

Pin this now to find it later
Pin ItThis post may contain affiliate links. If you click on one and make a purchase, we may earn a small commission at no extra cost to you. We only recommend products we genuinely love.
Easy Campfire Cone Recipe
To me, food prep is the hardest part about camping, so I’m always on a mission to come up with fun and creative campfire treats and dinners. We always make some version of this kielbasa and vegetable foil pack for dinner and these campfire cones have become our go-to dessert.
These sugar cookie campfire cones are loaded with mini marshmallows, white chocolate chips, and soft sugar cookie bits, plus some fun sprinkles, but there are so many variations you can make. We’ve made s’mores campfire cones, chocolate peanut butter cones, and more. You’ll find lots of ideas below!
And if camping and campfires aren’t your thing, don’t worry – these can just as easily be made in the oven or on the grill.
What You’ll Love This Campfire Treat
Here are a few reasons we love to make these campfire cones all summer long.
- Family-friendly. Loved by kids and adults alike! They’re also easy enough to make that the kids can help assemble them too.
- Lots of variations. While I’m partial to this sugar cookie version, there are so many different ways to make campfire cones. I’ve included several tasty variations below.
- Quick and easy. It takes just a few minutes to assemble these and about 10 minutes to cook them.
- No campfire needed. Despite the name, you don’t have to have a campfire to make these! I’ve included directions for baking them and using the grill as well.

What Are Campfire Cones?
A campfire cone is a delicious and fun treat that is often made during camping trips or outdoor gatherings.
It typically consists of a waffle cone filled with a variety of sweet ingredients, which are then wrapped in aluminum foil and heated over an open flame, grill, or baked in the oven until the ingredients are melted and the cone is warm and crispy. They are a fun and customizable snack that can be enjoyed by everyone!
Ingredients Needed
To make this fun campfire treat, you need only a waffle cone and your desired fillings.
(Scroll below to the printable recipe card for details and measurements.)
- Waffle cones – Use waffle cones, not regular ice cream cones. Regular ice cream cones are not sturdy enough to hold the fillings and survive the heat of the fire or grill.
- Fillings – For these sugar cookie campfire cones, we’re using mini marshmallows, white chocolate chips, sugar cookie pieces, and sprinkles. You can get soft sugar cookies at the store or bake our popular 3 ingredient sugar cookies in advance.
Campfire Cone Variations
There are so many different variations to this fun campfire treat. Here are a few of our favorite combinations:
- S’mores Cone: Fill your cone with mini marshmallows, chocolate chips, and broken graham cracker pieces for a classic s’mores flavor.
- Mint Chocolate Cone: Fill your cone with mini marshmallows, mint chocolate chips, chopped Andes mints, and a drizzle of chocolate sauce for a refreshing and chocolatey dessert (add chocolate sauce after cooking).
- Twix Cone: Fill your cone with mini marshmallows, chopped Twix bars, chocolate chips, and caramel sauce (add caramel sauce after cooking).
- Chocolate Peanut Butter Cone: Fill your cone with mini marshmallows, Reese’s Mini Peanut Butter Cups, Reese’s Pieces, and chocolate chips for a delicious and satisfying snack. Add melted peanut butter and/or chocolate sauce after cooking, if desired.
- Cinnamon Toast Crunch Cone: Fill your cone with mini marshmallows, cinnamon sugar, Cinnamon Toast Crunch cereal, and a drizzle of dulce de leche or caramel sauce for a sweet and crunchy treat (add sauce after cooking).

How to Make Campfire Cones
These campfire cones can be cooked over the fire, on the grill, or in the oven so you can enjoy them anytime!
(Scroll down to the printable recipe card for all the details and don’t miss the helpful tips and video below.)
- Fill the cones. Fill the bottom of the cone with a few mini marshmallows to act as a “plug” and prevent the bottom from leaking. Then layer the white chocolate chips, sugar cookies, sprinkles, and remaining marshmallows until filled. Gently press down the layers, as they will shrink when they melt.
- Wrap each cone. Wrap each cone in foil. I recommend covering the top of the cone so the ingredients don’t spill out, then folding up the bottom and wrapping the sides.
- Cook the cones. If using the oven, bake the cones for 10-15 minutes. If using the grill, place them on the hot grill grates for 5-7 minutes, turning occasionally, and if cooking over a fire, place on the hot coals for 5-7 minutes.
Tips for Success
Here are a few helpful things to keep in mind when preparing this campfire dessert.
- Add fruit after cooking. Fruit is not recommended with these campfire cones, because the juices of the fruit will leak out while cooking and make the cone soggy. If you’d like to add fruit, add it on top after cooking.
- Avoid touching the foil. When cooking over a fire, be sure to use long tongs or a grill fork to handle the cones, as they will be very hot.
- Allow to cool before eating. Be sure to let the cones cool for a few minutes before eating, as the fillings will be very hot right out of the fire. The cones may be soft at first, but will quickly harden after being unwrapped.
- Handle with care. Be careful not to break or crack the cones when packing them with ingredients and wrapping them with foil.
- Make sure all fillings are small. Chop your fillings into small pieces to ensure they melt and cook evenly inside the cones.

Video: Sugar Cookie Campfire Cones
Can These Be Prepared in Advance?
Yes, that’s one of the reasons we love to take these campfire cones camping with us!
You can prepare the cones ahead of time by filling them with your desired ingredients and wrapping them in aluminum foil. Store them in a cooler until ready to cook.
More Camping Recipes:
- Jambalaya Foil Packets
- Shrimp Boil Foil Packets
- Kielbasa and Vegetable Foil Packets
- Upside Down Pineapple Foil Packs
- S’mores Banana Boats
- Walking Tacos
- Walking Banana Pudding
- Walking Strawberry Pretzel Salad
I hope you love this delicious and easy recipe – be sure to give it a review below! Also don’t forget to follow Belly Full on TikTok, Facebook, Instagram, Pinterest, and YouTube!
Sugar Cookie Campfire Cones
Ingredients
- 1 waffle cone
- 1/3 cup mini marshmallows, , divided
- 1/4 cup white chocolate chips
- 1/4 cup sugar cookie pieces
- rainbow sprinkles
Instructions
- Fill the bottom of each cone with a few mini marshmallows (this acts as a “plug” to prevent anything from leaking out the bottom hole of the cone.)
- Then layer the white chocolate chips, chopped sugar cookies, rainbow sprinkles, and the remaining mini marshmallows until filled as much as possible, gently packing the layers down as you go (the ingredients will shrink quite a bit as they cook and melt).
- Wrap each cone individually in aluminum foil, making sure they are tightly sealed. The easiest way to do this is by first covering the top of the cone where the ingredients are to ensure they don’t spill out. Then fold up the bottom and wrap up the sides.
- Cook over the fire or on the grill: Place the wrapped cones over the hot coals of your campfire or on the grill grates. Cook for 5-7 minutes, turning occasionally, until the fillings are melted and the cone is slightly toasted.To bake in the oven: Preheat your oven to 350°F. Place the wrapped cones on a baking sheet and bake for 10-15 minutes or until everything is melted and gooey.
Video
Notes
Nutrition
Nutritional information given is an automatic calculation and can vary based on the exact products you use and any changes you make to the recipe. If these numbers are very important to you, I would recommend calculating them yourself.