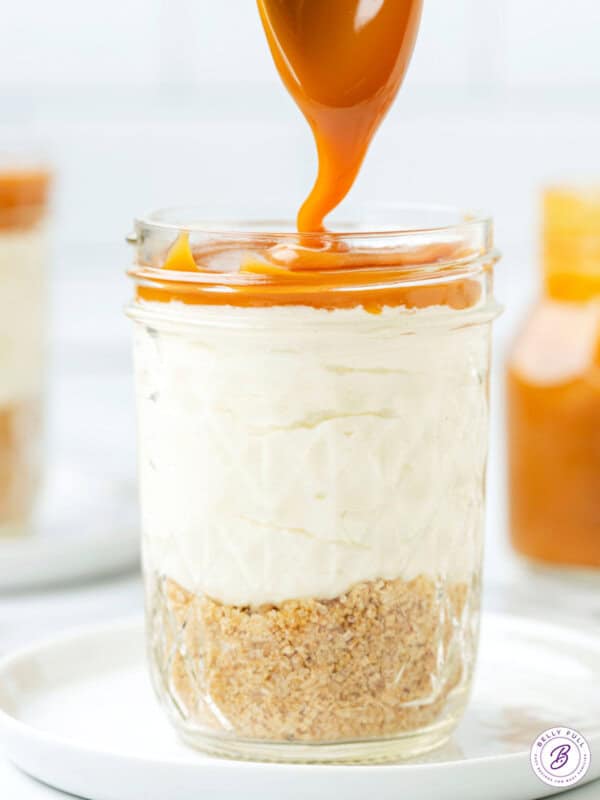
Cherry Cheesecake in a Jar
Updated
Updated
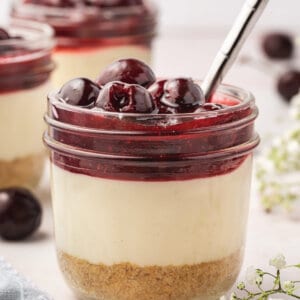
With a sweet and tart cherry topping, light and creamy filling, and buttery graham cracker crust, this Cherry Cheesecake in a Jar makes an easy and irresistible treat. Prepared in individual servings, so it’s perfect for a dessert table and celebrating any occasion!

Pin this now to find it later
Pin ItThis post may contain affiliate links. If you click on one and make a purchase, we may earn a small commission at no extra cost to you. We only recommend products we genuinely love.
No Bake Cherry Cheesecake in a Jar
Today’s recipe features elements of two other cheesecake recipes I love – Biscoff cheesecake jars and my no bake cherry cheesecake.
This cherry cheesecake in a jar recipe is assembled in small jars, just as the Biscoff recipe, but it features a sweet but tart cherry topping. While pie filling is often used in these recipes, I opted to create a black cherry topping from scratch. It’s a simple process but truly adds a vibrance to the flavor.
Personally, I love to make these no bake cherry cheesecakes whenever we need a dessert for a group. They’re the perfect individual serving size and you can easily eat them without sitting at a table.
Why You’ll Love This Cheesecake in a Cup
Here are a few reasons why I love this cherry cheesecake recipe.
- Light, creamy texture. This cheesecake in a cup has a lighter texture than your traditional no bake cheesecake, thanks to the sweetened condensed milk in the filling.
- Prepared in individual servings. Each cheesecake jar is the perfect serving size for one person, which makes these great for gatherings.
- No baking required. The cherry mixture needs to be cooked for a few minutes but that’s the only cooking or baking you’ll find in this recipe.

Ingredients Needed
Each part of this no bake cherry cheesecake is made with just a few simple ingredients.
(Scroll below to the printable recipe card for details and measurements.)
The Crust
- Graham cracker crumbs – You can usually find crumbs at the store or crush your own graham crackers.
- Granulated sugar – Sweetens the crust layer.
- Melted butter – Helps hold the crust together.
- Salt – Balances out the sweetness of the crust.
The Cheesecake Filling
- Cream cheese – Softened to room temperature for easy mixing.
- Granulated sugar – Adds a slight sweetness to the mixture.
- Sweetened condensed milk – Sweetened condensed milk is used in this recipe for a lighter consistency. If you prefer a thicker consistency, you can reduce the amount of sweetened condensed milk and increase the amount of sour cream.
- Sour cream – The sour cream should also be at room temperature.
- Lemon juice – A bit of acidity balances out the flavors.
- Vanilla extract – For Flavor.
The Cherry Topping
- Cherries – I use fresh sweet dark cherries.
- Granulated sugar – Sweetens the cherry filling.
- Lemon – Both lemon juice & lemon zest are used to balance the flavors.
- Cornstarch – Needed to thickens the fruit topping.
- Water
- Almond extract – Vanilla extract will work as well.

How to Make Cherry Cheesecake in a Jar
Making these cherry cheesecake jars is quick and easy. I do recommend preparing them in advance so they have time to set.
(Scroll below to the printable recipe card for details and measurements.)
- Prepare the crust. Combine the crust ingredients. Transfer 1/4 cup to each jar, pressing down with a spoon to compact.
- Make the cheesecake mixture. Beat the cream cheese and granulated sugar until fluffy. Blend in the sweetened condensed milk, sour cream, lemon juice, and vanilla extract. Spoon 1/3 cup into each jar over the crust.
- Chill. Place the jars in the fridge while you prep the cherry topping.
- Make the cherry topping. Combine the pitted cherries, sugar, lemon juice, and lemon zest. Bring to a boil then reduce heat and simmer, stirring frequently for 8 minutes. Combine the cornstarch with water then add to the pot. Simmer for 2-3 minutes, until the mixture thickens and turns glossy.
- Top the cheesecake filling. Top each cheesecake with 2 tablespoons of cherry topping.
- Chill. Refrigerate for 2 hours then enjoy!
Recipe Tips & Variations
Here are a few cheesecake in a jar variations, as well as tips for success.
- Make smaller portions. This recipe uses 6 (8-ounce) jars. If you prefer smaller servings, you can use 12 (4-ounce) jars for a larger crowd.
- Use room temperature ingredients. It’s recommended that the cream cheese and sour cream be at room temperature for better mixing and a creamier consistency. Allow the ingredients to sit at room temperature for 30 minutes before using them.
- Try a different crust. For the crust, you can replace graham crackers with other cookies like gingersnap cookies, Biscoff cookies, chocolate graham crackers, or Oreo cookies.
- Make a thicker filling. For the cheesecake filling, you can substitute sour cream with Greek yogurt. If you prefer a thicker filling, reduce the amount of sweetened condensed milk and increase the proportion of sour cream.
- Make a fluffier filling. Alternatively, you can replace the condensed milk with heavy cream and granulated sugar for a fluffier version.

Serving Suggestions
Keep your cherry cheesecake in a cup refrigerated until serving. These are perfect for picnics and parties, as they make the perfect individual-sized dessert and don’t require any cutting, slicing, or extra plates. Just the glass they’re built in and the fork!
On another note, while I do recommend allowing these to chill first, you can technically serve them sooner as the jars will hold the filling even if it’s not completely set.
Proper Storage
These cheesecakes in a jar should be stored in the refrigerator and will keep for up to 5 days. Make sure to cover the jars tightly with lids. These cheesecakes do not freeze well – freezing can affect the consistency of the cheesecake.
More Easy Cheesecake Recipes
- Mini Cheesecakes
- Mini Turtle Cheesecakes
- Instant Pot Cheesecake
- Sopapilla Cheesecake
- Oreo Cheesecake
I hope you love this delicious and easy recipe – be sure to give it a review below! Also don’t forget to follow Belly Full on TikTok, Facebook, Instagram, Pinterest, and YouTube!
Cherry Cheesecake in a Jar
Ingredients
FOR THE CRUST
- 1 & 1/2 cup graham cracker crumbs
- 1/4 cup granulated sugar
- 4 tablespoons melted butter
- 1/4 teaspoon salt
FOR THE CHEESECAKE FILLING
- 8 ounce package cream cheese, , softened to room temperature
- 2 tablespoons granulated sugar
- 14 ounce can sweetened condensed milk
- 1/2 cup sour cream, , room temperature
- 1 teaspoon lemon juice
- 1 teaspoon vanilla extract
FOR THE CHERRY TOPPING
- 3 cups fresh sweet dark cherries, , pitted
- 1/4 cup granulated sugar
- 1 teaspoon lemon juice
- 1 teaspoon lemon zest
- 2 tablespoons cornstarch
- 1/4 cup water
- 1/4 teaspoon almond or vanilla extract
Instructions
- Set out 6, 8 once glass jars.
- Combine the crust ingredients in a medium bowl. Mix well. Transfer a 1/4 cup of the crust mixture into each jar. Press down with the back of a spoon to compact.
- In a large mixing bowl, beat together the cream cheese and granulated sugar using an elective mixer until fluffy and no lumps remain. Blend in the sweetened condensed milk, sour cream, lemon juice, and vanilla extract until combined and smooth. Spoon 1/3 cup of the cheesecake filling mixture evenly into each jar over the crust.
- Place the jars in the refrigerator while preparing the cherry topping.
- In a large pot over medium-high heat, combine pitted cherries, sugar, lemon juice, and lemon zest. Bring the mixture to a boil, then reduce the heat to medium-low and simmer, stirring frequently, for about 8 minutes until the cherries start to soften.
- In a small bowl, mix cornstarch with water until thoroughly combined to create a slurry. Add to the pot and continue to simmer, stirring, for another 2 to 3 minutes until the mixture thickens and becomes glossy and clear. (Give it a taste – careful, it will be hot! – and adjust if necessary, adding more sugar or lemon juice. Remove the cherry filling from the heat and stir in the almond extract (avoid over-stirring to keep the cherries intact.) Let it cool completely.
- Take the jars out of the refrigerator and top each cheesecake with about 2 tablespoons of the cooled cherry topping, distributing it evenly among the jars.
- Refrigerate the jars for at least 2 hours before serving. Serve chilled and enjoy!
Notes
Nutrition
Nutritional information given is an automatic calculation and can vary based on the exact products you use and any changes you make to the recipe. If these numbers are very important to you, I would recommend calculating them yourself.